Onkyo TX-DS676 Owner Manual - Page 45
Rec Selector, VIDEO, OPTICAL
 |
View all Onkyo TX-DS676 manuals
Add to My Manuals
Save this manual to your list of manuals |
Page 45 highlights
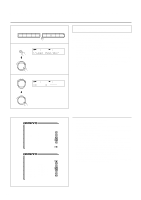
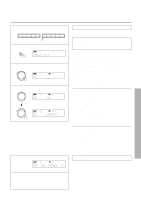
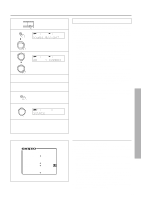
Recording a source 1 HONO C D SP/SYS 2 SETUP SPEAKERS DSP A PRESET/MODE ADJ PUSH TO ENTER 3 PRESET/MODE ADJ SPEAKERS A DSP PUSH TO ENTER PRESET/MODE ADJ 4 PUSH TO ENTER 5 6 REC OUT 7 PRESET/MODE ADJ 8 PUSH TO ENTER SPEAKERS REC OUT A STEREO ** Rec Selector ** •Picture =DVD VIDEO 1,2 •Sound =DVD •Digital =---- TAPE VIDEO 1,2 OPTICAL OUT Adding sound to a video tape You can add CD or MD sound to your video recordings. The following is an example of adding sound to a video recording using the video cassette recorder connected to the VIDEO-1 jacks of the receiver. Let's assume that you will record the images from a video camera connected to the VIDEO-4 VIDEO jack and the sound from a CD player. 1. Press the CD input selector button. 2. Press the SP/SYS SETUP button repeatedly until "Video Assign?" appears and then press the SMART SCAN CONTROLLER. 3. Rotate the SMART SCAN CONTROLLER until "VIDEO 4" appears. Press the SMART SCAN CONTROLLER . 4. Insert a CD in the CD player. Or, insert a tape in the video camera connected to the VIDEO-4 (VIDEO) jack. 5. Insert a tape to which recording is made in the video cassette recorder connected to the VIDEO-1 (R, L, V) jacks. 6. Press the REC OUT button. The REC OUT indicator blinks for 8 seconds. 7. Rotate the SMART SCAN CONTROLLER to select "SOURCE." "CD" has been selected as the audio input source and "VIDEO 4," which you set in steps 1 to 3, as the video input source. 8. Start recording on the video cassette recorder connected to the VIDEO-1 jacks. Then, start playing the CD player and the video camera connected to the VIDEO-4 jack. Notes: • If you change the input source during recording, you will record the audio signals from the newly selected input source and the video signals assigned to that input source. • You cannot record the surround effects. • Using the on-screen display You can use the on-screen display to set the recording equipment to which the signals are output. By doing so, you can record signals from the selected input source. 1. Press the OSD MENU button. 2. Select "Rec Selector" and press the right edge of the EN- TER/Cursor button. The Rec Selector screen appears. The recording sources are shown on the left and the corresponding output jacks are shown on the right. 3. Press the right or left edge of the ENTER/Cursor button to select the output jack. When Sound is set to "TAPE," "TUNER," "PHONE," or "CD," Picture shows the video source you set in "Assigning a video source to each audio input source" (see page 40). To record the currently playing sound or video images, select "(SOURCE)" below the source name for Sound or Picture. 4. Press the center of the ENTER/Cursor button, or press the EXIT button, to exit the setup mode. 45
-
 1
1 -
2
-
3
-
4
-
5
-
6
-
7
-
8
-
9
-
10
-
11
-
12
-
13
-
14
-
15
-
16
-
17
-
18
-
19
-
20
-
21
-
22
-
23
-
24
-
25
-
26
-
27
-
28
-
29
-
30
-
31
-
32
-
33
-
34
-
35
-
36
-
37
-
38
-
39
-
 40
40 -
 41
41 -
 42
42 -
 43
43 -
 44
44 -
 45
45 -
 46
46 -
 47
47 -
 48
48 -
 49
49 -
 50
50 -
51
-
52
-
53
-
54
-
55
-
56
-
57
-
58
-
59
-
60
-
61
-
62
-
63
-
64
 |
 |
