Onkyo TX-DS676 Owner Manual - Page 40
Assigning a video source to each audio, input source
 |
View all Onkyo TX-DS676 manuals
Add to My Manuals
Save this manual to your list of manuals |
Page 40 highlights
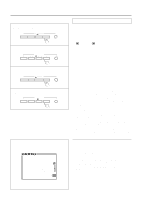
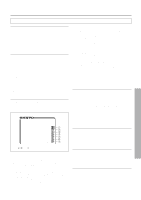
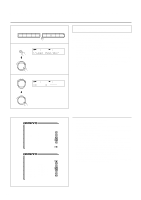
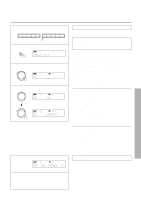
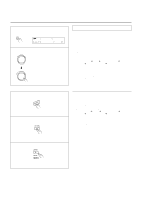
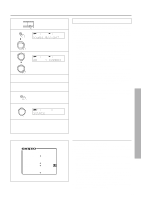
Assigning a video source to each audio input source 1 DVD VIDEO-1 VIDEO-2 VIDEO-3 VIDEO-4 TAPE FM AM PHONO C D 2 SP/SYS SETUP SPEAKERS DSP A PRESET/MODE ADJ PUSH TO ENTER 3 PRESET/MODE ADJ SPEAKERS A DSP PUSH TO ENTER PRESET/MODE ADJ Assigning a video source to each audio input source (video Assign Setup) You can assign a video source to audio input sources such as CD. By doing so, you can play a CD or other audio source while showing the assigned video images on the TV. 1. Select the desired audio input source by pressing the corre- sponding input selector button. 2. Press the SP/SYS SETUP button repeatedly until "Video Assign?" is displayed. Then Press the SMART SCAN CONTROLLER. The video assign mode has been set. 3. Rotate the SMART SCAN CONTROLLER to select the video source you wish to assign. You can select one from 6 video sources, DVD, VIDEO 1, VIDEO 2, VIDEO 3, VIDEO 4, and ---- (None). Press the SMART SCAN CONTROLLER. PUSH TO ENTER * Video Assign Setup * CD PHONO FM AM TAPE * Video Assign Setup * DVD :DVD VIDEO 1 :VIDEO 1 VIDEO 2 :VIDEO 2 VIDEO 3 :VIDEO 3 VIDEO 4 :VIDEO 4 MULTI CH:---- • Using the on-screen display 1. Press the OSD MENU button. 2. Select "Input Selector" and then press the right edge of the ENTER/Cursor button. 3. Select "Video Assign Setup" and then press the right edge of the ENTER/Cursor button. "Video Assign Setup" screen is displayed. When the cursor is on "TAPE," you can press the lower edge of the ENTER/Cursor button to display additional items. When the cursor is on "DVD," you can press the upper edge of the ENTER/Cursor button to display the previous items. 4. Press the upper or lower edge of the ENTER/Cursor button to select the audio input source and then press the right or left edge of the button to assign a video source. You can select one from 6 video sources, DVD, VIDEO 1, VIDEO 2, VIDEO 3, VIDEO 4, and ---- (None). 5. Press the center of the ENTER/Cursor button, or press the EXIT button, to exit the setup mode. 40
-
 1
1 -
2
-
3
-
4
-
5
-
6
-
7
-
8
-
9
-
10
-
11
-
12
-
13
-
14
-
15
-
16
-
17
-
18
-
19
-
20
-
21
-
22
-
23
-
24
-
25
-
26
-
27
-
28
-
29
-
30
-
31
-
32
-
33
-
34
-
 35
35 -
 36
36 -
 37
37 -
 38
38 -
 39
39 -
 40
40 -
 41
41 -
 42
42 -
 43
43 -
 44
44 -
 45
45 -
46
-
47
-
48
-
49
-
50
-
51
-
52
-
53
-
54
-
55
-
56
-
57
-
58
-
59
-
60
-
61
-
62
-
63
-
64
 |
 |
