Panasonic KX-MB2061 Operating Instructions - Page 17
Approx. 2 kg 4.4 lb
 |
View all Panasonic KX-MB2061 manuals
Add to My Manuals
Save this manual to your list of manuals |
Page 17 highlights
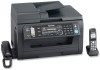
3 Load the paper, print-side up (B). Important: R Push down to lock the plate (C) in the paper input tray, if necessary. 1. Introduction and Installation 5 Insert the paper input tray into the base unit, lifting the front part of the tray. Then push it completely into the base unit. B C 4 Adjust the recording paper guides. Pinch the front side of the recording paper guide (D), then slide it to match the paper size mark. Pinch the right side of the recording paper guide (E), then slide it to adjust the width to the size of the recording paper. R Make sure that the recording paper is under the paper limit mark (F), and the paper should not be loaded over the snubbers (G). Note: R If the paper is not loaded correctly, re-adjust the paper guides, or the paper may jam. R If the paper input tray does not close, the plate in the paper input tray may not be in the locked position. Push the paper down and make sure that the paper is laying flat in the paper input tray. Caution for the paper input tray R Do not drop the paper input tray. F G D E R Hold the paper input tray with both hands when removing or installing. The paper input tray weighs approximately 2 kg (4.4 lb) when fully loaded with recording paper. Approx. 2 kg (4.4 lb) For assistance, please visit http://www.panasonic.com/help 17
-
 1
1 -
2
-
3
-
4
-
5
-
6
-
7
-
8
-
9
-
10
-
11
-
 12
12 -
 13
13 -
 14
14 -
 15
15 -
 16
16 -
 17
17 -
 18
18 -
 19
19 -
 20
20 -
 21
21 -
 22
22 -
23
-
24
-
25
-
26
-
27
-
28
-
29
-
30
-
31
-
32
-
33
-
34
-
35
-
36
-
37
-
38
-
39
-
40
-
41
-
42
-
43
-
44
-
45
-
46
-
47
-
48
-
49
-
50
-
51
-
52
-
53
-
54
-
55
-
56
-
57
-
58
-
59
-
60
-
61
-
62
-
63
-
64
-
65
-
66
-
67
-
68
-
69
-
70
-
71
-
72
-
73
-
74
-
75
-
76
-
77
-
78
-
79
-
80
-
81
-
82
-
83
-
84
-
85
-
86
-
87
-
88
-
89
-
90
-
91
-
92
-
93
-
94
-
95
-
96
-
97
-
98
-
99
-
100
-
101
-
102
-
103
-
104
-
105
-
106
-
107
-
108
-
109
-
110
-
111
-
112
-
113
-
114
-
115
-
116
-
117
-
118
-
119
-
120
-
121
-
122
-
123
-
124
-
125
-
126
-
127
-
128
-
129
-
130
-
131
-
132
-
133
-
134
-
135
-
136
-
137
-
138
-
139
-
140
-
141
-
142
-
143
-
144
-
145
-
146
-
147
-
148
-
149
-
150
-
151
-
152
-
153
-
154
-
155
-
156
-
157
-
158
-
159
-
160
 |
 |
