Philips HDRW720 User manual - Page 71
General, Picture settings
 |
View all Philips HDRW720 manuals
Add to My Manuals
Save this manual to your list of manuals |
Page 71 highlights
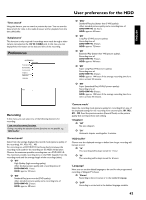
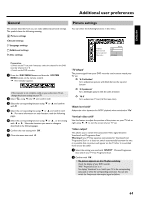
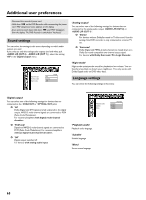
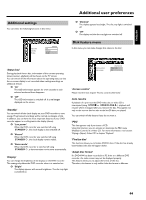
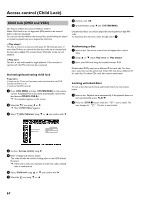
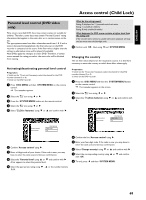
ENGLISH Additional user preferences General This section describes how you can make additional personal settings. The symbols have the following meaning: t Picture settings v Sound settings u Language settings w Additional settings s Disc settings Picture settings You can select the following functions in this menu: TV Shape Black level shift Vertical video shift Video output Picture 16:9 Off ï Interlaced Preparation: •) Switch on the TV set, and if necessary, select the channel for the DVD recorder (channel 3 or 4). •) Switch on the DVD recorder. 1 Press the DISC MENU button and then the SYSTEM MENU button on the remote control. P The menubar appears. If this menubar is not complete visible on your wide screen TV-set, change the picture settings on your TV. A 2 Select ' ' using D oder C and confirm with 3 Select the corresponding function using B or A and confirm with C . 4 Select the corresponding line using B or A and confirm with C . For more information on each function, read the following pages. 5 Select the corresponding function using B or A , or the setting with D or C . Select the functions you want to change as described in the following pages. 6 Confirm the new setting with OK . 7 Close the menu item with D . 'TV Shape' The picture signal from your DVD recorder can be set to match your TV set: O '4:3 letterbox' for a widescreen picture with black bars at the top and bottom O '4:3 panscan' for a full-height picture with the sides trimmed. O '16:9' for a widescreen TV set (16:9 screen ratio) 'Black level shift' Adapts the color dynamics for NTSC playback when switched to 'On' 'Vertical video shift' Use this feature to adjust the position of the picture on your TV left or right using D , C to suit the screen of your TV set. 'Video output' This allows you to switch the Component Video signal between 'Interlaced' and 'Progressive Scan.' Warning If your TV has separate connections for 'Interlaced' and 'Progressive Scan' or it does not switch automatically between the two, it is possible that no picture will appear on the TV after it is switched from one to the other. 1 Select the setting you need with SELECT . Choose Progressive Scan only if your TV has Progressive Scan. 2 Confirm with OK . a No picture appears on the TV after switching Check the display of your DVD recorder. 'PRO': 'Progressive Scan' is on No display: 'Interlaced' is on. Switch your TV to the corresponding input jack or select the corresponding connection. You can also switch the Component video output signal as follows: 64
-
 1
1 -
2
-
3
-
4
-
5
-
6
-
7
-
8
-
9
-
10
-
11
-
12
-
13
-
14
-
15
-
16
-
17
-
18
-
19
-
20
-
21
-
22
-
23
-
24
-
25
-
26
-
27
-
28
-
29
-
30
-
31
-
32
-
33
-
34
-
35
-
36
-
37
-
38
-
39
-
40
-
41
-
42
-
43
-
44
-
45
-
46
-
47
-
48
-
49
-
50
-
51
-
52
-
53
-
54
-
55
-
56
-
57
-
58
-
59
-
60
-
61
-
62
-
63
-
64
-
65
-
 66
66 -
 67
67 -
 68
68 -
 69
69 -
 70
70 -
 71
71 -
 72
72 -
 73
73 -
 74
74 -
 75
75 -
 76
76 -
77
-
78
-
79
-
80
-
81
-
82
-
83
-
84
-
85
-
86
-
87
-
88
-
89
-
90
 |
 |