Philips TSU6000 User manual - Page 38
Editing Timers, Adding Macro Groups and Timer Groups
 |
View all Philips TSU6000 manuals
Add to My Manuals
Save this manual to your list of manuals |
Page 38 highlights
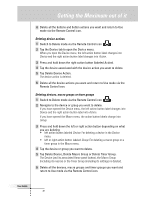
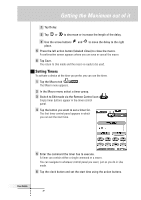
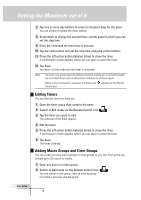
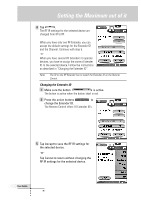
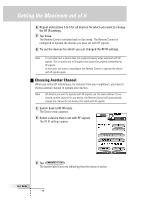
Getting the Maximum out of it User Guide 7 Tap one or more day buttons to select or deselect days for the timer. You can choose to repeat the timer weekly. 8 Scroll down to display the second timer control panel in which you can set the stop time. 9 Enter the command the timer has to execute. 10 Tap the clock button and set the stop time using the action buttons. 11 Press the left action button (labeled Close) to close the timer. A confirmation screen appears where you can save or cancel the timer. 12 Tap Save. You return to Use mode and the timer is activated. Note The timer only works when the Remote Control's sending eye is pointed towards the controlled device and no obstructions interfere the infrared signal. When a timer command is executed, the Alarm icon appears on the Remote Control icon. Editing Timers You can edit any timer you have set. 1 Open the timer group that contains the timer. 2 Switch to Edit mode via the Remote Control icon . 3 Tap the timer you want to edit. The contents of the timer appear. 4 Edit the timer. 5 Press the left action button (labeled Close) to close the timer. A confirmation screen appears where you can save or cancel the timer. 6 Tap Save. The timer is edited. Adding Macro Groups and Timer Groups You can create as many macro groups or timer groups as you like. Each group can contain up to 25 macros or timers. 1 Open any macro or timer group. 2 Switch to Add mode via the Remote Control icon . You can create a new group, copy an existing group or restore a previous deleted group. 38
-
 1
1 -
2
-
3
-
4
-
5
-
6
-
7
-
8
-
9
-
10
-
11
-
12
-
13
-
14
-
15
-
16
-
17
-
18
-
19
-
20
-
21
-
22
-
23
-
24
-
25
-
26
-
27
-
28
-
29
-
30
-
31
-
32
-
 33
33 -
 34
34 -
 35
35 -
 36
36 -
 37
37 -
 38
38 -
 39
39 -
 40
40 -
 41
41 -
 42
42 -
 43
43 -
44
-
45
-
46
-
47
-
48
-
49
-
50
-
51
-
52
-
53
-
54
-
55
-
56
-
57
-
58
-
59
-
60
 |
 |
