Pioneer P5900DVD Owner's Manual - Page 35
Adjusting loudness, Using subwoofer output
 |
UPC - 012562848563
View all Pioneer P5900DVD manuals
Add to My Manuals
Save this manual to your list of manuals |
Page 35 highlights
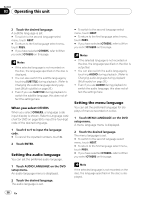
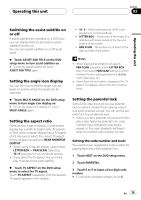
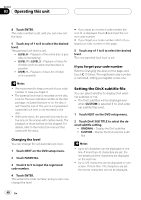
Operating this unit Section 03 Operating this unit 3 Touch c or d to adjust the equalizer curve. +6 to -4 (or -6) is displayed as the equalizer curve is increased or decreased. # The actual range of the adjustments are different depending on which equalizer curve is selected. # The equalizer curve with all frequencies set to 0 cannot be adjusted. Adjusting 7-band graphic equalizer For CUSTOM1 and CUSTOM2 equalizer curves, you can adjust the level of each band. ! A separate CUSTOM1 curve can be cre- ated for each source. If you make adjustments when a curve other than CUSTOM2 is selected, the equalizer curve settings will be memorized in CUSTOM1. ! A CUSTOM2 curve can be created common to all sources. If you make adjustments when the CUSTOM2 curve is selected, the CUSTOM2 curve will be updated. 1 Touch GRAPHIC EQ on the audio function menu. 2 Touch c or d to select an equalizer curve. POWERFUL-NATURAL-VOCAL- CUSTOM1-CUSTOM2-FLAT- SUPER BASS 3 Touch c or d to select the equalizer band to adjust. 50Hz-125Hz-315Hz-800Hz-2kHz- 5kHz-12.5kHz 4 Touch a or b to adjust the level of the equalizer band. +12dB to -12dB is displayed as the level is increased or decreased. # You can then select another band and adjust the level. Adjusting loudness Loudness compensates for deficiencies in the low- and high-sound ranges at low volume. 1 Touch LOUDNESS on the audio function menu. 2 Touch d to turn loudness on. # To turn loudness off, touch c. 3 Touch c or d to select a desired level. LOW (low)-MID (mid)-HIGH (high) Using subwoofer output This unit is equipped with a subwoofer output which can be turned on or off. ! When the subwoofer output is on, you can adjust the cut-off frequency and the output level of the subwoofer. 1 Touch SUB WOOFER on the audio function menu. 2 Touch d next to SUB WOOFER to turn subwoofer output on. # To turn subwoofer output off, touch c. 3 Touch c or d next to PHASE to select the phase of subwoofer output. Touch d to select normal phase and NORMAL appears in the display. Touch c to select reverse phase and REVERSE appears in the display. 4 Touch c or d next to FREQUENCY to select cut-off frequency. Each time you touch c or d selects cut-off frequencies in the following order: 50Hz-63Hz-80Hz-100Hz-125Hz Only frequencies lower than those in the selected range are outputted from the subwoofer. En 35
-
 1
1 -
2
-
3
-
4
-
5
-
6
-
7
-
8
-
9
-
10
-
11
-
12
-
13
-
14
-
15
-
16
-
17
-
18
-
19
-
20
-
21
-
22
-
23
-
24
-
25
-
26
-
27
-
28
-
29
-
 30
30 -
 31
31 -
 32
32 -
 33
33 -
 34
34 -
 35
35 -
 36
36 -
 37
37 -
 38
38 -
 39
39 -
 40
40 -
41
-
42
-
43
-
44
-
45
-
46
-
47
-
48
-
49
-
50
-
51
-
52
-
53
-
54
-
55
-
56
-
57
-
58
-
59
-
60
-
61
-
62
-
63
-
64
-
65
-
66
-
67
-
68
-
69
-
70
-
71
-
72
-
73
-
74
-
75
-
76
-
77
-
78
-
79
-
80
-
81
-
82
-
83
-
84
-
85
-
86
-
87
-
88
-
89
-
90
-
91
-
92
-
93
-
94
-
95
-
96
-
97
-
98
-
99
-
100
-
101
-
102
-
103
-
104
-
105
-
106
 |
 |
