Pioneer P5900DVD Owner's Manual - Page 44
Other Functions, Operating this unit
 |
UPC - 012562848563
View all Pioneer P5900DVD manuals
Add to My Manuals
Save this manual to your list of manuals |
Page 44 highlights
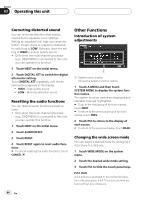
Section 03 Operating this unit Correcting distorted sound You can minimize distortion that may be caused by the equalizer curve settings. Setting an equalizer level high can cause distortion. If high sound is crippled or distorted, try switching to LOW. Normally, leave the setting at HIGH to ensure quality sound. ! Only when the multi-channel processor (e.g., DEQ-P8000) is connected to this unit, you can operate this function. 1 Touch NEXT on the initial menu. 2 Touch DIGITAL ATT to switch the digital attenuator setting. Touch DIGITAL ATT repeatedly until the desired setting appears in the display. ! HIGH - High quality sound ! LOW - Minimize distortion sound Resetting the audio functions You can reset all audio functions except volume. ! Only when the multi-channel processor (e.g., DEQ-P8000) is connected to this unit, you can operate this function. 1 Touch NEXT on the initial menu. 2 Touch AUDIO RESET. 3 Touch RESET. 4 Touch RESET again to reset audio functions. # To cancel resetting the audio functions, touch CANCEL. Other Functions Introduction of system adjustments 1 1 System menu display Shows the system function names. 1 Touch A.MENU and then touch SYSTEM MENU to display the system function names. The system function names are displayed and operable ones are highlighted. # To go to the next group of function names, touch NEXT. # To return to the previous group of function names, touch PREV. 2 Touch ESC to return to the display of each source. # To return to the previous display, touch BACK. Changing the wide screen mode You can select a desired mode for enlarging a 4:3 picture to a 16:9 one. 1 Touch WIDE MODE on the system menu. 2 Touch the desired wide mode setting. 3 Touch ESC to hide the touch panel keys. FULL (full) A 4:3 picture is enlarged in the horizontal direction only, giving you a 4:3 TV picture (normal picture) without any omissions. 44 En
-
 1
1 -
2
-
3
-
4
-
5
-
6
-
7
-
8
-
9
-
10
-
11
-
12
-
13
-
14
-
15
-
16
-
17
-
18
-
19
-
20
-
21
-
22
-
23
-
24
-
25
-
26
-
27
-
28
-
29
-
30
-
31
-
32
-
33
-
34
-
35
-
36
-
37
-
38
-
 39
39 -
 40
40 -
 41
41 -
 42
42 -
 43
43 -
 44
44 -
 45
45 -
 46
46 -
 47
47 -
 48
48 -
 49
49 -
50
-
51
-
52
-
53
-
54
-
55
-
56
-
57
-
58
-
59
-
60
-
61
-
62
-
63
-
64
-
65
-
66
-
67
-
68
-
69
-
70
-
71
-
72
-
73
-
74
-
75
-
76
-
77
-
78
-
79
-
80
-
81
-
82
-
83
-
84
-
85
-
86
-
87
-
88
-
89
-
90
-
91
-
92
-
93
-
94
-
95
-
96
-
97
-
98
-
99
-
100
-
101
-
102
-
103
-
104
-
105
-
106
 |
 |
