Ricoh SFX2000M User Guide - Page 17
Starting Up, Default Mode - securefax
 |
View all Ricoh SFX2000M manuals
Add to My Manuals
Save this manual to your list of manuals |
Page 17 highlights
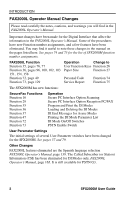
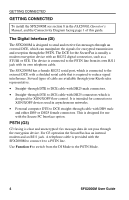
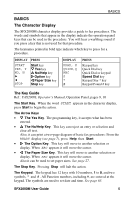
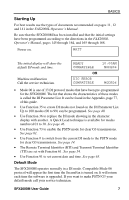
BASICS Starting Up For best results use the types of documents recommended on pages 11, 12 and 141 in the FAX2000L Operator's Manual. Be sure that the SFX2000M has been installed and that the initial settings have been programmed according to the directions in the FAX2000L Operator's Manual, pages 145 through 164, and 165 through 168. Power on. WAIT The initial display will show the default DI mode and time. Machine malfunction Call the service technician. READY COMPATIBLE OR DIC ERROR COMPATIBLE 10:00AM MODE06 MODE06 • Mode 06 is one of 13 DI protocol modes that have been pre-programmed for the SFX2000M. The list that shows the characteristics of these modes is called the DI Parameter List. It can be found in the Appendix, page 77, of this guide. • Use Function 35 to create DI modes not found on the DI Parameter List. Up to 100 modes (00 to 99) can be programmed. See page 40. • Use Function 36 to replace the DI mode showing in the character display with another. A Quick Load technique is available for modes numbered 01 to 30. See page 46. • Use Function 73 to enable the PSTN mode for clear G3 transmissions. See page 61. • Use Function # to switch from the current DI mode to the PSTN mode for clear G3 transmissions. See page 14. • The Remote Terminal Identifier (RTI) and Transmit Terminal Identifier (TTI) are set with Function 61. See page 54. • Use Function 91 to set current date and time. See page 65. Default Mode The SFX2000M operates normally in a DI mode. Compatible Mode 06 protocol will appear the first time the SecureFax is turned on. It will return each time the software is upgraded. If you want to make PSTN G3 your default mode call your service technician. SFX2000M User Guide 7
-
 1
1 -
2
-
3
-
4
-
5
-
6
-
7
-
8
-
9
-
10
-
11
-
 12
12 -
 13
13 -
 14
14 -
 15
15 -
 16
16 -
 17
17 -
 18
18 -
 19
19 -
 20
20 -
 21
21 -
 22
22 -
23
-
24
-
25
-
26
-
27
-
28
-
29
-
30
-
31
-
32
-
33
-
34
-
35
-
36
-
37
-
38
-
39
-
40
-
41
-
42
-
43
-
44
-
45
-
46
-
47
-
48
-
49
-
50
-
51
-
52
-
53
-
54
-
55
-
56
-
57
-
58
-
59
-
60
-
61
-
62
-
63
-
64
-
65
-
66
-
67
-
68
-
69
-
70
-
71
-
72
-
73
-
74
-
75
-
76
-
77
-
78
-
79
-
80
-
81
-
82
-
83
-
84
-
85
-
86
-
87
-
88
-
89
-
90
-
91
-
92
-
93
-
94
-
95
-
96
 |
 |
