Ricoh SP 8400DN User Guide - Page 94
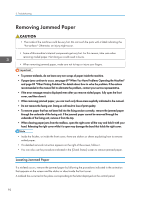
Removing Jammed Paper, Locating Jammed Paper
 |
View all Ricoh SP 8400DN manuals
Add to My Manuals
Save this manual to your list of manuals |
Page 94 highlights
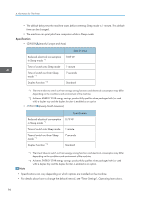
3. Troubleshooting Removing Jammed Paper • The inside of the machine could be very hot. Do not touch the parts with a label indicating the "hot surface." Otherwise, an injury might occur. • Some of this machine's internal components get very hot. For this reason, take care when removing misfed paper. Not doing so could result in burns. • When removing jammed paper, make sure not to trap or injure your fingers. • To prevent misfeeds, do not leave any torn scraps of paper inside the machine. • If paper jams continue to occur, see page 69 "When You Have Problems Operating the Machine" and page 83 "Other Printing Problems" for details about how to solve the problem. If the actions recommended in this manual fail to eliminate the problem, contact your service representative. • If the error message remains displayed even after you remove misfed paper, fully open the front cover, and then close it. • When removing jammed paper, you can touch only those areas explicitly indicated in the manual. • Do not remove the fusing unit. Doing so will result in loss of print quality. • To remove paper that has not been fed into the fixing section correctly, remove the jammed paper through the underside of the fusing unit. If the jammed paper cannot be removed through the underside of the fusing unit, remove it from the top. • When clearing paper jams from the mailbox, open the right cover all the way and hold it with your hand. Releasing the right cover while it is open may damage the band that holds the right cover. • Inside the finisher, or inside the front cover, there are stickers or sheets explaining how to remove misfed paper. • If a detailed removal instruction appears on the right of the screen, follow it. • You can also use the procedure indicated in the [Check Status] screen to remove jammed paper. Locating Jammed Paper If a misfeed occurs, remove the jammed paper by following the procedures indicated in the animation that appears on the screen and the sticker or sheet inside the front cover. A misfeed has occurred in the place corresponding to the letter displayed on the control panel. 92
-
 1
1 -
2
-
3
-
4
-
5
-
6
-
7
-
8
-
9
-
10
-
11
-
12
-
13
-
14
-
15
-
16
-
17
-
18
-
19
-
20
-
21
-
22
-
23
-
24
-
25
-
26
-
27
-
28
-
29
-
30
-
31
-
32
-
33
-
34
-
35
-
36
-
37
-
38
-
39
-
40
-
41
-
42
-
43
-
44
-
45
-
46
-
47
-
48
-
49
-
50
-
51
-
52
-
53
-
54
-
55
-
56
-
57
-
58
-
59
-
60
-
61
-
62
-
63
-
64
-
65
-
66
-
67
-
68
-
69
-
70
-
71
-
72
-
73
-
74
-
75
-
76
-
77
-
78
-
79
-
80
-
81
-
82
-
83
-
84
-
85
-
86
-
87
-
88
-
 89
89 -
 90
90 -
 91
91 -
 92
92 -
 93
93 -
 94
94 -
 95
95 -
 96
96 -
 97
97 -
 98
98 -
 99
99 -
100
-
101
-
102
-
103
-
104
-
105
-
106
-
107
-
108
 |
 |
