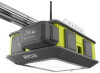
Ryobi GD201 Operation Manual - Page 38
Aligning The Safety Sensors
 |
View all Ryobi GD201 manuals
Add to My Manuals
Save this manual to your list of manuals |
Page 38 highlights
OPERATION ALIGNING THE SAFETY SENSORS See Figure 69 - 70. WARNING: DO NOT operate the garage door opener unless the safety sensors are installed and working correctly. Failure to properly install and ensure that the safety sensors are working correctly can result in death or serious personal injury. WARNING: The effectiveness of the safety sensors included in this system directly relates to the placement and installation of the sensors. Incorrect placement or installation could prevent the sensors from working as intended and result in death or serious personal injury. NOTICE: The garage door will not close unless the safety sensors are installed, wired, and aligned correctly. Install and wire the safety sensors as described earlier in the Installation section. Connect the garage door opener to an AC power supply. NOTE: Make sure the power supply is normal household voltage, 120 volts, AC only, 60 Hz If wired correctly, the LED lights on both sensors should shine continuously. If one or both LEDs do not come on, unplug the garage door opener and ensure that the sensors are wired correctly. If problem persists, refer to the Safety Sensor Diagnostic Feedback chart later in the manual. If the LED lights on both sensors shine continuously, then the sensors are aligned and no adjustments are needed. If the red LED light is ON and the green LED light is blinking, then something may be interfering with the Invisible Light Beam Lens Lens LED 6 in. Fig. 69 38 - English
-
 1
1 -
2
-
3
-
4
-
5
-
6
-
7
-
8
-
9
-
10
-
11
-
12
-
13
-
14
-
15
-
16
-
17
-
18
-
19
-
20
-
21
-
22
-
23
-
24
-
25
-
26
-
27
-
28
-
29
-
30
-
31
-
32
-
 33
33 -
 34
34 -
 35
35 -
 36
36 -
 37
37 -
 38
38 -
 39
39 -
 40
40 -
 41
41 -
 42
42 -
 43
43 -
44
-
45
-
46
-
47
-
48
-
49
-
50
-
51
-
52
-
53
-
54
-
55
-
56
-
57
-
58
-
59
-
60
-
61
-
62
-
63
-
64
-
65
-
66
-
67
-
68
-
69
-
70
-
71
-
72
-
73
-
74
-
75
-
76
-
77
-
78
-
79
-
80
-
81
-
82
-
83
-
84
-
85
-
86
-
87
-
88
-
89
-
90
-
91
-
92
-
93
-
94
-
95
-
96
-
97
-
98
-
99
-
100
-
101
-
102
-
103
-
104
-
105
-
106
-
107
-
108
-
109
-
110
-
111
-
112
-
113
-
114
-
115
-
116
-
117
-
118
-
119
-
120
-
121
-
122
-
123
-
124
-
125
-
126
-
127
-
128
-
129
-
130
-
131
-
132
-
133
-
134
-
135
-
136
-
137
-
138
-
139
-
140
-
141
-
142
-
143
-
144
-
145
-
146
-
147
-
148
-
149
-
150
-
151
-
152
-
153
-
154
-
155
-
156
-
157
-
158
-
159
-
160
 |
 |
