Ryobi GD201 Operation Manual - Page 49
Periodic Maintenance Schedule, Replacing Car Remote Batteries
 |
View all Ryobi GD201 manuals
Add to My Manuals
Save this manual to your list of manuals |
Page 49 highlights
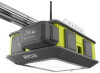
MAINTENANCE REPLACING CAR REMOTE BATTERIES See Figure 85. WARNING: KEEP BUTTON/COIN CELL BATTERIES OUT OF SIGHT AND REACH OF CHILDREN. Swallowing batteries can lead to serious injury or death. If you suspect a child has ingested a battery, go to the hospital immediately. Do not induce vomiting or have your child eat or drink anything. For more information, call the National Battery Ingestion Hotline: 202-625-3333. The battery identification number for this product is CR2016 or CR2032. Reassemble the remote by aligning the sections as shown. Snap the sections together to close. Make sure the remote is securely reassembled before attaching the visor clip. Coin Visor Clip WARNING: Risk of injury due to fire, explosion, or leakage. Do not disassemble, charge, crush, or expose to fire or high temperatures. Remove visor clip. Remove the battery cover by inserting the edge of a coin into the slot and twisting. Install the battery or batteries according to the polarity indicators. NOTE: The remote can be powered by one 2032-size battery, or two 2016-size batteries stacked together. Batteries OR Fig. 85 Each Week Each Month Every 3 Months Each Year PERIODIC MAINTENANCE SCHEDULE Check the power head, rail, brackets, door arms, track, and rollers for loose or damaged parts. Replace or tighten as needed. Manually open and close the garage door. If the door does not move smoothly, binds, or is out of balance, have the garage door or door springs repaired by a qualified service person. Test the automatic reversal system as described in the Installation section. Test the travel limits of the garage door, as described in the Operation section, and ensure it opens and closes fully. Check the condition of the power suppy cord and battery pack. Replace as needed. Lubricate the garage door rollers and hinges. The garage door opener is lubricated with a sufficient amount of lubricant for the life of the unit under normal operating conditions. Therefore, no further lubrication of the unit is required. DO NOT ADD LUBRICANT TO TRACKS. Unplug the power head and test the battery backup. If the unit cannot run on DC power alone, charge or replace the battery pack. 49 - English
-
 1
1 -
2
-
3
-
4
-
5
-
6
-
7
-
8
-
9
-
10
-
11
-
12
-
13
-
14
-
15
-
16
-
17
-
18
-
19
-
20
-
21
-
22
-
23
-
24
-
25
-
26
-
27
-
28
-
29
-
30
-
31
-
32
-
33
-
34
-
35
-
36
-
37
-
38
-
39
-
40
-
41
-
42
-
43
-
 44
44 -
 45
45 -
 46
46 -
 47
47 -
 48
48 -
 49
49 -
 50
50 -
 51
51 -
 52
52 -
 53
53 -
 54
54 -
55
-
56
-
57
-
58
-
59
-
60
-
61
-
62
-
63
-
64
-
65
-
66
-
67
-
68
-
69
-
70
-
71
-
72
-
73
-
74
-
75
-
76
-
77
-
78
-
79
-
80
-
81
-
82
-
83
-
84
-
85
-
86
-
87
-
88
-
89
-
90
-
91
-
92
-
93
-
94
-
95
-
96
-
97
-
98
-
99
-
100
-
101
-
102
-
103
-
104
-
105
-
106
-
107
-
108
-
109
-
110
-
111
-
112
-
113
-
114
-
115
-
116
-
117
-
118
-
119
-
120
-
121
-
122
-
123
-
124
-
125
-
126
-
127
-
128
-
129
-
130
-
131
-
132
-
133
-
134
-
135
-
136
-
137
-
138
-
139
-
140
-
141
-
142
-
143
-
144
-
145
-
146
-
147
-
148
-
149
-
150
-
151
-
152
-
153
-
154
-
155
-
156
-
157
-
158
-
159
-
160
 |
 |
