Samsung A877 User Manual - Page 114
Caller Image, Search Contact
 |
View all Samsung A877 manuals
Add to My Manuals
Save this manual to your list of manuals |
Page 114 highlights
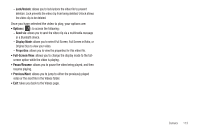
Editing a Photo 1. Touch ➔ My Stuff ➔ Pictures ➔ . 2. Use the following options onscreen buttons and icons for editing and photo management. 3. Touch Edit ( following: ) ➔ Edit and select from any of the • Effects: allows you to choose from among several effects such as: Filter, Style, Warp, or Partial Blur. • Adjust: allows you to adjust Auto Level, Brightness, Contrast, and Color. • Transform: allows you to Resize, Rotate, and Flip the image. • Crop: allows you to crop the image. Touch one corner of the image and, in a single motion, drag to another location to create the crop area, then touch Crop. • Insert: allows you to add Frames, Picture, Clip arts, Emoticon, and Text to the image. • Memo on screen: allows you to select a color, then handwrite a message onto the current image. Touch Done to store the new changes. Assigning an Image to an Address Book Entry 1. Touch ➔ My Stuff ➔ Pictures ➔ . 2. Touch Set as ➔ Caller Image ➔ Search Contact, touch an onscreen entry and touch Save . - or - Touch Set as ➔ Caller Image ➔ Create Contact, and follow the create a new Address Book entry with the image already assigned. For more information, refer to "Understanding Your Address Book" on page 82. Assigning an Image as a Wallpaper 1. Touch ➔ My Stuff ➔ Pictures ➔ . 2. Touch Set as ➔ Wallpaper. 3. Touch the screen to reveal the adjustment tools: • Zoom slider: touch the magnifying icons at either the top or bottom of the slider to adjust the magnification of the current image. • Rotate: orients the current image in either a landscape or portrait orientation. The bottom left of the page indicates how much of the image will be displayed as the wallpaper. 4. Touch Set to store the new settings and assign the wallpaper image. 110
-
 1
1 -
2
-
3
-
4
-
5
-
6
-
7
-
8
-
9
-
10
-
11
-
12
-
13
-
14
-
15
-
16
-
17
-
18
-
19
-
20
-
21
-
22
-
23
-
24
-
25
-
26
-
27
-
28
-
29
-
30
-
31
-
32
-
33
-
34
-
35
-
36
-
37
-
38
-
39
-
40
-
41
-
42
-
43
-
44
-
45
-
46
-
47
-
48
-
49
-
50
-
51
-
52
-
53
-
54
-
55
-
56
-
57
-
58
-
59
-
60
-
61
-
62
-
63
-
64
-
65
-
66
-
67
-
68
-
69
-
70
-
71
-
72
-
73
-
74
-
75
-
76
-
77
-
78
-
79
-
80
-
81
-
82
-
83
-
84
-
85
-
86
-
87
-
88
-
89
-
90
-
91
-
92
-
93
-
94
-
95
-
96
-
97
-
98
-
99
-
100
-
101
-
102
-
103
-
104
-
105
-
106
-
107
-
108
-
 109
109 -
 110
110 -
 111
111 -
 112
112 -
 113
113 -
 114
114 -
 115
115 -
 116
116 -
 117
117 -
 118
118 -
 119
119 -
120
-
121
-
122
-
123
-
124
-
125
-
126
-
127
-
128
-
129
-
130
-
131
-
132
-
133
-
134
-
135
-
136
-
137
-
138
-
139
-
140
-
141
-
142
-
143
-
144
-
145
-
146
-
147
-
148
-
149
-
150
-
151
-
152
-
153
-
154
-
155
-
156
-
157
-
158
-
159
-
160
-
161
-
162
-
163
-
164
-
165
-
166
-
167
-
168
-
169
-
170
-
171
-
172
-
173
-
174
-
175
-
176
-
177
-
178
-
179
-
180
-
181
-
182
-
183
-
184
-
185
-
186
-
187
-
188
-
189
-
190
-
191
-
192
-
193
-
194
-
195
-
196
-
197
-
198
-
199
-
200
-
201
-
202
-
203
-
204
-
205
 |
 |
