Samsung NV10 User Manual (user Manual) (ver.1.0) (English) - Page 45
Resize, Effect, Trimming
 |
UPC - 044701006749
View all Samsung NV10 manuals
Add to My Manuals
Save this manual to your list of manuals |
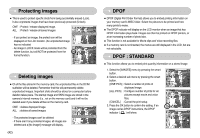
Page 45 highlights
Resize ƈ Change the resolution (size) of pictures taken. Select [User image] to save an image to be the start-up image. The resized image will have a new file name. 1. Press the smart button (horizontal). 2. Press the [RESIZE] menu button. 3. Select a desired sub menu by pressing the smart button. ƃ Image Resize Types 3136x2352 2688x2016 2240x1680 1024x768 START IMAGE Size 3136X2352 2688X2016 2240X1680 1024X768 START IMAGE 10M O O O O O 7M X O O O O 5M X X O O O 3M X X X O O 1M X X X X O INFORMATION ƃ You can change the resolution of only those files compressed in the JPEG 4:2:2 format. ƃ The resized image will have a new file name. The [START IMAGE] image is stored not on the memory card but on the internal memory. ƃ Only one [START IMAGE] image can be saved. If you save a new [START IMAGE], the existing startup image will be deleted. ƃ If the memory capacity is insufficient to store the resized image, a [Memory Full!] message will display on the LCD monitor and the resized image will not be stored. ŝ44Ş Trimming ƈ You can extract part of the image that you want and save it separately. 1. Select an image that you want to enlarge and press the enlargement button. 2. Press the smart button (horizontal). 3. Press the [TRIM] menu button. 4. Press the smart button. The trimmed image will save as a new file name, and display on the LCD monitor. To cancel the trimming, press the BACK button. ſ If there is not enough memory space to save the trimmed image, the image can't be trimmed. Trim: ſ To delete the enlarged image during the trimming function, press the delete button. Cancel:BACK Effect ƈ By using the camera's digital processor, it is possible to add special effects to your images. 1. Press the smart button. 2. Press the [EFFECT] menu button. 3. Select a desired sub menu by using the smart button. : No effect is added to the image : Captured images will be stored in black and white. RED : Captured images will be stored in a sepia tone BLUE (a range of yellowish brown colours). SEPIA : Captured images will be stored in a blue tone. B & W : Captured images will be stored in a red tone. : Captured images will be stored in a green tone. : Save the image in negative mode.
-
 1
1 -
2
-
3
-
4
-
5
-
6
-
7
-
8
-
9
-
10
-
11
-
12
-
13
-
14
-
15
-
16
-
17
-
18
-
19
-
20
-
21
-
22
-
23
-
24
-
25
-
26
-
27
-
28
-
29
-
30
-
31
-
32
-
33
-
34
-
35
-
36
-
37
-
38
-
39
-
 40
40 -
 41
41 -
 42
42 -
 43
43 -
 44
44 -
 45
45 -
 46
46 -
 47
47 -
 48
48 -
 49
49 -
 50
50 -
51
-
52
-
53
-
54
-
55
-
56
-
57
-
58
-
59
-
60
-
61
-
62
-
63
-
64
-
65
-
66
-
67
-
68
-
69
-
70
-
71
-
72
-
73
-
74
 |
 |
