Samsung SCH-R560 User Manual (user Manual) (ver.f2) (English) - Page 108
Add a New Event, Options, Go to Date, Go to Today, Erase Old, Monthly, Erase
 |
View all Samsung SCH-R560 manuals
Add to My Manuals
Save this manual to your list of manuals |
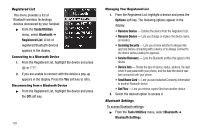
Page 108 highlights
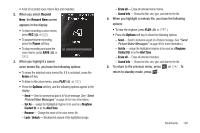
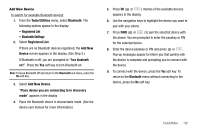
- To show the details of an event, press VIEW ( ). - Press the Options soft key to return to the Monthly calendar or to Erase a highlighted event or Erase all events. • To access other options while viewing the calendar, press the Options soft key. The following options pop-up in the display: - Go to Date - Lets you jump to any date you specify. - Go to Today - Lets you return to today from any other date. - Erase Old - Lets you erase past events. - Erase all - Lets you erase all events. Select the desired option and perform the related process. 3. Press VIEW ( or ) to display the specifics of the highlighted event. The following options are available: • To change the event details, press the Edit soft key. (See "Add a New Event" on page 105 for more information.) • To return to the Events list, press OK ( or ). • For more options, press the Options soft key. The following options appear in the display: - Monthly - Returns you to the Monthly calendar display. 105 - Erase - Remove this event from the Calendar. Select the desired option. Add a New Event 1. From the Tools/Utilities menu, select Calendar. A calendar appears in the display with the current date highlighted. The month and year appear at the top of the display. 2. Press the Add soft key. The New Event screen appears in the display. • Use the Up and Down navigation keys to highlight New Event options. • Use the Left and Right navigation keys to select option values. • Use the keypad to enter option values. 3. Enter the Name of the new event using the keypad. (For more information, refer to "Entering Text" on page 35.)
-
 1
1 -
2
-
3
-
4
-
5
-
6
-
7
-
8
-
9
-
10
-
11
-
12
-
13
-
14
-
15
-
16
-
17
-
18
-
19
-
20
-
21
-
22
-
23
-
24
-
25
-
26
-
27
-
28
-
29
-
30
-
31
-
32
-
33
-
34
-
35
-
36
-
37
-
38
-
39
-
40
-
41
-
42
-
43
-
44
-
45
-
46
-
47
-
48
-
49
-
50
-
51
-
52
-
53
-
54
-
55
-
56
-
57
-
58
-
59
-
60
-
61
-
62
-
63
-
64
-
65
-
66
-
67
-
68
-
69
-
70
-
71
-
72
-
73
-
74
-
75
-
76
-
77
-
78
-
79
-
80
-
81
-
82
-
83
-
84
-
85
-
86
-
87
-
88
-
89
-
90
-
91
-
92
-
93
-
94
-
95
-
96
-
97
-
98
-
99
-
100
-
101
-
102
-
 103
103 -
 104
104 -
 105
105 -
 106
106 -
 107
107 -
 108
108 -
 109
109 -
 110
110 -
 111
111 -
 112
112 -
 113
113 -
114
-
115
-
116
-
117
-
118
-
119
-
120
-
121
-
122
-
123
-
124
-
125
-
126
-
127
-
128
-
129
-
130
-
131
-
132
-
133
-
134
-
135
-
136
-
137
-
138
-
139
-
140
-
141
-
142
-
143
-
144
-
145
-
146
-
147
-
148
-
149
-
150
-
151
-
152
-
153
-
154
-
155
-
156
-
157
-
158
-
159
-
160
-
161
-
162
-
163
-
164
-
165
-
166
-
167
 |
 |
