Samsung SCH-R560 User Manual (user Manual) (ver.f2) (English) - Page 50
Add to an Existing Entry, Update Existing, Go
 |
View all Samsung SCH-R560 manuals
Add to My Manuals
Save this manual to your list of manuals |
Page 50 highlights
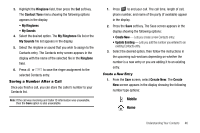
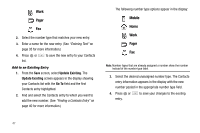
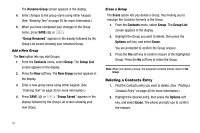
Work Pager Fax 2. Select the number type that matches your new entry. 3. Enter a name for the new entry. (See "Entering Text" on page 35 for more information.) 4. Press or list. to save the new entry to your Contacts Add to an Existing Entry 1. From the Save screen, select Update Existing. The Update Existing screen appears in the display showing your Contacts list with the Go To field and the first Contacts entry highlighted. 2. Find and select the Contacts entry to which you want to add the new number. (See "Finding a Contacts Entry" on page 40 for more information.) The following number type options appear in the display: Mobile Home Work Pager Fax Note: Number types that are already assigned a number show the number instead of the number type label. 3. Select the desired unassigned number type. The Contacts entry information appears in the display with the new number posted in the appropriate number type field. 4. Press or entry. to save your changes to the existing 47
-
 1
1 -
2
-
3
-
4
-
5
-
6
-
7
-
8
-
9
-
10
-
11
-
12
-
13
-
14
-
15
-
16
-
17
-
18
-
19
-
20
-
21
-
22
-
23
-
24
-
25
-
26
-
27
-
28
-
29
-
30
-
31
-
32
-
33
-
34
-
35
-
36
-
37
-
38
-
39
-
40
-
41
-
42
-
43
-
44
-
 45
45 -
 46
46 -
 47
47 -
 48
48 -
 49
49 -
 50
50 -
 51
51 -
 52
52 -
 53
53 -
 54
54 -
 55
55 -
56
-
57
-
58
-
59
-
60
-
61
-
62
-
63
-
64
-
65
-
66
-
67
-
68
-
69
-
70
-
71
-
72
-
73
-
74
-
75
-
76
-
77
-
78
-
79
-
80
-
81
-
82
-
83
-
84
-
85
-
86
-
87
-
88
-
89
-
90
-
91
-
92
-
93
-
94
-
95
-
96
-
97
-
98
-
99
-
100
-
101
-
102
-
103
-
104
-
105
-
106
-
107
-
108
-
109
-
110
-
111
-
112
-
113
-
114
-
115
-
116
-
117
-
118
-
119
-
120
-
121
-
122
-
123
-
124
-
125
-
126
-
127
-
128
-
129
-
130
-
131
-
132
-
133
-
134
-
135
-
136
-
137
-
138
-
139
-
140
-
141
-
142
-
143
-
144
-
145
-
146
-
147
-
148
-
149
-
150
-
151
-
152
-
153
-
154
-
155
-
156
-
157
-
158
-
159
-
160
-
161
-
162
-
163
-
164
-
165
-
166
-
167
 |
 |
