Sharp MX-6500N Adjustment Guide - Page 11
Fuser Adjustment
 |
View all Sharp MX-6500N manuals
Add to My Manuals
Save this manual to your list of manuals |
Page 11 highlights
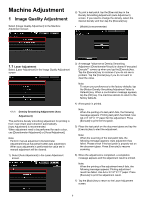
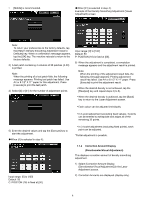
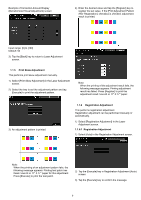
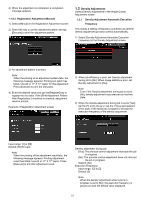
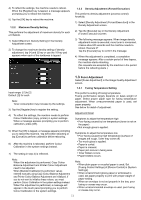
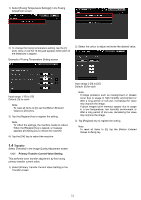
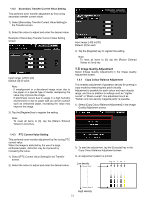
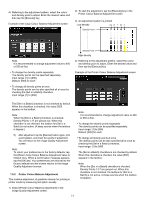
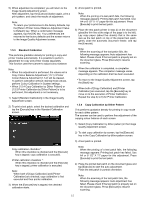
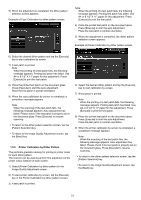
4) To reflect the settings, the machine needs to reboot. When the [Register] key is tapped, a message appears prompting you to reboot the machine. 5) Tap the [OK] key to reboot the machine. 1.2.2 Maximum Density Setting This performs the adjustment of maximum density for each of Y/M/C/K. 1) Select [Maximum Density Setting] in the Density Adjustment screen. 2) To change the maximum density setting of density adjustment, tap [+] and [-] key or use the 10-key pad appears when each of the textboxes is tapped. 1.2.3 Density Adjustment (Forced Execution) This performs density adjustment (process control) forcefully. 1) Select [Density Adjustment (Forced Execution)] in the Density Adjustment screen. 2) Tap the [Execute] key in the Density Adjustment (Forced Execution) screen. 3) The following message appears: When image density adjustment mode is executed, more toner is consumed, it takes about 20 seconds and the machine needs to reboot. Execute it? Tap the [Execute] key to confirm the message. 4) When the adjustment is completed, a completion message appears. After a certain period of time lapses, the machine starts rebooting. (No requests are accepted by the machine in the period before the rebooting starts.) 1.3 Fuser Adjustment Select [Fuser Adjustment] in the Image Quality Adjustment screen. Input range: [-2] to [2] Default: [0] for each Note: Toner consumption may increase by the settings. 3) Tap the [Register] key to register the setting. 4) To reflect the settings, the machine needs to perform Colour Calibration (copy, printer) in system settings. When a message appears prompting you to perform calibration, press [OK]. 5) When the [OK] is tapped, a message appears prompting you to reboot the machine. Tap [OK] when rebooting or tap [Cancel] to perform calibration before rebooting. 6) After the machine is rebooted, perform Colour Calibration in the system settings instead. 7) The setting in step 3) is reflected. Note: When this adjustment is performed, Copy Colour Balance Adjustment and Printer Colour Adjustment need to be adjusted. When [Standard Calibration] is performed, values entered manually using Copy Colour Balance Adjustment and Printer Colour Balance Adjustment are initialized. If you do not want to initialize these values, you must perform Colour Calibration in the system settings instead. When this adjustment is performed, a message will appear in the touch panel prompting you to perform Colour Calibration in the system settings. 1.3.1 Fusing Temperature Setting This performs setting of fusing temperature. Fusing performance largely depends on basis weight of paper. Select proper paper type for fusing temperature adjustment. When unrecommended paper is used, set paper property. See below for detail of adjustment. Adjustment Detail Symptoms to adjust the temperature high Poor fusing caused by low temperature (toner is not on the paper) Not enough gloss is applied. Symptoms to adjust the temperature low Poor fusing caused by high temperature (surface of images are rough, Toner may come off) Too much gloss is applied. Paper is curled. Paper is creased. Paper jam occurs in fusing area. Toner blisters occurs. Paper blisters occurs. Note: When plain paper or recycled paper is used, Set [Fusing Control Settings] of [Device Control] in [System Settings]. When unrecommend glossy paper or embossed is used, set paper property to print with proper weight of paper setting. When an envelope is not set properly in the tray, poor fusing or crease may occur. When unrecommended envelope is used, poor fusing or crease may occur. 11
-
 1
1 -
2
-
3
-
4
-
5
-
 6
6 -
 7
7 -
 8
8 -
 9
9 -
 10
10 -
 11
11 -
 12
12 -
 13
13 -
 14
14 -
 15
15 -
 16
16 -
17
-
18
-
19
-
20
-
21
-
22
-
23
-
24
-
25
-
26
-
27
-
28
-
29
-
30
 |
 |