Sharp MX-6500N Adjustment Guide - Page 17
Colour Copy Black Component Amount, Adjustment, Area Separation Level Adjustment
 |
View all Sharp MX-6500N manuals
Add to My Manuals
Save this manual to your list of manuals |
Page 17 highlights
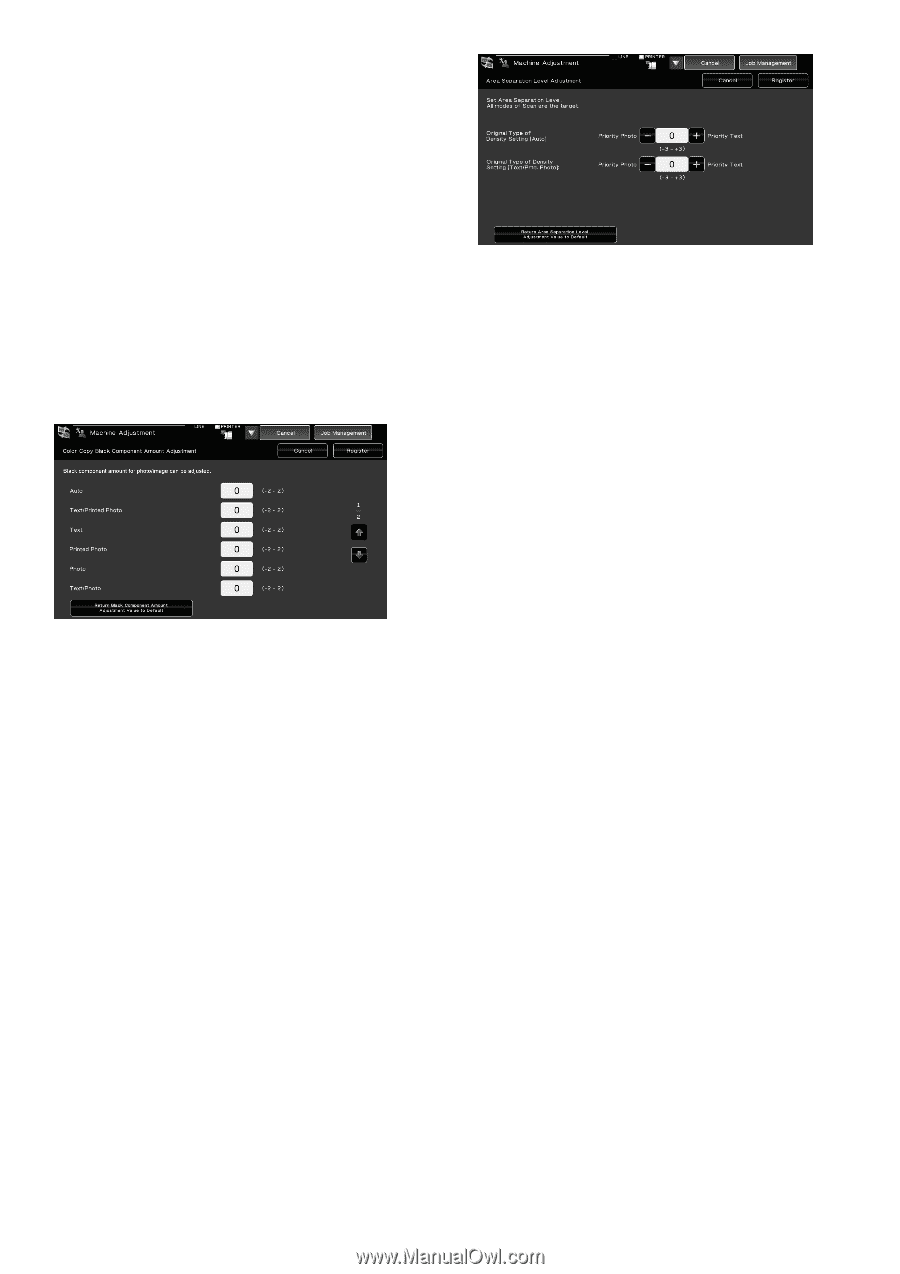
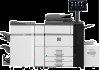
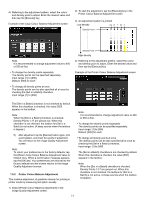
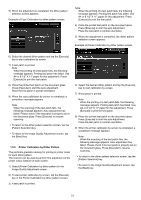
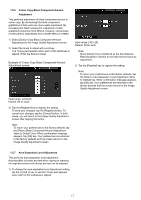
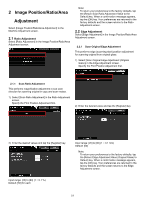
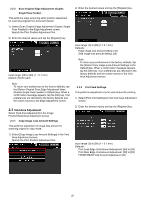
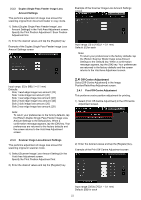
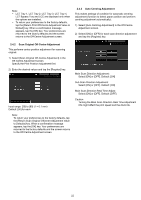
1.5.6 Colour Copy Black Component Amount Adjustment This performs adjustment of black component amount in colour copy. By decreasing the black component, gradations of dark parts are more easily expressed. By increasing the black component, expression of dark gradations becomes more difficult, however, unevenness of dark parts is suppressed and a darker effect is created. 1) Select [Colour Copy Black Component Amount Adjustment] in the Image Quality Adjustment screen. 2) Select the mode to adjust with scroll key. The 10-key pad appears when each of the textboxes is tapped. Enter the desired values Example of Colour Copy Black Component Amount Adjustment screen. Input range: [-3] to [3] Default: [0] for each Note: Since default (0) is considered as the best balance, Reproducibility of photos or text may become poor by adjustment. 2) Tap the [Register] key to register the setting. Note: To return your preferences to the factory defaults, tap the [Return Area Separation Level Adjustment Value to Default] key. When confirmation message appears, tap [OK] key. Your preferences are returned to the factory defaults and the screen returns to the Image Quality Adjustment screen. Input range: [-2] to [2] Default: [0] for each 3) Tap the [Register] key to register the setting. To save your changes, tap the [Register] button. To cancel your changes, tap the [Cancel] button. In both cases, you will return to the Image Quality Adjustment screen after tapping the button. Note: To return your preferences to the factory defaults, tap the [Return Black Component Amount Adjustment Value to Default.] key. When confirmation message appears, tap [OK] key. Your preferences are returned to the factory defaults and the screen returns to the Image Quality Adjustment screen. 1.5.7 Area Separation Level Adjustment This performs area separation level adjustment. Reproducibility of photos and text when copying or scanning the originals contains both photos and text can be adjusted. 1) To change the area separation level adjustment setting, tap the [+] and [-] key or use the 10-key pad appears when each of the textboxes is tapped. 17
-
 1
1 -
2
-
3
-
4
-
5
-
6
-
7
-
8
-
9
-
10
-
11
-
 12
12 -
 13
13 -
 14
14 -
 15
15 -
 16
16 -
 17
17 -
 18
18 -
 19
19 -
 20
20 -
 21
21 -
 22
22 -
23
-
24
-
25
-
26
-
27
-
28
-
29
-
30
 |
 |