Sharp MX-6500N Adjustment Guide - Page 6
Machine Adjustment
 |
View all Sharp MX-6500N manuals
Add to My Manuals
Save this manual to your list of manuals |
Page 6 highlights
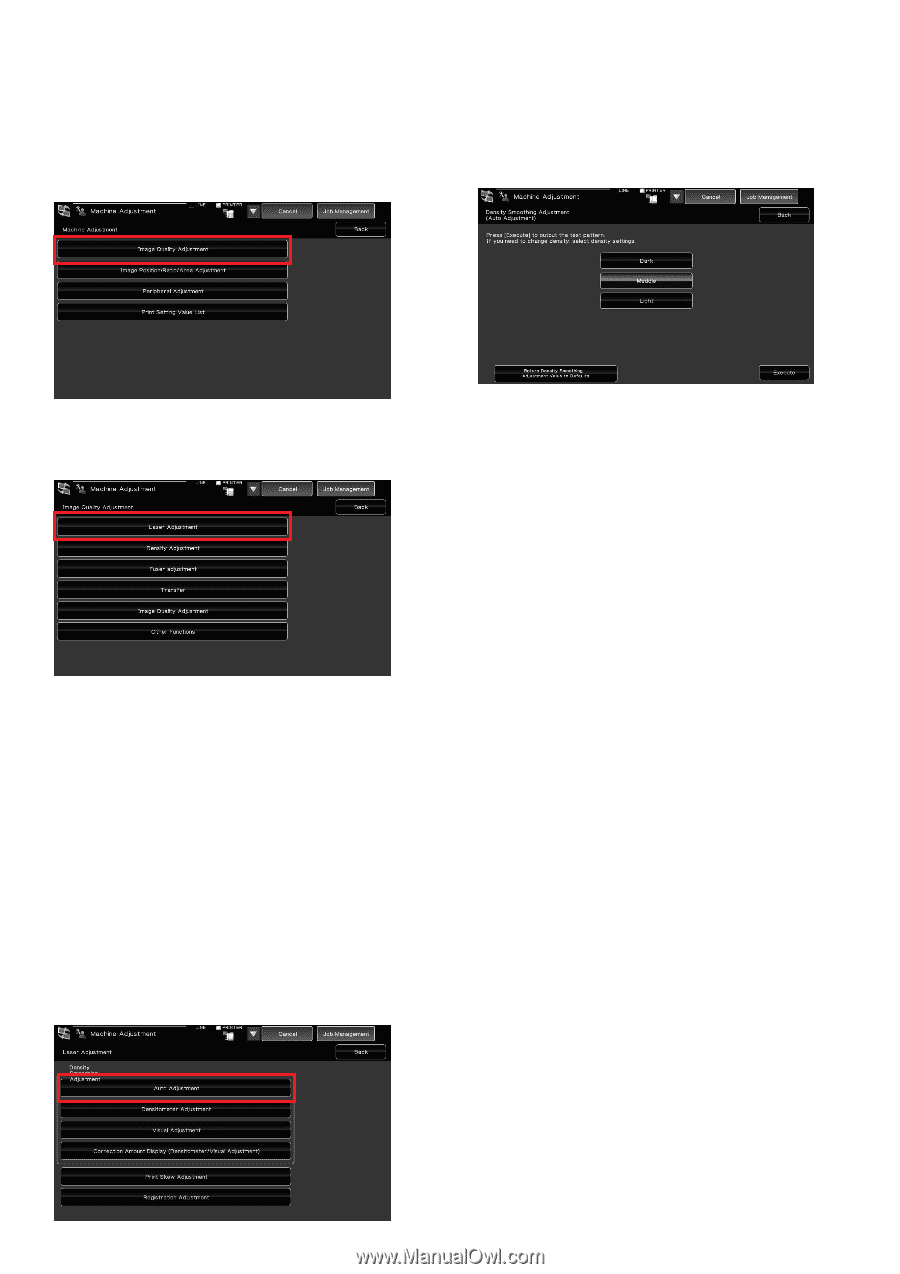
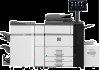
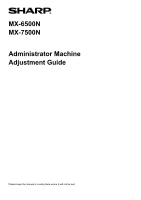
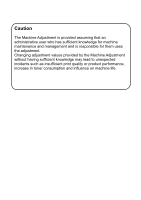
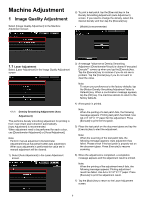
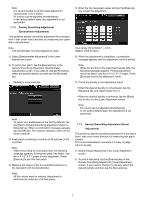
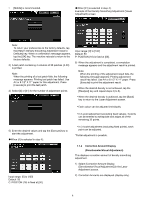
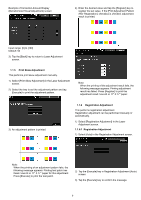
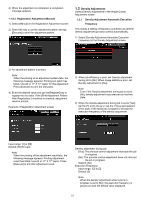
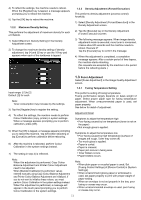
Machine Adjustment 1 Image Quality Adjustment Select [Image Quality Adjustment] in the Machine Adjustment screen. 2) To print a test patch, tap the [Execute] key in the Density Smoothing Adjustment (Auto Adjustment) screen. If you need to change the density, select the desired density and then tap the [Execute] key. [Middle] is recommended. 1.1 Laser Adjustment Select [Laser Adjustment] in the Image Quality Adjustment screen. 1.1.1 Density Smoothing Adjustment (Auto Adjustment) This performs density smoothing adjustment for printing in front / rear (main scan) direction automatically. [Auto Adjustment] is recommended. When adjustment need to be performed for each colour, use [Densitometer Adjustment] or [Visual Adjustment]. Note: Perform manual adjustment (Densitometer Adjustment/Visual Adjustment) after auto adjustment. When auto adjustment is performed the value set in manual adjustment will be cleared. 1) Select [Auto Adjustment] in the Laser Adjustment screen. 3) A message "Value set at Density Smoothing Adjustment (Densitometer/Visual) is cleared if executed. Execute?" comes up when you tap the [Execute] key. Tap the [Execute] key to continue if you do not see a problem. Tap the [Cancel] key if you do not want to clear the value. Note: To return your preferences to the factory defaults, tap the [Return Density Smoothing Adjustment Value to Defaults] key. When a confirmation message appears, tap the [OK] key. The machine reboots to return to the factory defaults. 4) A test patch is printed. Note: When the printing of a test patch fails, the following message appears: Printing test patch has failed. Use A4 or 8 1/2" X 11" paper for this adjustment. Press [Execute] to print the test patch. 5) Place the test patch on the document glass and tap the [Execute] key to start the adjustment. Note: When the scanning of the test patch fails, the following message appears: Auto adjustment has failed. Please check if the test patch is properly set on the document glass. Press [Execute] to resume scanning. 6) When the adjustment is completed, a completion message appears and the adjustment result is printed. Note: When the printing of the adjustment result fails, the following message appears: Printing adjustment result has failed. Use A4 or 8 1/2" X 11" paper. Press [Execute] to print the adjustment result. 7) Tap the [Back] key to return to the Laser Adjustment screen. 6
-
 1
1 -
 2
2 -
 3
3 -
 4
4 -
 5
5 -
 6
6 -
 7
7 -
 8
8 -
 9
9 -
 10
10 -
 11
11 -
 12
12 -
13
-
14
-
15
-
16
-
17
-
18
-
19
-
20
-
21
-
22
-
23
-
24
-
25
-
26
-
27
-
28
-
29
-
30
 |
 |