Sharp MX-6500N Adjustment Guide - Page 16
Printer Calibration by Dither Pattern
 |
View all Sharp MX-6500N manuals
Add to My Manuals
Save this manual to your list of manuals |
Page 16 highlights
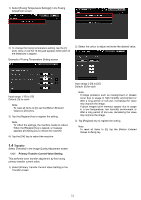
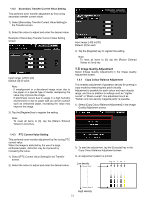
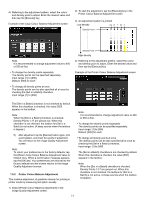
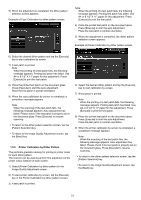
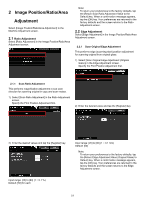
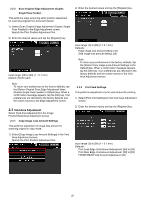
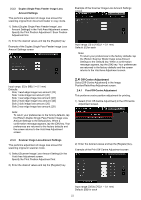
5) When the adjustment is completed, the dither pattern selection screen appears. Example of Copy Calibration by dither pattern screen. Note: When the printing of a test patch fails, the following message appears: Printing test patch has failed. Use A4 or 8 1/2" X 11" paper for this adjustment. Press [Execute] to print the test patch. 4) Place the printed test patch on the document glass. Press [Execute] to start the auto adjustment. Place the test patch in portrait orientation. 5) When the adjustment is completed, the dither pattern selection screen appears. Example of Printer Calibration by dither pattern screen. 6) Select the desired dither pattern and tap the [Execute] key to start calibration by screen. 7) A test patch is printed. Note: When the printing of a test patch fails, the following message appears: Printing test patch has failed. Use A4 or 8 1/2" X 11" paper for this adjustment. Press [Execute] to print the test patch. 8) Place the printed test patch on the document glass. Press [Execute] to start the auto adjustment. Place the test patch in portrait orientation. 9) When the copy calibration by screen is completed, a completion message appears. Note: When the scanning of the test patch fails, the following message appears: Auto adjustment has failed. Please check if the test patch is properly set on the document glass. Press [Execute] to resume scanning. To return to the dither pattern selection screen, tap the [Pattern Selection] key. To return to the Image Quality Adjustment screen, tap the [Back] key. 1.5.5 Printer Calibration by Dither Pattern This performs gradation density for printing in printer mode for each dither pattern. The scanner can be used to perform fine adjustment of the printer colour balance of each screen. 1) Select [Printer Calibration by dither pattern] in the Image Quality Adjustment screen. 2) To start printer calibration by screen, tap the [Execute] key in the Printer Calibration by dither pattern screen. 3) A test patch is printed. 6) Select the desired dither pattern and tap the [Execute] key to start calibration by screen. 7) A test patch is printed. Note: When the printing of a test patch fails, the following message appears: Printing test patch has failed. Use A4 or 8 1/2" X 11" paper for this adjustment. Press [Execute] to print the test patch. 8) Place the printed test patch on the document glass. Press [Execute] to start the auto adjustment. Place the test patch in portrait orientation. 9) When the printer calibration by screen is completed, a completion message appears. Note: When the scanning of the test patch fails, the following message appears: Auto adjustment has failed. Please check if the test patch is properly set on the document glass. Press [Execute] to resume scanning. To return to the dither pattern selection screen, tap the [Pattern Selection] key. To return to the Image Quality Adjustment screen, tap the [Back] key. 16
-
 1
1 -
2
-
3
-
4
-
5
-
6
-
7
-
8
-
9
-
10
-
 11
11 -
 12
12 -
 13
13 -
 14
14 -
 15
15 -
 16
16 -
 17
17 -
 18
18 -
 19
19 -
 20
20 -
 21
21 -
22
-
23
-
24
-
25
-
26
-
27
-
28
-
29
-
30
 |
 |
