Sharp MX-6500N Adjustment Guide - Page 13
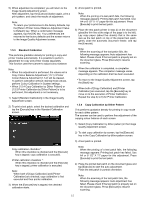
Image Quality Adjustment
 |
View all Sharp MX-6500N manuals
Add to My Manuals
Save this manual to your list of manuals |
Page 13 highlights
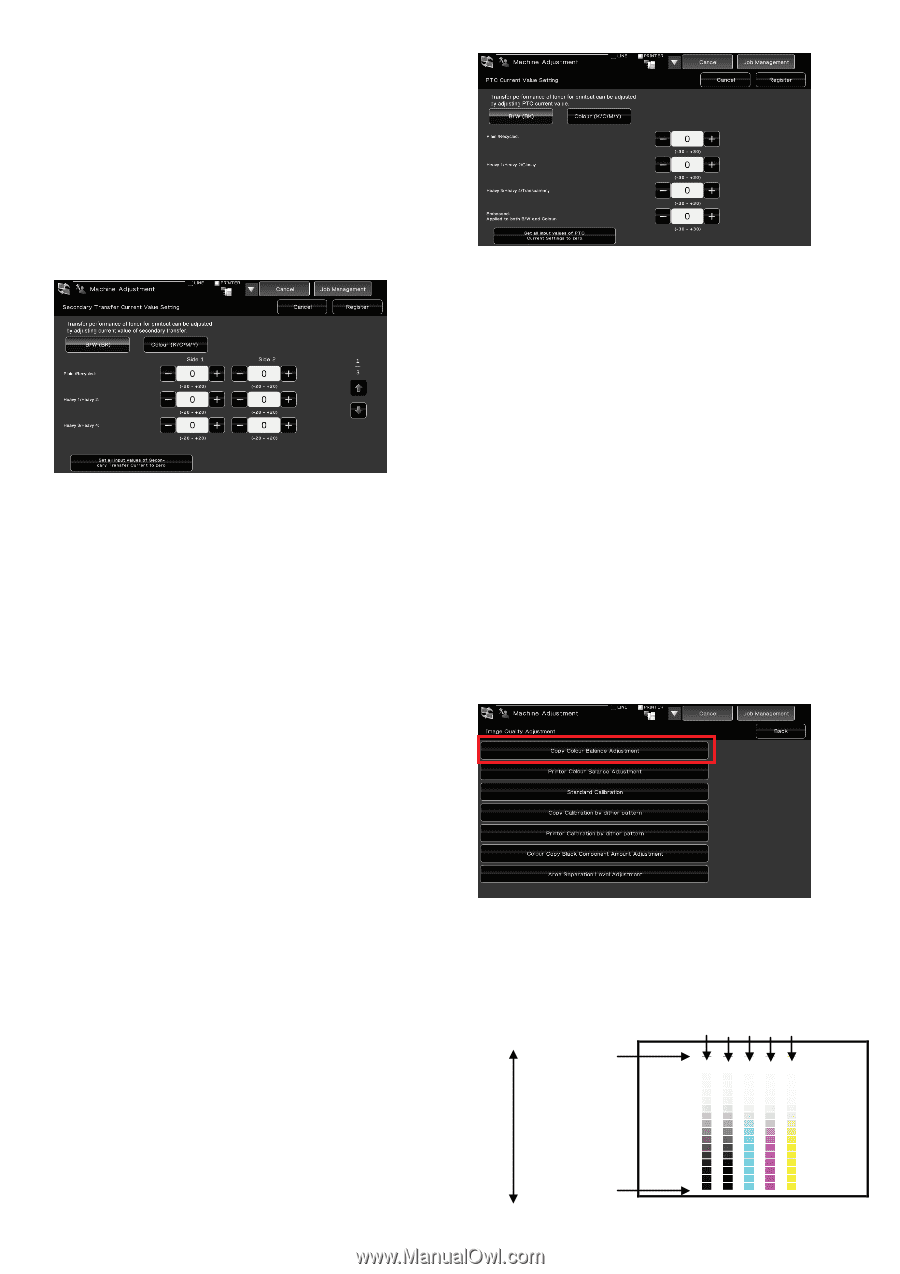
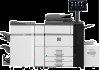
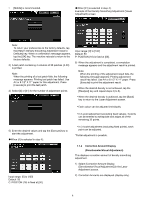
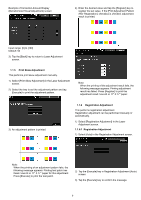
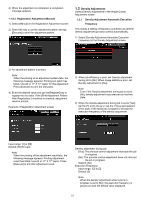
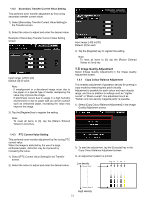
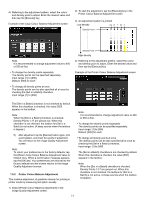
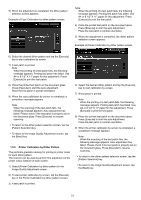
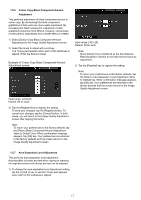
1.4.2 Secondary Transfer Current Value Setting This performs toner transfer adjustment by fine tuning secondary transfer current value. 1) Select [Secondary Transfer Current Value Setting] in the Transfer screen. 2) Select the colour to adjust and enter the desired value. Example of Secondary Transfer Current Value Setting screen Input range: [-20] to [20] Default: [0] for each Note: If misalignment or a disordered image occur due to the paper or a special type of media, decreasing the value may improve the image. If patchiness occurs due to usage in a high humidity environment or due to paper with an uneven surface such as embossed paper, increasing the value may improve the image. 3) Tap the [Register] key to register the setting. Note: To reset all items to [0], tap the [Return Entered Values to Zero] key. Input range: [-30] to [30] Default: [0] for each 3) Tap the [Register] key to register the setting. Note: To reset all items to [0], tap the [Return Entered Values to Zero] key. 1.5 Image Quality Adjustment Select [Image Quality Adjustment] in the Image Quality Adjustment screen. 1.5.1 Copy Colour Balance Adjustment This enables adjustment of gradation density for printing in copy mode by measuring test patch visually. Adjustment is possible for each colour and each density range, and thus in addition to settings such as "Lighter overall" or "Bluish overall", fine adjustment such as "Darken only low-density magenta parts" is possible. 1) Select [Copy Colour Balance Adjustment] in the Image Quality Adjustment screen. 1.4.3 PTC Current Value Setting This performs toner transfer adjustment by fine tuning PTC current value. When the image is distorted by the use of a large embossed paper, distortion may be improved by increasing the value. 1) Select [PTC Current Value Setting] in the Transfer screen. 2) Select the colour to adjust and enter the desired value. 2) To start the adjustment, tap the [Execute] key in the Copy Colour Balance Adjustment screen. 3) An adjustment pattern is printed. Low density Density Point 1 mix K C M Y Density Point 17 High density 13
-
 1
1 -
2
-
3
-
4
-
5
-
6
-
7
-
 8
8 -
 9
9 -
 10
10 -
 11
11 -
 12
12 -
 13
13 -
 14
14 -
 15
15 -
 16
16 -
 17
17 -
 18
18 -
19
-
20
-
21
-
22
-
23
-
24
-
25
-
26
-
27
-
28
-
29
-
30
 |
 |