Sharp MX-6500N Adjustment Guide - Page 9
Print Skew Adjustment, Registration Adjustment, 1.6.1 Registration Adjustment
 |
View all Sharp MX-6500N manuals
Add to My Manuals
Save this manual to your list of manuals |
Page 9 highlights
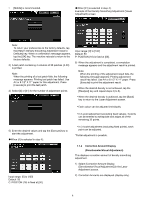
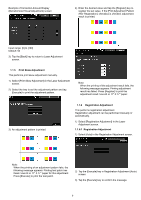
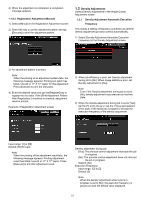
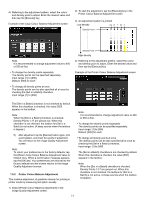
Example of Correction Amount Display (Densitometer/Visual Adjustment) screen 4) Enter the desired value and tap the [Register] key to register the set value. If the [Print Adjustment Pattern After Registration.] checkbox is checked, adjustment result is printed. Input range: [0] to [100] Default: 50 3) Tap the [Back] key to return to Laser Adjustment screen. 1.1.5 Print Skew Adjustment This performs print skew adjustment manually. 1) Select [Print Skew Adjustment] in the Laser Adjustment screen. 2) Select the tray to set the adjustment pattern and tap [Execute] to print the adjustment pattern. Note: When the printing of the adjustment result fails, the following message appears: Printing adjustment result has failed. Press [Register] to print the adjustment result. Use A3 or 11" X 17" paper. 3) An adjustment pattern is printed. 1.1.6 Registration Adjustment This performs registration adjustment. Registration adjustment can be performed manually or automatically. 1) Select [Registration Adjustment] in the Laser Adjustment screen. 1.1.6.1 Registration Adjustment 1) Select [Auto] in the Registration Adjustment screen. Note: When the printing of an adjustment pattern fails, the following message appears: Printing test patch has failed. Use A3 or 11" X 17" paper for this adjustment. Press [Execute] to print the test patch. 2) Tap the [Execute] key in Registration Adjustment (Auto) screen. 3) Tap the [Execute] key to confirm the message. 9
-
 1
1 -
2
-
3
-
 4
4 -
 5
5 -
 6
6 -
 7
7 -
 8
8 -
 9
9 -
 10
10 -
 11
11 -
 12
12 -
 13
13 -
 14
14 -
15
-
16
-
17
-
18
-
19
-
20
-
21
-
22
-
23
-
24
-
25
-
26
-
27
-
28
-
29
-
30
 |
 |