Sharp MX-6500N Adjustment Guide - Page 7
Density Smoothing Adjustment, Densitometer Adjustment, Density Smoothing Adjustment Visual,
 |
View all Sharp MX-6500N manuals
Add to My Manuals
Save this manual to your list of manuals |
Page 7 highlights
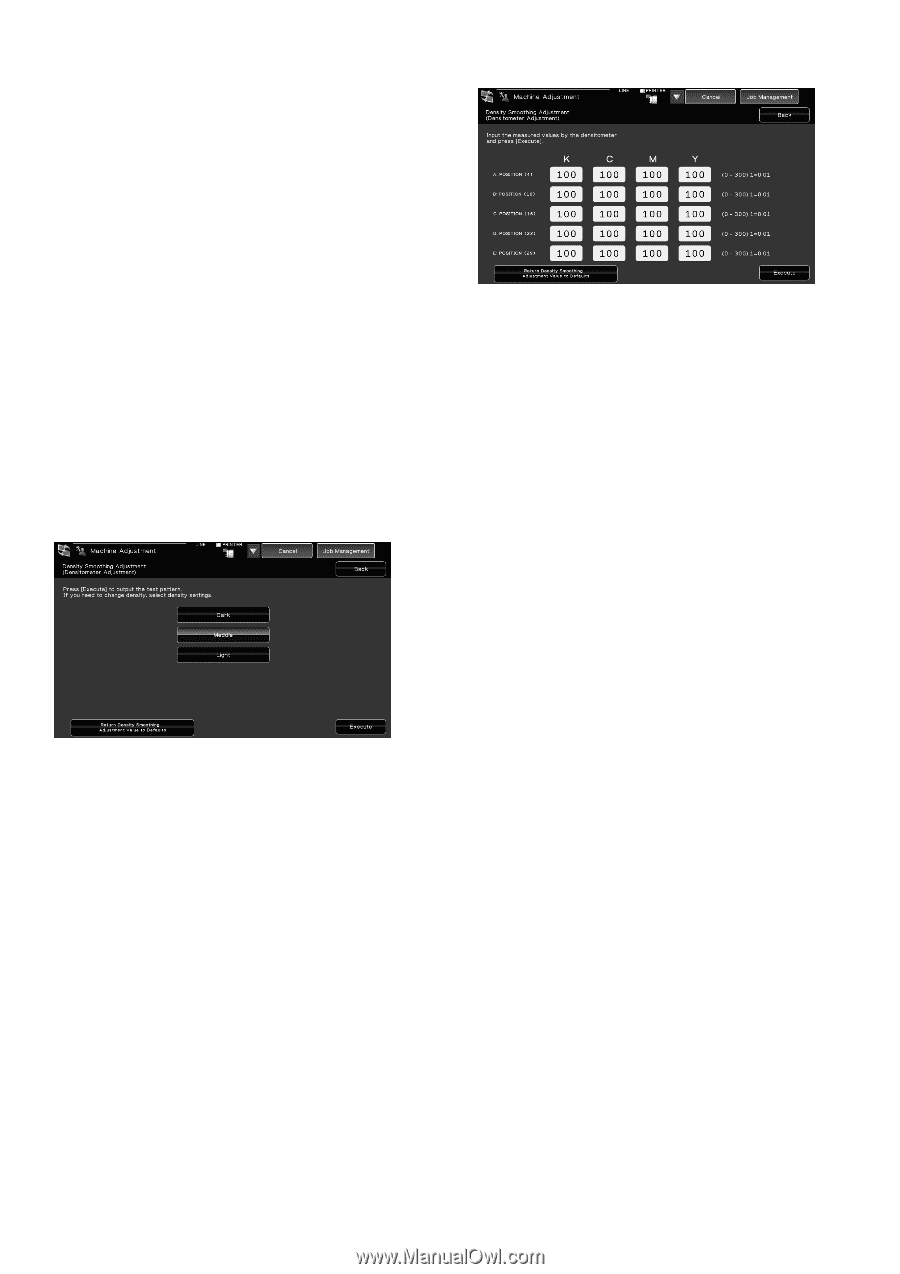
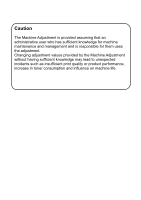
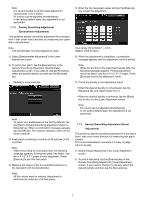
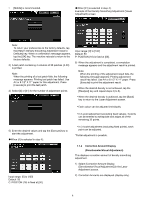
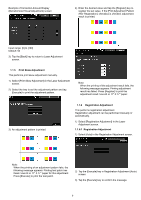
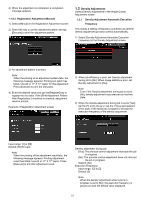
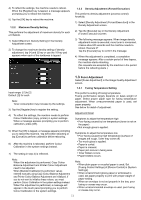
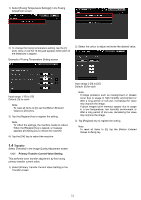
Note: It is recommended to perform Auto Adjustment several times. (2 to 3 times) All colours can be adjusted simultaneously. In the factory default state, this adjustment is not performed. 1.1.2 Density Smoothing Adjustment (Densitometer Adjustment) This performs density smoothing adjustment for printing in front / rear (main scan) direction by measuring test patch with a densitometer. Note: The densitometer is to be prepared by users. 1) Select [Densitometer Adjustment] in the Laser Adjustment screen. 2) To print a test patch, tap the [Execute] key in the Density Smoothing Adjustment (Densitometer Adjustment) screen. If you need to change the density, select the desired density and then tap the [Execute] key. [Middle] is recommended. Note: To return your preferences to the factory defaults, tap the [Return Density Smoothing Adjustment Value to Defaults] key. When a confirmation message appears, tap the [OK] key. The machine reboots to return to the factory defaults. 3) A test patch containing 4 columns of 28 patches (3-30) is printed. Note: When the printing of a test patch fails, the following message appears: Printing test patch has failed. Use A4 or 8 1/2" X 11" paper for this adjustment. Press [Execute] to print the test patch. 4) Measure the values of the five specified positions on the test patch with the densitometer. Note: All five values must be entered. Adjustment is performed by reduction of all five points. 5) Enter the five measured values and tap the [Execute] key to start the adjustment. Input range: [0] to [300] (1 = 0.01) Default: [100] for each 6) When the adjustment is completed, a completion message appears and the adjustment result is printed. Note: When the printing of the adjustment results fails, the following message appears: Printing adjustment result has failed. Use A4 or 8 1/2" X 11" paper. Press [Execute] to print the adjustment result. 7) Check the density in the adjustment result. When the desired density is not achieved, tap the [Readjust] key and repeat steps 3) to 7). When the desired density is achieved, tap the [Back] key to return to the Laser Adjustment screen. Note: All colours can be adjusted simultaneously. In the factory default state, this adjustment is not performed. 1.1.3 Density Smoothing Adjustment (Visual Adjustment) This performs density smoothing adjustment for printing in front / rear (main scan) direction by measuring test patch visually. This is recommended to use when it is easy to judge colours visually. 1) Select [Visual Adjustment] in the Laser Adjustment screen. 2) To print a test patch, tap the [Execute] key in the Density Smoothing Adjustment (Visual Adjustment) screen. If you need to change the density, select the desired density and then tap the [Execute] key. 7
-
 1
1 -
 2
2 -
 3
3 -
 4
4 -
 5
5 -
 6
6 -
 7
7 -
 8
8 -
 9
9 -
 10
10 -
 11
11 -
 12
12 -
13
-
14
-
15
-
16
-
17
-
18
-
19
-
20
-
21
-
22
-
23
-
24
-
25
-
26
-
27
-
28
-
29
-
30
 |
 |