Sony DVWM2000 Product Manual (dvwm2000 installation manual) - Page 13
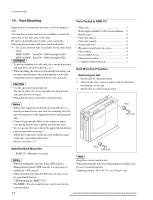
Mounting in rack
 |
View all Sony DVWM2000 manuals
Add to My Manuals
Save this manual to your list of manuals |
Page 13 highlights
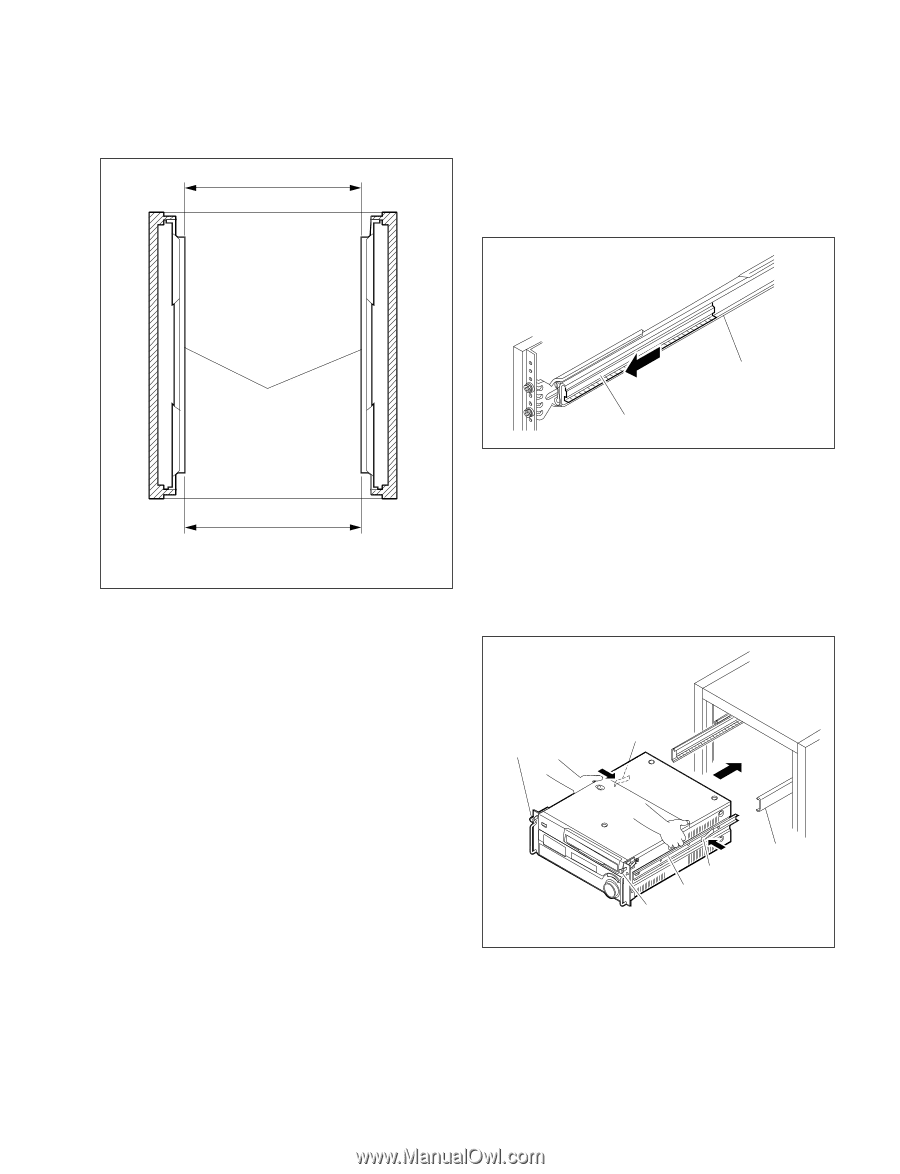
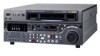
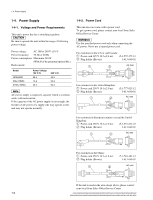
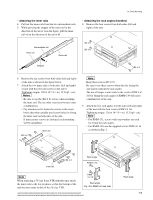
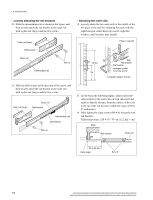
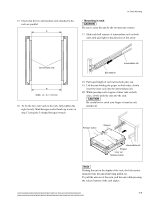
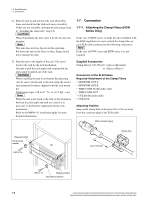
15. Check that the two intermediate rails attached to the rack are parallel. A 1-6. Rack Mounting . Mounting in rack c Be sure to carry the unit by the two persons or more. 17. Slide each ball retainer of intermediate rails on both sides (left and right) in the direction of the arrow. Intermediate rails Ball retainer Intermediate rail A' Width : A = A' = 416 mm 16. To fix the two outer rails to the rack, fully tighten the eight loosely fitted hexagon socket head cap screws in step 12 using the L-shaped hexagon wrench. 18. Pull equal length of each rail on both sides out. 19. Lift the unit holding the gripes on both sides, slowly insert the inner rails into the intermediate rails. 20. While pressing each stopper of inner rails on both sides, slowly push the unit into the rack. c Be careful not to catch your finger or hand in rack mount rail. Release button Stopper Intermediate rail Stopper Inner rail Release button n Pushing the unit in the depths of the rack, the lock mechanism prevents the unit from being pulled out. To pull the unit out of the rack, pull the unit while pressing the release buttons of the rack angles. HDW-2000/M2000/M2000P/S2000/S2000P/M2100/M2100P, DVW-2000/2000P/M2000/M2000P MSW-2000/A2000/A2000P/M2000/M2000P/M2000E/M2000EP/M2100/M2100P/M2100E/M2100EP 1-7
-
 1
1 -
2
-
3
-
4
-
5
-
6
-
7
-
 8
8 -
 9
9 -
 10
10 -
 11
11 -
 12
12 -
 13
13 -
 14
14 -
 15
15 -
 16
16 -
 17
17 -
 18
18 -
19
-
20
-
21
-
22
-
23
-
24
-
25
-
26
-
27
-
28
-
29
-
30
-
31
-
32
-
33
-
34
-
35
-
36
-
37
-
38
-
39
-
40
-
41
-
42
-
43
-
44
-
45
-
46
-
47
-
48
 |
 |