Sony DVWM2000 Product Manual (dvwm2000 installation manual) - Page 29
Reattaching the Lower Control Panel Unit
 |
View all Sony DVWM2000 manuals
Add to My Manuals
Save this manual to your list of manuals |
Page 29 highlights
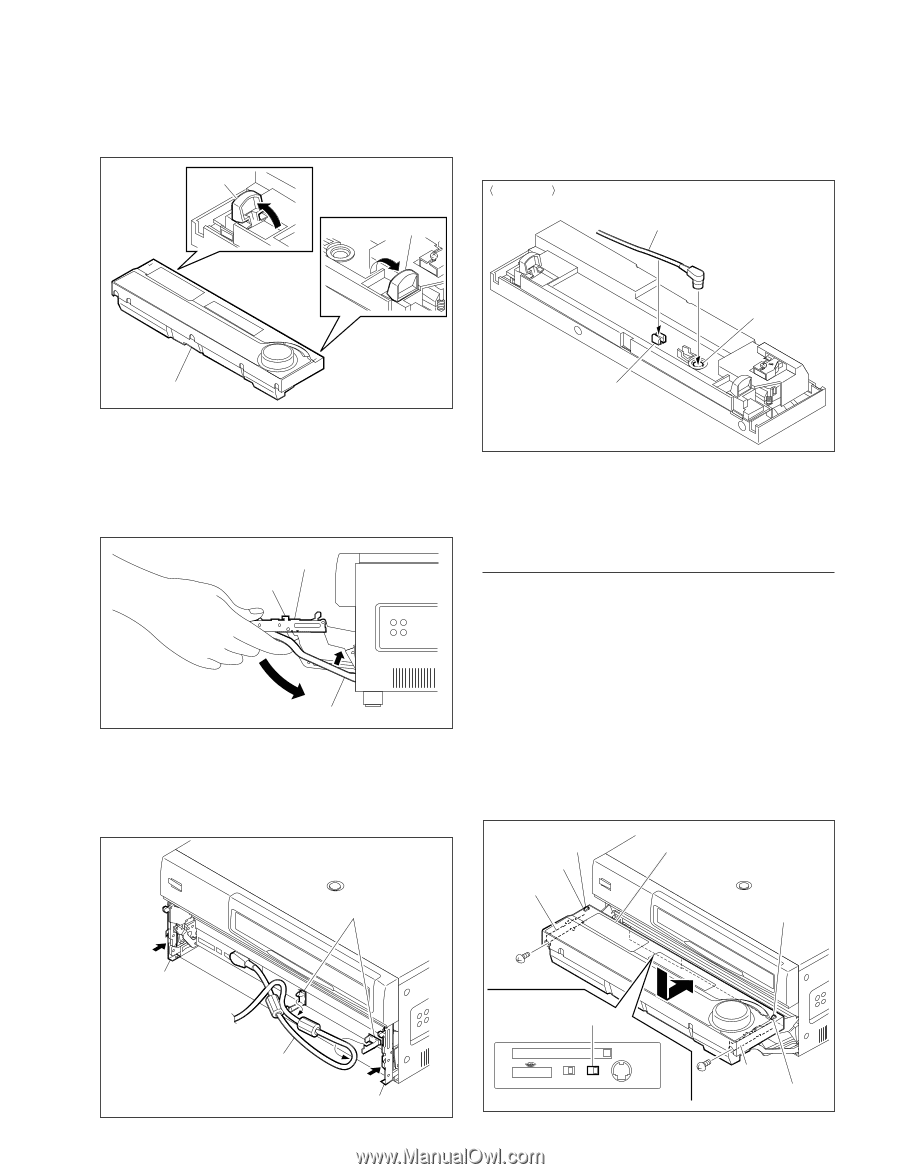
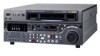
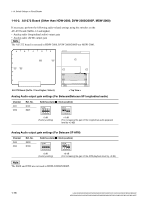
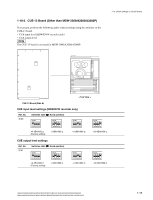
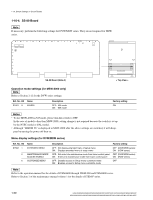
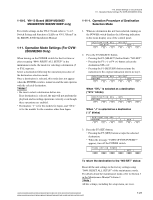
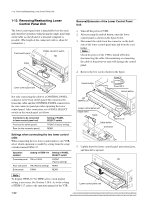
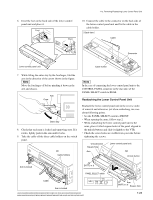
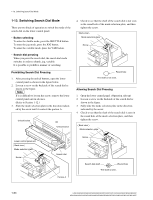
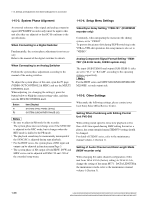
6. Erect the feet on the back side of the lower control panel unit and place it. Foot Foot 1-12. Removing/Reattaching Lower Control Panel Unit 10. Connect the cable to the connector on the back side of the lower control panel unit and fix the cable in the cable holder. Back view Cable Connector Lower control panel unit Cable holder 7. While lifting the outer stay by the forefinger, fold the arm in the direction of the arrow shown in the figure. n Move the forefinger off before pinching it between the arm and chassis. Arm Craw Outer stay 8. Check that each arm is locked and unmoving state. If it rattles, lightly push in the arm until it locks. 9. Take the cable off the three cable holders on the switch panel. Cable holders n In the case of connecting the lower control panel unit to the CONTROL PANEL connector in the rear side, set the PANEL SELECT switch to REAR. Reattaching the Lower Control Panel Unit Reattach the lower control panel unit in the reverse order of removal and extension, yet when reattaching, use care about following points. . Set the PANEL SELECT switch to FRONT. . When opening the arms, follow step 2. . When reattaching the lower control panel unit to the arms, place it which square holes of the panel aligned to the unlock buttons and slide it slightly to the VTR. . Check the screw holes are visible from your side before tightening the screws. Unlock button Square hole Arm Lower control panel unit Unlock button Arm is locked BVTT3 x 6 PANEL SELECT switch Cable Arm is locked HDW-2000/M2000/M2000P/S2000/S2000P/M2100/M2100P, DVW-2000/2000P/M2000/M2000P MSW-2000/A2000/A2000P/M2000/M2000P/M2000E/M2000EP/M2100/M2100P/M2100E/M2100EP KEY INHI PANEL SEL ON OFF REAR FRONT CONTROL PANEL Arm BVTT3 x 6 Square hole 1-23
-
 1
1 -
2
-
3
-
4
-
5
-
6
-
7
-
8
-
9
-
10
-
11
-
12
-
13
-
14
-
15
-
16
-
17
-
18
-
19
-
20
-
21
-
22
-
23
-
 24
24 -
 25
25 -
 26
26 -
 27
27 -
 28
28 -
 29
29 -
 30
30 -
 31
31 -
 32
32 -
 33
33 -
 34
34 -
35
-
36
-
37
-
38
-
39
-
40
-
41
-
42
-
43
-
44
-
45
-
46
-
47
-
48
 |
 |