Sony DVWM2000 Product Manual (dvwm2000 installation manual) - Page 35
Removing/Reattaching Plug-in, Board
 |
View all Sony DVWM2000 manuals
Add to My Manuals
Save this manual to your list of manuals |
Page 35 highlights
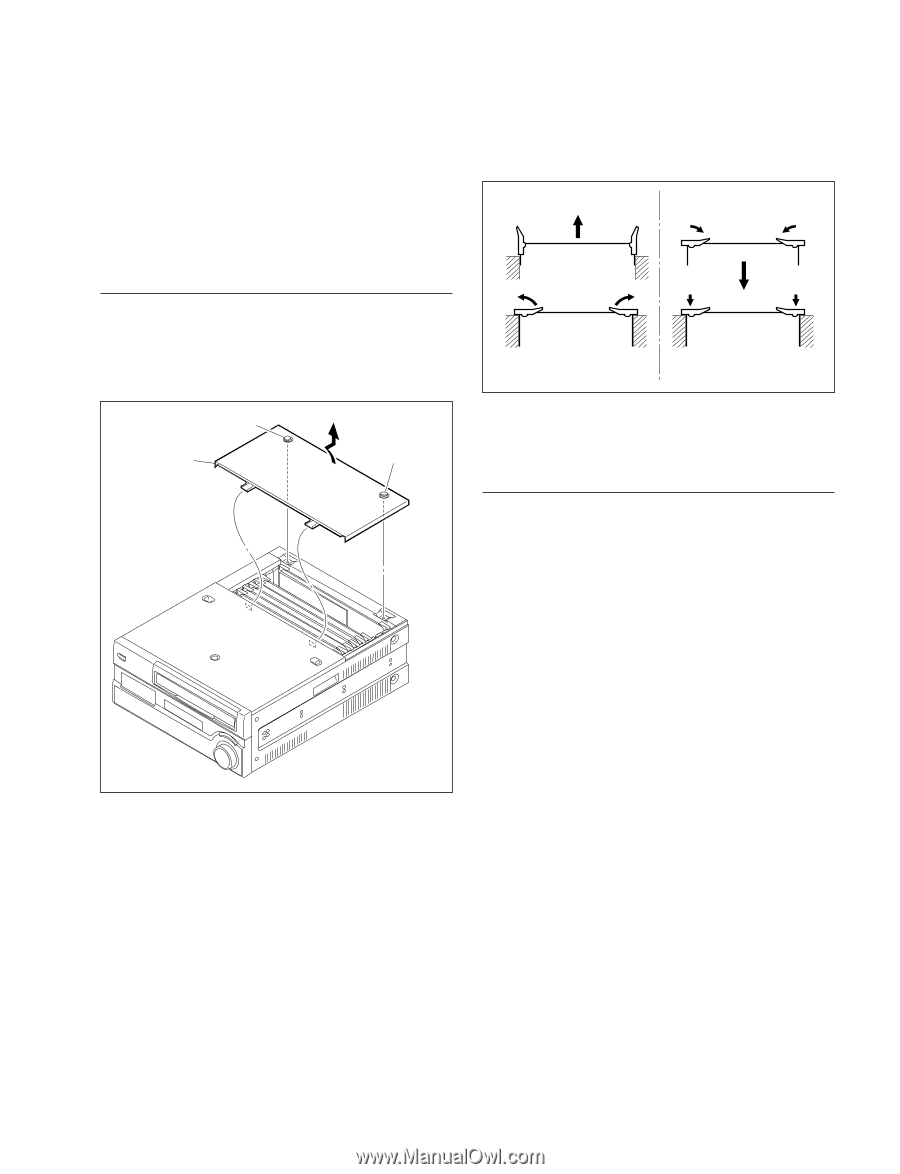
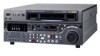
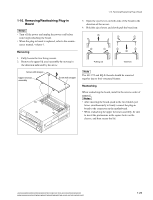
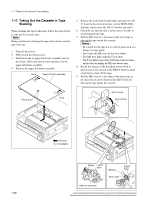
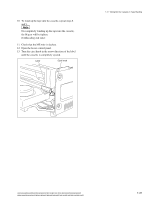
1-16. Removing/Reattaching Plug-in Board 1-16. Removing/Reattaching Plug-in Board m . Turn off the power and unplug the power cord before removing/reattaching the board. . When the plug-in board is replaced, refer to the mainte- nance manual, volume-1. Removing 1. Fully loosen the two fixing screws. 2. Remove the upper lid (rear) assembly by moving in the direction indicated by the arrow. Screw with stopper Upper lid (rear) assembly Screw with stopper 3. Open the eject levers on both ends of the board in the direction of the arrows. 4. Hold the eject levers and slowly pull the board out. 2 1 1 1 1 3 3 2 Pulling out Insertion n The AU-272 and EQ-84 boards should be removed together due to their structural feature. Reattaching When reattaching the board, install in the reverse order of removal. m . After inserting the board, push in the two folded eject levers simultaneously to firmly connect the plug-in board to the connector on the motherboard. . When reattaching the upper lid (rear) assembly, be sure to insert the protrusions in the square holes on the chassis, and then secure the lid. HDW-2000/M2000/M2000P/S2000/S2000P/M2100/M2100P, DVW-2000/2000P/M2000/M2000P MSW-2000/A2000/A2000P/M2000/M2000P/M2000E/M2000EP/M2100/M2100P/M2100E/M2100EP 1-29
-
 1
1 -
2
-
3
-
4
-
5
-
6
-
7
-
8
-
9
-
10
-
11
-
12
-
13
-
14
-
15
-
16
-
17
-
18
-
19
-
20
-
21
-
22
-
23
-
24
-
25
-
26
-
27
-
28
-
29
-
 30
30 -
 31
31 -
 32
32 -
 33
33 -
 34
34 -
 35
35 -
 36
36 -
 37
37 -
 38
38 -
 39
39 -
 40
40 -
41
-
42
-
43
-
44
-
45
-
46
-
47
-
48
 |
 |