Sony GV-HD700/1 Operating Guide
Sony GV-HD700/1 - Hdv™ Video Walkman Vcr Manual
 |
View all Sony GV-HD700/1 manuals
Add to My Manuals
Save this manual to your list of manuals |
Sony GV-HD700/1 manual content summary:
- Sony GV-HD700/1 | Operating Guide - Page 1
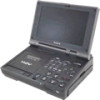
4-152-362-11(1) Digital HD Videocassette Recorder Operating Guide GV-HD700/1 GV-HD700E/1 Getting Started 12 Basic Operations 21 Dubbing/Editing 39 Using a "Memory Stick 45 Duo" media Customizing your VCR 54 Troubleshooting 66 Additional Information 76 Quick Reference 90 Spanish Quick Guide/ 98 Gu - Sony GV-HD700/1 | Operating Guide - Page 2
located on the bottom. Record the serial number in the space provided below. Refer to these numbers whenever you call your Sony dealer regarding this product. intended to alert the user to the presence of important operating and maintenance (servicing) instructions in the literature accompanying the - Sony GV-HD700/1 | Operating Guide - Page 3
block any ventilation openings. Install in accordance with the manufacturer's instructions. • Do not install near any heat sources such as radiators unused for long periods of time. • Refer all servicing to qualified service personnel. Servicing is required when the apparatus has been damaged in any - Sony GV-HD700/1 | Operating Guide - Page 4
read this manual thoroughly, and equivalent type recommended by Sony. • Dispose of used battery packs promptly as described in the instructions. Replace the battery with socket) immediately if any malfunction occurs while using your VCR. Even if your VCR is turned off, AC power (house current/mains) - Sony GV-HD700/1 | Operating Guide - Page 5
SONY Model No.: GV-HD700/1 Responsible Party: Sony changes or modifications not expressly approved in this manual could void your authority to operate this equipment. Note This equipment has been tested and found to comply with the limits for a Class B digital the user is encouraged to try to correct - Sony GV-HD700/1 | Operating Guide - Page 6
Office, your household waste disposal service or the shop where you purchased the product. Applicable Accessory: Remote Commander Notes on use Types of cassette you can use in your VCR You can use mini DV cassettes marked with . Your VCR is not compatible with the Cassette Memory function - Sony GV-HD700/1 | Operating Guide - Page 7
the correct way. Pushing the plug forcibly into the terminal will damage the terminal and may result in a malfunction of the VCR. About menu items and the LCD panel • A menu item that is grayed out is not available under the current recording or playback conditions. • The LCD screen is manufactured - Sony GV-HD700/1 | Operating Guide - Page 8
8 TV (for GV-HD700/1 owners) or a PAL TV (for GV-HD700E/1 owners). • Television programs, films, video tapes, and other materials may be copyrighted. Unauthorized recording of such materials may be contrary to the copyright laws. On playing back the tapes recorded in the HDV format on other devices - Sony GV-HD700/1 | Operating Guide - Page 9
for the point where the index signal is recorded (Index search 34 Changing/checking the settings in your VCR 35 Turning off the LCD screen ......... 35 Switching the information display on the screen 35 Displaying the settings in your VCR (Status check 35 Displaying all area surrounding the - Sony GV-HD700/1 | Operating Guide - Page 10
of the LCD screen (LCD SET/COLOR BAR/DATA CODE, etc.) (AUDIO SET) menu 61 Settings for the audio recording (DV AU. Troubleshooting Troubleshooting 66 Warning indicators and messages 73 Additional Information Using your VCR abroad 76 Maintenance and precautions ...... 79 HDV format and recording - Sony GV-HD700/1 | Operating Guide - Page 11
• This "Operating Guide" refers to the HDV1080i specification as HDV format unless there is a need to specify. Features of this VCR 1 Compatible with HDV/DV formats The VCR is compatible with both the HDV and DV formats. You can record or play back a tape in the desired format. 2 Equipped with - Sony GV-HD700/1 | Operating Guide - Page 12
(Mains lead) (1) (p. 13) Operating Guide (This manual) (1) Wireless Remote Commander (1) (p. 93) Size R6 (AA) battery for the supplied Remote Commander (2) For details on how to change the battery, see page 93. A/V connecting cable (1) (p. 24, 26, 41) Component video cable (1) (p. 24, 26) 12 - Sony GV-HD700/1 | Operating Guide - Page 13
to use your VCR. Using an outside power source from a wall outlet (wall socket) with the AC Adaptor When recording/editing or using the VCR for a long time M series (optional) (p. 15) to the VCR and charge it. For the types of battery packs compatible with the VCR, see page 16. 1 Attach the battery - Sony GV-HD700/1 | Operating Guide - Page 14
. lever and open the LCD panel. 4 Connect the AC Adaptor to the DC IN jack on the VCR. Make sure that the v mark on the DC plug is facing to the v mark on the VCR. OPEN. lever 3 Set the POWER switch to OFF (CHG) (The default setting). DC IN jack DC plug - Sony GV-HD700/1 | Operating Guide - Page 15
pack, disconnect the AC Adaptor from the DC IN jack on the VCR. b Notes • When you remove the battery pack or disconnect the AC the M series (optional) (p. 15). Make sure to attach your battery in the correct direction. If you attempt to attach it in the wrong direction forcibly, a malfunction - Sony GV-HD700/1 | Operating Guide - Page 16
Do not attach an incompatible battery pack forcibly. Doing so may cause the VCR to malfunction. Available playback time Approximate time (min.) available when you use a fully charged battery pack. HDV format pictures (GV-HD700/1) Battery pack LCD panel LCD panel opened closed NP-FM50 75 115 - Sony GV-HD700/1 | Operating Guide - Page 17
Getting Started DV format pictures (GV-HD700/1) Battery pack LCD panel LCD panel opened closed NP-FM50 80 130 NP-QM71D 205 315 NP-QM91D 315 475 NP-F570 (supplied) 160 245 NP-F770 335 510 NP-F970 500 760 HDV format pictures (GV-HD700E/1) Battery pack LCD panel LCD panel - Sony GV-HD700/1 | Operating Guide - Page 18
using your VCR for the first time. If you do not set the date and time, the [CLOCK SET] screen appears every time you turn on your VCR. 1 and the [CLOCK SET] screen appears. POWER switch GV-HD700/1: EXEC V/v 12:00 AM stands for midnight. 12:00 PM stands for noon. GV-HD700E/1: POWER/ CHARGE lamp - Sony GV-HD700/1 | Operating Guide - Page 19
to be ready to record or playback after the power is turned on. You cannot operate the VCR during this time. Changing the language setting Press MENU and select (OTHERS) t [LANGUAGE], then set the desired language (p. 64). Step 4: Inserting a cassette tape or a "Memory Stick Duo" media Cassette - Sony GV-HD700/1 | Operating Guide - Page 20
It may cause a malfunction. • If you touch any part of the VCR other than the (PUSH) mark when closing the cassette compartment, the cassette malfunction. z Tips • The recordable time varies depending on [DV REC MODE] (p. 56). To eject the cassette tape Open the cassette compartment following the - Sony GV-HD700/1 | Operating Guide - Page 21
temporarily interrupted when the signal switches between the HDV and DV formats. • The tape recorded in the HDV format cannot be played back on a video camera only compatible with the DV format or a mini-DV player. z Tips • Indicators displayed on the screen during playback are shown on page 35, 94 - Sony GV-HD700/1 | Operating Guide - Page 22
screen as a mosaic image. • Note the following when playing back the picture recorded in the HDV format: - Pictures recorded in the HDV format are not output from the HDV Remote Commander have the same functions with the video control buttons on the VCR, and some of the functions are available - Sony GV-HD700/1 | Operating Guide - Page 23
playback mode other than normal playback, no sound is produced and the previous picture may remain on the screen as a mosaic image. • Note the following when playing back the picture recorded in the HDV format: - Reverse slow playback and reverse frame-by- frame playback do not function. - Pictures - Sony GV-HD700/1 | Operating Guide - Page 24
the instruction manual supplied with the device to be connected. z Tips • You can play back pictures recorded in x.v.Color on the TV supporting x.v.Color (p. 84). To playing back the pictures, the settings of the TV may be needed. Jacks on the VCR Open the jack cover and connect the cable. 1 HDV/DV - Sony GV-HD700/1 | Operating Guide - Page 25
Type VCR Cable : Signal flow TV Menu Setting Component video cable (supplied) (Green) Y (Blue) PB/CB (Red) PR/CR A/V connecting cable (supplied) (White) (Red) (IN/OUT REC) t [HDV/DV SEL] t [AUTO] (p. 56) [COMPONENT] t [1080i/480i] (GV-HD700/1)/ [1080i/576i] (GV-HD700E/1) (p. 57 - Sony GV-HD700/1 | Operating Guide - Page 26
. • If your TV is not compatible with HDV1080i, connect the VCR and TV with the supplied component video cable and A/V connecting cable as illustrated in . • The TV needs to be set to recognize the connection of the VCR. See the instruction manual supplied with your TV. • This VCR has a 4-pin i.LINK - Sony GV-HD700/1 | Operating Guide - Page 27
Type VCR Cable : Signal flow TV Menu Setting Component video cable (supplied) (Green) Y (Blue) PB/CB (Red) PR/CR A/V connecting cable (supplied) (White) (Red) (IN/OUT REC) t [HDV/DV SEL] t [AUTO] (p. 56) [COMPONENT] t [1080i/480i] (GV-HD700/1)/ [1080i/576i] (GV-HD700E/1) (p. 57 - Sony GV-HD700/1 | Operating Guide - Page 28
t [HDV/DV SEL] t [AUTO] (p. 56) [TV TYPE] t [16:9]/[4:3] (p. 57) When connecting to your TV via the other VCR Select video input jack, then connect the white (left channel) or red (right channel) plug to the audio input jack of your TV. If your TV/VCR has a 21-pin adaptor (EUROCONNECTOR) (GV-HD700E - Sony GV-HD700/1 | Operating Guide - Page 29
and connect the cable. Basic Operations 1 HDV/DV (i.LINK) interface 2 S VIDEO IN jack 3 VIDEO IN jack 4 AUDIO IN jacks Using an i.LINK cable (optional) VCR Cable i.LINK cable (optional) External device : Signal flow HDV1080i compatible device t HD quality* • The external device should come - Sony GV-HD700/1 | Operating Guide - Page 30
Recording the picture from TV, VCR, etc. (Continued) b Notes • Disconnect the i.LINK cable before changing [HDV/DV SEL] and [i.LINK CONV] settings. Otherwise, the VCR may not recognize the video signal from the connected device. • This VCR has a 4-pin i.LINK terminal. Select a cable that fits the - Sony GV-HD700/1 | Operating Guide - Page 31
on the playback device or TV. When recording the picture from the other VCR, insert a cassette tape for playback. When you connect to the TV, pictures from the TV is displayed on the screen of the VCR. When you connect to devices with an i.LINK cable, the format of the input signal ( or ) will - Sony GV-HD700/1 | Operating Guide - Page 32
tape in the HDV and DV formats, set [HDV/DV SEL] to [HDV] on the VCR. To record the part recorded in the DV format, set [HDV/DV SEL] to [DV] on the VCR (p. 56). The rest of the parts recorded in the undefined format will remain unrecorded then. • When you also use the another GV-HD700/1, GV-HD700E - Sony GV-HD700/1 | Operating Guide - Page 33
only with the tape recorded with date data. • You need to record more than 2 minutes after the date is changed. The VCR may not accurately detect the point where the recording date changes. • The date search function will not function correctly, if a blank section between recorded sections on the - Sony GV-HD700/1 | Operating Guide - Page 34
the Remote Commander. To cancel the operation Press STOP 7. b Notes • If an index recording is less than 2 minutes, the VCR may not accurately detect the index point. • The index search function will not function correctly, if a blank section between recorded sections on the tape is detected. 34 - Sony GV-HD700/1 | Operating Guide - Page 35
3. z Tips • You can display the information during playback on a TV. Set [DISP OUTPUT] to [V-OUT/PANEL] (p. 59). • The time code is recorded for easy scene search on the tape. The VCR records the time code during recording. • The time code starts counting from "0:00:00:00" at the beginning of the - Sony GV-HD700/1 | Operating Guide - Page 36
the screen. • All scan display does not affect to the original picture. • If ALLSCAN is displayed while inputting signals with HDV/DV jack or VIDEO IN/S VIDEO IN jack, fluctuation may appear around the picture frame. This is not malfunction, and there is no problem with pictures recorded on the tape - Sony GV-HD700/1 | Operating Guide - Page 37
6 Select [OK] using V/v, then press EXEC. 7 Press MENU to hide the menu screen. 2 Press the ASSIGN button assigned to [PB ZOOM]. The center of the picture is cannot be output via the HDV/DV (i.LINK) interface when you play back the picture recorded in the HDV/DV format. • During magnifying a movie - Sony GV-HD700/1 | Operating Guide - Page 38
before recording flashes. When recording starts, appears for about 7 seconds and an index signal is recorded. To cancel the operation before recording During flashing, press the ASSIGN button assigned to [INDEX MARK] again. b Notes • You cannot record an index signal on a recorded tape afterward - Sony GV-HD700/1 | Operating Guide - Page 39
) : Signal flow External device HDV1080i compatible device t HD quality* • The external device should come equipped with an i.LINK jack compatible with HDV1080i. i.LINK cable (optional) AV device with i.LINK jack t SD quality * Pictures recorded in the DV format are dubbed in the SD (standard - Sony GV-HD700/1 | Operating Guide - Page 40
when the signal switches between the HDV and DV formats. • Disconnect the i.LINK cable before changing [HDV/DV SEL] and [i.LINK CONV] settings. Otherwise, the VCR, DVD/HDD recorder may not be able to recognize the video signal from the VCR. • This VCR has a 4-pin i.LINK terminal. Select a cable - Sony GV-HD700/1 | Operating Guide - Page 41
data on the screen when connected with an A/V connecting cable, set [DISP OUTPUT] to [V-OUT/PANEL] (p. 59). z Tips • When you connect the VCR to the other VCR or DVD/HDD recorder via the S VIDEO jack by using an A/V connecting cable with S VIDEO (optional), higher quality DV format pictures can be - Sony GV-HD700/1 | Operating Guide - Page 42
( or ) will be indicated on the screen of the VCR. Refer to the instruction manual supplied with your recording device for details. 5 Stop recording on the recording device, and press STOP x to finish playback on the VCR. b Notes • Pictures recorded in the HDV format are not output from the - Sony GV-HD700/1 | Operating Guide - Page 43
has the i.LINK (DV) jack via your VCR. Connect the VCR to the wall outlet (wall socket) using the supplied AC Adaptor for this operation (p. 13). You need to install software to capture video signals on your computer, if necessary. Refer to the instruction manual of your computer and software. An - Sony GV-HD700/1 | Operating Guide - Page 44
record or capture video output via the VCR when the video includes copyright protection signals (GV-HD700E/1 only). • If ALLSCAN is displayed while inputting signals with VIDEO IN/S VIDEO IN jack, fluctuation may appear around the picture frame. This is not malfunction, and there is no problem - Sony GV-HD700/1 | Operating Guide - Page 45
of the picture recorded on the tape will be displayed. Camera setting data recorded on the tape cannot be stored on the "Memory Stick Duo" media. • The image size is fixed depending on the format or the aspect ratio of movies as follows: - When capturing from a movie in the HDV format: 1.2M - When - Sony GV-HD700/1 | Operating Guide - Page 46
can play back still images recorded on a "Memory Stick Duo" media. Insert a "Memory Stick Duo" media into your VCR before this operation. • The last recorded image is displayed. 2 Press MEMORY INDEX. A red B mark appears above the image that is displayed before changing to the index screen mode. - Sony GV-HD700/1 | Operating Guide - Page 47
/ Windows Vista* * 64-bit editions and Starter (Edition) are not supported. Standard installation is required. Operation is not assured if the above OS has been upgraded. • CPU: MMX Pentium 200MHz or faster • Others: USB port (provided as standard). For Macintosh users • OS: Mac OS 9.1/9.2 or Mac OS - Sony GV-HD700/1 | Operating Guide - Page 48
2000/Windows XP/ Windows Vista Log on as an Administrator. 2 Insert the "Memory Stick Duo" media into the VCR. 3 Connect the VCR to the wall outlet (wall socket) using the supplied AC Adaptor (p. 13). 4 Set the POWER switch to ON. 5 Press MENU. The menu screen appears. 6 Select (OTHERS) t [USB - Sony GV-HD700/1 | Operating Guide - Page 49
image format will differ. A file error indicator may appear and you may not open the file. • Communications between the VCR and your computer may not recover after recovering from Suspend, Resume, or Sleep. Disconnecting the USB cable For Windows users If [USB CONNECTING] appears on the LCD screen - Sony GV-HD700/1 | Operating Guide - Page 50
the LCD screen, do only step 4. For Macintosh users 1 Close down all applications running on the computer. 2 Drag and drop the drive icon on the desktop onto the [Trash] icon. 3 Disconnect the USB cable from the VCR and computer. b Notes • Disconnect the USB cable according to the correct procedure - Sony GV-HD700/1 | Operating Guide - Page 51
Printing recorded images (PictBridge compliant printer) You can print out pictures using a PictBridge compliant printer without connecting the VCR to the selected picture is protected. z Tips • To delete images from the index screen, press VOLUME/MEMORY (-/+) to move the B mark to the image you want - Sony GV-HD700/1 | Operating Guide - Page 52
can guarantee the operation of only models that are PictBridge compatible. • Refer also to the operating instructions for the printer to be used. • Do not attempt the following operations when the printer is connected ( is on the screen). The operations may not be performed properly. - Set the POWER - Sony GV-HD700/1 | Operating Guide - Page 53
be trimmed widely. • Some printer models may not support the date/ time printing function. Refer to your printer's operating instructions for details. • We cannot guarantee the printing of images recorded with a device other than the VCR. z Tips • PictBridge is an industry standard established by - Sony GV-HD700/1 | Operating Guide - Page 54
your VCR Using the menu items You can change various settings or make detailed adjustments using the menu items displayed on the screen. POWER switch V/v/B/b/EXEC MENU 4 Select the desired item using V/v, then press EXEC. 1 Set the POWER switch to ON. 2 Press MENU to display the menu screen - Sony GV-HD700/1 | Operating Guide - Page 55
List of the menu items Customizing your VCR (IN/OUT REC) menu (p. 56) Items Page HDV/DV SEL 56 DV REC MODE 56 MIX 61 (MEMORY SET) menu (p. 62) Items Page QUALITY 62 ALL ERASE 62 FORMAT 63 FILE NO. 63 NEW FOLDER 63 REC FOLDER 63 PB FOLDER 63 (OTHERS) menu (p. 64) Items - Sony GV-HD700/1 | Operating Guide - Page 56
only the portions recorded in the DV format. During i.LINK connection, inputs/outputs only the DV formatted signals from the HDV/DV (i.LINK) interface. You can also select this when connecting the VCR to a computer, etc. 56 b Notes • Disconnect the i.LINK cable before changing [HDV/DV SEL] setting - Sony GV-HD700/1 | Operating Guide - Page 57
the VCR to a TV compatible with the ID-1 system for playing back the tape, set [TV TYPE] to [16:9]. The TV automatically switches the aspect ratio according to the playback picture. Refer also to the manual supplied with your TV (GV-HD700/1). • The aspect ratio of color bars in the DV format is - Sony GV-HD700/1 | Operating Guide - Page 58
kinds of LCD panel setups in the VCR as LCD profiles. Using these saved screen. The LCD profile settings are saved. • If you select [NEW FILE], profile name is set to [LCD1]-[LCD6]. • If you select an existing LCD profile as a destination, the LCD profile is overwritten. PROFILE NAME You can change - Sony GV-HD700/1 | Operating Guide - Page 59
. WIDE ( ) Sets the aspect ratio to 16:9. 4:3 ( ) Sets the aspect ratio to 4:3. b Notes • You cannot change the aspect ratio of the HDV format picture and the still image displayed on the screen. • When setting [DV WIDE DISP] to [WIDE] or [4:3] while displaying the color bar, the aspect - Sony GV-HD700/1 | Operating Guide - Page 60
You can select the aspect ratio of color bars in the DV format. B 16:9 Sets the aspect ratio of color bars to 16:9. 4:3 Sets the aspect ratio of color bars to 4:3. b Notes • You cannot change the current setting during recording. DATA CODE During playback, you can display the information (data code - Sony GV-HD700/1 | Operating Guide - Page 61
When recording in the HDV format, sound is automatically recorded in [16BIT] mode. MULTI-SOUND You can select whether to play back audio recorded record a dual sound track cassette on the VCR. DV AUDIO MIX You can monitor the sound recorded on the tape with audio dubbing or 4ch microphone recording - Sony GV-HD700/1 | Operating Guide - Page 62
HDV format: 1.2M - When capturing from a movie in the DV format (16:9): 0.2M - When capturing from a movie in the DV format (4:3): VGA (0.3M) b Notes • All numbers measured when using a "Memory Stick Duo" media made by Sony Corporation. The number of still images may vary depending on the recording - Sony GV-HD700/1 | Operating Guide - Page 63
of 9,999 still images are stored), a new folder is automatically created. b Notes • You cannot delete the created folders using the VCR. You will have to format the "Memory Stick Duo" media (p. 63), or delete them using your computer. • The number of recordable still images on a "Memory Stick Duo - Sony GV-HD700/1 | Operating Guide - Page 64
the screen. See page 19. z Tips • The VCR offers . ON Always displays the remaining tape indicator. BEEP B ON A VCR with the supplied Remote Commander or the one supplied by other Sony products. B VTR2 You can operate the VCR with the supplied Remote Commander or the one supplied by other Sony - Sony GV-HD700/1 | Operating Guide - Page 65
a computer with a USB cable and copy still images on the "Memory Stick Duo" media to the computer (p. 47). You can also connect the VCR to a PictBridge compatible printer (p. 51) using this function. B Memory Stick Select to view still images on a "Memory Stick Duo" media on the computer or to copy - Sony GV-HD700/1 | Operating Guide - Page 66
troubleshoot the problem. If the problem persists, disconnect the power source and contact your Sony dealer. • Overall operations/Remote Commander 66 • Batteries/Power sources 66 • LCD screen 67 • Cassette tapes/"Memory Stick Duo" media 67 • Playback 68 • Recording the VCR correctly (p. 13). - Sony GV-HD700/1 | Operating Guide - Page 67
that the battery pack cannot be charged. • Attach the battery pack to the VCR correctly (p. 13). If the problem persists, disconnect the AC Adaptor from the wall outlet (wall socket) and contact your Sony dealer. The battery pack may be damaged. The remaining battery time indicator does not - Sony GV-HD700/1 | Operating Guide - Page 68
(p. 81). • Still images recorded by other devices may not be played back in actual size or displayed correctly. This is not a malfunction. The data file name is displayed incorrectly, or flashing. • The file is damaged. • The file format is not supported on the VCR (p. 80). Horizontal lines appear - Sony GV-HD700/1 | Operating Guide - Page 69
is displayed on the screen (GV- HD700E/1). • The tape was recorded in a TV color system other than that of the VCR (PAL) (p. 78). This is not a malfunction. Date search does not work correctly. • Make sure to record more than 2 minutes after the date changed. If one day's recording is too short - Sony GV-HD700/1 | Operating Guide - Page 70
the TV, if an i.LINK jack of the TV is not compatible with the HDV1080i specification (p. 24). Refer to the instruction manual supplied with your TV. • Down convert the pictures recorded in the HDV format and play back in the DV format (SD image quality) (p. 57). • Play back pictures using another - Sony GV-HD700/1 | Operating Guide - Page 71
to the instruction manual supplied with the connected device. • Set [i.LINK CONV] to [ON] (p. 57) and dub pictures in the SD (standard definition) image quality. You cannot add sound to the recorded tape. • You cannot add sound to the recorded tape on the VCR. You cannot dub pictures correctly using - Sony GV-HD700/1 | Operating Guide - Page 72
Troubleshooting (Continued) Your computer freezes. • Set [HDV/DV SEL] correctly according to the connected device (p. 56). • Disconnect the cable from your computer and VCR. Reboot your computer, then connect your computer and VCR following the steps in the correct order (p. 49). 72 - Sony GV-HD700/1 | Operating Guide - Page 73
Troubleshooting Self-diagnosis display/Warning indicators If indicators appear on the LCD screen, check the following. You can fix some symptoms by yourself. If the problem persists even after you have tried a couple of times, contact your Sony dealer or local authorized Sony service facility - Sony GV-HD700/1 | Operating Guide - Page 74
(p. 64). Description of warning messages If messages appear on the screen, follow the instructions. x Moisture condensation %Z Moisture condensation. Eject the cassette (p. 84) % Moisture condensation. Turn off for 1H. (p. 84) x Cassette/Tape Z Reinsert the cassette. (p. 19) • Check if the cassette - Sony GV-HD700/1 | Operating Guide - Page 75
and reconnect it. x Others Change to correct tape format. • The pictures cannot be played back because of an incompatible format. No signal display in "HDV/DV SEL". Change setting. • Stop playback or signal input, or change [HDV/DV SEL] setting (p. 56). x Dirty video head. Use a cleaning cassette - Sony GV-HD700/1 | Operating Guide - Page 76
in any country/region using the AC Adaptor supplied with the VCR within the AC 100 V to 240 V, 50/60 Hz range. Use a commercially available AC plug adaptor [a], if necessary, depending on the design of the wall - Sony GV-HD700/1 | Operating Guide - Page 77
Oceania Countries/regions Australia New Zealand North America Countries/regions Canada USA Central America Countries/regions Bahamas Costa Rica Cuba Dominican (rep) El Salvador Guatemala Honduras Jamaica Mexico Nicaragua Panama - Sony GV-HD700/1 | Operating Guide - Page 78
color systems GV-HD700/1: Your VCR is NTSC system, so its picture can only be viewed on an NTSC system TV with an AUDIO/VIDEO input jack. GV-HD700E/1: Your VCR is PAL system, so its picture can only be viewed on a PAL system TV with an AUDIO/VIDEO input jack. System NTSC PAL PAL - M PAL - N SECAM - Sony GV-HD700/1 | Operating Guide - Page 79
compatible with the Cassette Memory function. What is the HDV format? The HDV format is a video format developed to record and play back digital high definition (HD) video signals on a DV cassette. Your VCR adopts the Interlace mode with 1,080 effective scan lines of screen ruling (1080i, number - Sony GV-HD700/1 | Operating Guide - Page 80
80 • Still image format: Your VCR compresses and records image data in the JPEG (Joint Photographic Experts Group) format. The file extension is ".JPG." • A "Memory Stick Duo" media formatted by a computer (Windows OS/Mac OS) does not have guaranteed compatibility with your VCR. • Data read/write - Sony GV-HD700/1 | Operating Guide - Page 81
inserted facing in the correct direction, then insert it PRO Duo" media • The maximum memory capacity of a "Memory Stick PRO Duo" media that can be used on your VCR compatibility • Image data files recorded on a "Memory Stick Duo" media by your VCR format it with your VCR (p. 63). Note that formatting - Sony GV-HD700/1 | Operating Guide - Page 82
i.LINK The HDV/DV (i.LINK) interface on this unit is an i.LINK-compliant interface. This section describes the i.LINK standard and its features. What is i.LINK? i.LINK is a digital serial interface for transferring digital video, digital audio, and other data to other i.LINK-compatible devices. You - Sony GV-HD700/1 | Operating Guide - Page 83
also be connected to other i.LINK-compatible devices made by Sony (for example, a VAIO series personal computer) as well as to video devices. Some i.LINK compatible video devices, such as Digital Televisions, DVD, MICROMV or HDV recorders/players are not compatible with this unit. Before connecting - Sony GV-HD700/1 | Operating Guide - Page 84
record properly. - Near AM receivers and video equipment. Noise may occur. - On a sandy beach or anywhere dusty. If sand or dust gets in your VCR, it may malfunction. Sometimes this malfunction cannot be repaired. - Near windows or outdoors, where the LCD screen authorized Sony service facility. - Sony GV-HD700/1 | Operating Guide - Page 85
in the HDV format, the image and sound may freeze for a while (about 0.5 seconds). This occurs if the HDV signals cannot be recorded or played back correctly because of dirt on the tape or video head. Depending on the cassette, this fairly infrequently occurs even if the cassette is brand new or is - Sony GV-HD700/1 | Operating Guide - Page 86
2), 16 bits (Fs 48 kHz, stereo) Video signal GV-HD700/1: NTSC color, EIA standards 1080/60i specification GV-HD700E/1: PAL color, CCIR standards 1080/50i specification Usable cassette Mini DV cassette with the mark printed Tape speed GV-HD700/1: HDV Approx. 18.812 mm/s DV SP Approx - Sony GV-HD700/1 | Operating Guide - Page 87
). Files in this format can have additional information such as your VCR's setting information at the time of recording. Input/Output connectors S VIDEO IN jack GV-HD700/1: 4-pin mini DIN Luminance signal: 1 Vp-p, 75 Ω (ohms) Chrominance signal: 0.286 Vp-p, 75 Ω (ohms) GV-HD700E/1: 4-pin mini DIN - Sony GV-HD700/1 | Operating Guide - Page 88
1.2 kg (2 lb 9 oz) Mass in use (approx.) 1.3 kg (2 lb 13 oz) including a tape (DVM80RM3), a battery pack (NPF570) and the "Memory Stick Duo" media (128MB). Supplied accessories See page to 40 °C (32 °F to 104 °F) Type Lithium ion Design and specifications are subject to change without notice. 88 - Sony GV-HD700/1 | Operating Guide - Page 89
Corporation. • i.LINK and are trademarks of Sony Corporation. • is a trademark. • Microsoft, Windows, Windows Media, and Windows Vista are trademarks or registered trademarks of U.S. Microsoft Corporation in the U.S. and other countries. • Macintosh and Mac OS are trademarks of Apple Inc - Sony GV-HD700/1 | Operating Guide - Page 90
settings including the clock setting (except the LCD profile settings) return to the default. D EJECT lever (19) E Cassette compartment (19) F Cassette compartment lid (19) G LCD screen (18) H Stereo speakers (21) I Remote sensor (93) J POWER/CHARGE lamp (15, 18) 90 - Sony GV-HD700/1 | Operating Guide - Page 91
pack (13) E i (headphones) jack Use a headphone with a stereo miniplug. When you use headphones, the speaker on the VCR is silent. F (USB) jack (47, 51) G DC IN jack (13) H Jack cover (24, 29, 39) I HDV/DV (i.LINK) interface (24, 29, 39) J HDMI OUT jack (24) K COMPONENT OUT jack (24) L A/V OUT jack - Sony GV-HD700/1 | Operating Guide - Page 92
* (21, 46) G LCD BRIGHT buttons (21) H POWER switch (18) I EXEC button (54) J V/v/B/b buttons (54) K STATUS CHECK button (35) L MENU button (54) M Video control buttons (PLAY N*, REW m, FF M, PAUSE X, STOP x, SLOW y, REC) (21, 31) * Each of the PLAY N button, VOLUME/ MEMORY (+) button and ASSIGN2 - Sony GV-HD700/1 | Operating Guide - Page 93
VCR with the supplied Remote Commander, the other VCR may malfunction. In this case, change the commander code to other than VTR2 on the other VCR or cover the sensor of the other VCR with black paper. To change J Power Zoom (37) K . > (33, 34) L Video control buttons (REW, PLAY, FF, c I, STOP, i C, - Sony GV-HD700/1 | Operating Guide - Page 94
indicators will not be recorded on the tape during recording. Recording movies Recording still images Viewing movies A Recording format ( or ) (56) Recording mode (SP or LP) is also displayed in the DV format. B Recording status ([STBY] (standby) or [z] (recording)) C Time code (hour: minute - Sony GV-HD700/1 | Operating Guide - Page 95
Indicators when you made changes Upper left Upper right Bottom Upper left Indicator SP LP Upper right Indicator Center Indicator Z Center Meaning Recording format (56) DV REC MODE (56)* Meaning QUALITY (62) INDEX MARK (38) HDV input/ DV input (31) HDV output/ DV output (42) i.LINK connection (24 - Sony GV-HD700/1 | Operating Guide - Page 96
video cable 25, 27 Computer 43, 47 Connection DVD/HDD recorder ..... 39 High definition TV ....... 24 Printer 51 VCR 29 FORMAT 63, 80 Frame-by-frame playback.... 22 H HD (high definition) image quality 11, 79 HDMI cable 25 HDMI OUT jack 24 HDV 11, 56, 79 HDV1080i 56 HDV/DV SEL 56 HDV - Sony GV-HD700/1 | Operating Guide - Page 97
MPEG2 79 MULTI-SOUND 61 N NEW FOLDER 63 NTSC 78 O Operatioin confirmation beep See BEEP OTHERS 64 P PAL 78 PB FOLDER 63 PB zoom Recording 29 Remaining battery 16 REMAINING (tape 64 Remote Commander 93 REMOTE CTRL 64 RESET button 90 Reversal playback 22 S S VIDEO cable 30, 43 S VIDEO - Sony GV-HD700/1 | Operating Guide - Page 98
Spanish Quick Guide/Guía rápida en español Paso 1: Comprobación de los artículos Adaptador de ca (1) Cable USB (1) Batería recargable NP-F570 (1) Cable de alimentación (1) Manual de instrucciones (este manual) (1) Mando a distancia inalámbrico (1) Pila de tamaño R6 (AA) para el mando - Sony GV-HD700/1 | Operating Guide - Page 99
de la serie "InfoLITHIUM" L (en la versión suministrada) o de la serie M (opcional) en la videograbadora y cárguela. Para ver los tipos de baterías compatibles con la videograbadora, consulte la página 102. 1 Para conectar la batería, sujétela de la parte central (1) y deslícela en la dirección que - Sony GV-HD700/1 | Operating Guide - Page 100
Paso 2: Preparación del suministro eléctrico (continuación) Asegúrese de que la batería encaja perfectamente y de que queda firmemente sujeta a la videograbadora. 2 Desplace la palanca OPEN. y abra el panel LCD. 4 Conecte el adaptador de ca a la toma DC IN en la videograbadora. Asegúrese de que la - Sony GV-HD700/1 | Operating Guide - Page 101
batería Ajuste el interruptor POWER en OFF (CHG). Mantenga pulsado el botón vBATT RELEASE y extraiga la batería. Serie L: Botón vBATT RELEASE Spanish Quick Guide/Guía rápida en español Cable de alimentación Adaptador de ca A la toma de corriente mural El indicador POWER/CHARGE se apaga cuando - Sony GV-HD700/1 | Operating Guide - Page 102
Paso 2: Preparación del suministro eléctrico (continuación) Asegúrese de que la batería encaja perfectamente y de que queda firmemente sujeta a la videograbadora. Extracción: Botón vBATT RELEASE Almacenamiento de la batería Antes de guardar la batería durante un período prolongado de tiempo, descá - Sony GV-HD700/1 | Operating Guide - Page 103
GV-HD700/1) Batería Panel LCD Panel LCD abierto cerrado NP-FM50 80 130 NP-QM71D 205 315 NP-QM91D 315 475 NP-F570 (suministrada) 160 245 NP-F770 335 510 NP-F970 500 760 Imágenes en formato HDV (GV-HD700E toma de corriente mural. Spanish Quick Guide/Guía rápida en español - Sony GV-HD700/1 | Operating Guide - Page 104
Paso 2: Preparación del suministro eléctrico (continuación) • Tenga cuidado de no provocar un cortocircuito en la clavija DC del adaptador de ca ni en el terminal de la batería con algún objeto metálico. Podría producir una avería. • Incluso con la videograbadora apagada, ésta seguirá recibiendo - Sony GV-HD700/1 | Operating Guide - Page 105
Interruptor POWER GV-HD700E/1: Indicador POWER/ CHARGE 3 Defina el valor de [A] (año) con V/ v y, a continuación, pulse EXEC. Puede seleccionar cualquier año hasta 2079. GV-HD700/1: EXEC V/v LANGUAGE], a continuación, seleccione el idioma deseado. 105 Spanish Quick Guide/Guía rápida en español - Sony GV-HD700/1 | Operating Guide - Page 106
Paso 4: Procedimiento para insertar un videocasete o un "Memory Stick Duo" Cinta de videocasete Este equipo sólo admite videocasetes de formato mini DV . 1 Deslice la palanca EJECT en la dirección que indica la flecha. 3 Para cerrar el compartimiento del videocasete, presione el indicador ( - Sony GV-HD700/1 | Operating Guide - Page 107
ni la apague, extraiga el "Memory Stick Duo" ni la batería. Si lo hace, los datos de imágenes pueden resultar dañados. Spanish Quick Guide/Guía rápida en español 107 - Sony GV-HD700/1 | Operating Guide - Page 108
o DV, la imagen y el sonido se interrumpen temporalmente mientras la señal alterna entre HDV y DV. • Las cintas grabadas en formato HDV no se pueden reproducir con una videocámara que sólo sea compatible con el formato DV ni con un reproductor de mini DV. z Sugerencias • El brillo de la pantalla LCD - Sony GV-HD700/1 | Operating Guide - Page 109
la reproducción de imágenes grabadas en formato HDV tenga en cuenta que: - Las imágenes grabadas en formato HDV no se emiten a través de la interfaz HDV/DV (i.LINK) durante la pausa en la án disponibles a través del mando a distancia. Spanish Quick Guide/Guía rápida en español Continúa , 109 - Sony GV-HD700/1 | Operating Guide - Page 110
ningún sonido y es posible que la imagen se quede estática en forma de mosaico. • Durante la reproducción de imágenes grabadas en formato HDV tenga en cuenta que: - Ni la reproducción a cámara lenta en modo de reproducción inversa ni la reproducción de fotograma a fotograma son posibles. - Las im - Sony GV-HD700/1 | Operating Guide - Page 111
- Sony GV-HD700/1 | Operating Guide - Page 112
GB Additional information on this product and answers to frequently asked questions can be found at our Customer Support Website. Printed on 70% or more recycled paper using VOC (Volatile Organic Compound)free vegetable oil based ink. Printed in Japan
-
 1
1 -
 2
2 -
 3
3 -
 4
4 -
 5
5 -
 6
6 -
 7
7 -
8
-
9
-
10
-
11
-
12
-
13
-
14
-
15
-
16
-
17
-
18
-
19
-
20
-
21
-
22
-
23
-
24
-
25
-
26
-
27
-
28
-
29
-
30
-
31
-
32
-
33
-
34
-
35
-
36
-
37
-
38
-
39
-
40
-
41
-
42
-
43
-
44
-
45
-
46
-
47
-
48
-
49
-
50
-
51
-
52
-
53
-
54
-
55
-
56
-
57
-
58
-
59
-
60
-
61
-
62
-
63
-
64
-
65
-
66
-
67
-
68
-
69
-
70
-
71
-
72
-
73
-
74
-
75
-
76
-
77
-
78
-
79
-
80
-
81
-
82
-
83
-
84
-
85
-
86
-
87
-
88
-
89
-
90
-
91
-
92
-
93
-
94
-
95
-
96
-
97
-
98
-
99
-
100
-
101
-
102
-
103
-
104
-
105
-
106
-
107
-
108
-
109
-
110
-
111
-
112
 |
 |

4-152-362-
11
(1)
© 2009 Sony Corporation
Digital HD Videocassette Recorder
Operating Guide
GV-HD700/1
GV-HD700E/1
Getting Started
12
Basic Operations
21
Dubbing/Editing
39
Using a “Memory Stick
Duo” media
45
Customizing your VCR
54
Troubleshooting
66
Additional Information
76
Quick Reference
90
Spanish Quick Guide/
Guía rápida en español
98