Sony GV-HD700/1 Operating Guide - Page 31
Recording the picture on your, Press PAUSE
 |
View all Sony GV-HD700/1 manuals
Add to My Manuals
Save this manual to your list of manuals |
Page 31 highlights
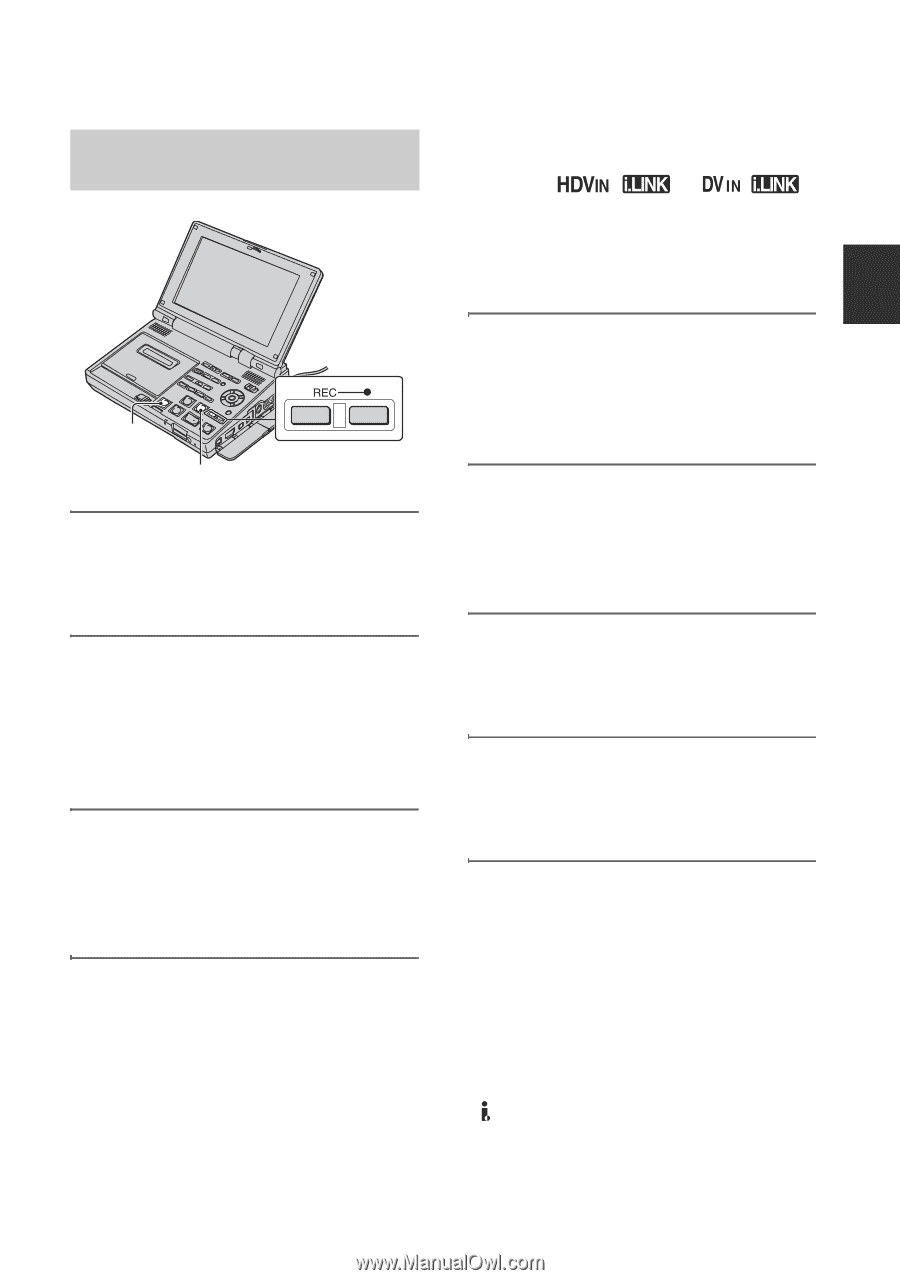
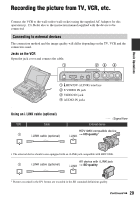
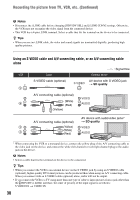
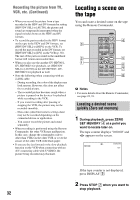
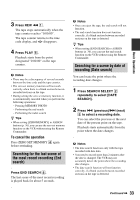
Recording the picture on your VCR STOP x PAUSE X 1 Prepare the VCR for recording. Insert a cassette tape for recording. Set the POWER switch to ON. 2 When connecting with an i.LINK cable, set the input signal to the VCR (p. 56). Normally set [HDV/DV SEL] to [AUTO] (the default setting). 3 Connect the VCR to the playback device or TV. For details about connection, see page 29. 4 Prepare the playback device or TV. Turn on the playback device or TV. When recording the picture from the other VCR, insert a cassette tape for playback. When you connect to the TV, pictures from the TV is displayed on the screen of the VCR. When you connect to devices with an i.LINK cable, the format of the input signal ( or ) will be indicated on the screen of the VCR (this indicator may appear on the screen of the playback device, however, it will not be recorded). 5 Press two REC buttons simultaneously, then immediately press PAUSE X on the VCR. The recording is paused. 6 When recording the picture from the other VCR, start playback. The picture from the playback device is displayed on the screen of the VCR. 7 Press PAUSE X at the desired scene on the VCR, then start recording. 8 Press STOP x to finish recording on the VCR, and stop playback on the playback device. Using the Remote Commander In step 5, press two REC buttons simultaneously then immediately press PAUSE X. And in step 7, press X at the point where you want to start recording from. b Notes • You cannot record TV programs from the HDV/DV (i.LINK) interface. • You can record pictures from DV devices only in the DV format. Continued , 31 Basic Operations
-
 1
1 -
2
-
3
-
4
-
5
-
6
-
7
-
8
-
9
-
10
-
11
-
12
-
13
-
14
-
15
-
16
-
17
-
18
-
19
-
20
-
21
-
22
-
23
-
24
-
25
-
 26
26 -
 27
27 -
 28
28 -
 29
29 -
 30
30 -
 31
31 -
 32
32 -
 33
33 -
 34
34 -
 35
35 -
 36
36 -
37
-
38
-
39
-
40
-
41
-
42
-
43
-
44
-
45
-
46
-
47
-
48
-
49
-
50
-
51
-
52
-
53
-
54
-
55
-
56
-
57
-
58
-
59
-
60
-
61
-
62
-
63
-
64
-
65
-
66
-
67
-
68
-
69
-
70
-
71
-
72
-
73
-
74
-
75
-
76
-
77
-
78
-
79
-
80
-
81
-
82
-
83
-
84
-
85
-
86
-
87
-
88
-
89
-
90
-
91
-
92
-
93
-
94
-
95
-
96
-
97
-
98
-
99
-
100
-
101
-
102
-
103
-
104
-
105
-
106
-
107
-
108
-
109
-
110
-
111
-
112
 |
 |