Sony GV-HD700/1 Operating Guide - Page 35
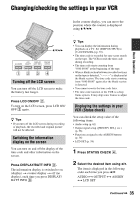
Changing/checking the settings in your VCR, Turning off the LCD screen
 |
View all Sony GV-HD700/1 manuals
Add to My Manuals
Save this manual to your list of manuals |
Page 35 highlights
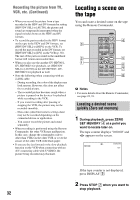
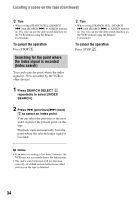
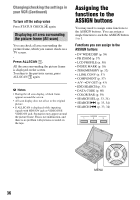
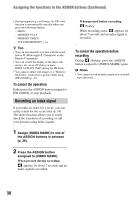
Changing/checking the settings in your VCR In the counter display, you can move the position where the counter is displayed using V/v/B/b. Basic Operations V/v/B/b Turning off the LCD screen You can turn off the LCD screen to make the battery last longer. Press LCD ON/OFF 2. To turn on the LCD screen, press LCD ON/ OFF 2 again. z Tips • If you turn off the LCD screen during recording or playback, the recorded and original picture will not be affected. Switching the information display on the screen You can turn on and off the display of the time code and other information on the screen. Press DISPLAY/BATT INFO 3. The information display is switched to on (display) t counter display t off (no display), each time you press DISPLAY/ BATT INFO 3. z Tips • You can display the information during playback on a TV. Set [DISP OUTPUT] to [V-OUT/PANEL] (p. 59). • The time code is recorded for easy scene search on the tape. The VCR records the time code during recording. • The time code starts counting from "0:00:00:00" at the beginning of the tape. • When a blank section between recorded sections on the tape is detected is displayed at the blank section. The time code starts counting from "0:00:00:00" again after the blank section is detected. • You cannot rewrite the time code later. • The time code function of the VCR is a drop frame system. It may skip some frames to adjust the time code. Displaying the settings in your VCR (Status check) You can check the setup value of the following items. • Audio setup (p. 61) • Output signal setup ([HDV/DV SEL], etc.) (p. 56) • Functions assigned to the ASSIGN buttons (p. 36) • LCD SET (p. 58) 1 Press STATUS CHECK 4. 2 Select the desired item using V/v. The item is displayed in the following order each time you press V/v: AUDIO y OUTPUT y ASSIGN y LCD SET Continued , 35
-
 1
1 -
2
-
3
-
4
-
5
-
6
-
7
-
8
-
9
-
10
-
11
-
12
-
13
-
14
-
15
-
16
-
17
-
18
-
19
-
20
-
21
-
22
-
23
-
24
-
25
-
26
-
27
-
28
-
29
-
 30
30 -
 31
31 -
 32
32 -
 33
33 -
 34
34 -
 35
35 -
 36
36 -
 37
37 -
 38
38 -
 39
39 -
 40
40 -
41
-
42
-
43
-
44
-
45
-
46
-
47
-
48
-
49
-
50
-
51
-
52
-
53
-
54
-
55
-
56
-
57
-
58
-
59
-
60
-
61
-
62
-
63
-
64
-
65
-
66
-
67
-
68
-
69
-
70
-
71
-
72
-
73
-
74
-
75
-
76
-
77
-
78
-
79
-
80
-
81
-
82
-
83
-
84
-
85
-
86
-
87
-
88
-
89
-
90
-
91
-
92
-
93
-
94
-
95
-
96
-
97
-
98
-
99
-
100
-
101
-
102
-
103
-
104
-
105
-
106
-
107
-
108
-
109
-
110
-
111
-
112
 |
 |
