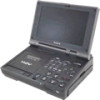
Sony GV-HD700/1 Operating Guide - Page 9

Table of Contents, Getting Started, Basic Operations, Dubbing/Editing, Using a Memory Stick Duo - hdv video

Page 9 highlights

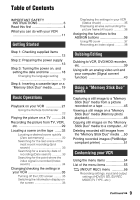
Table of Contents IMPORTANT SAFETY INSTRUCTIONS 3 Read this first 4 What you can do with your VCR 11 Getting Started Step 1: Checking supplied items 12 Step 2: Preparing the power supply 13 Step 3: Turning the power on, and setting the date and time 18 Changing the language setting 19 Step 4: Inserting a cassette tape or a "Memory Stick Duo" media .......... 19 Basic Operations Playback on your VCR 21 Using the Remote Commander 22 Playing the picture on a TV .......... 24 Recording the picture from TV, VCR, etc 29 Locating a scene on the tape ....... 32 Locating a desired scene quickly (Zero set memory 32 Searching for the last scene of the most recent recording (End search 33 Searching for a scene by date of recording (Date search 33 Searching for the point where the index signal is recorded (Index search 34 Changing/checking the settings in your VCR 35 Turning off the LCD screen ......... 35 Switching the information display on the screen 35 Displaying the settings in your VCR (Status check 35 Displaying all area surrounding the picture frame (All scan 36 Assigning the functions to the ASSIGN buttons 36 Using PB zoom 37 Recording an index signal .......... 38 Dubbing/Editing Dubbing to VCR, DVD/HDD recorder, etc 39 Using with an analog video unit and your computer (Signal convert function 43 Using a "Memory Stick Duo" media Capturing a still image to a "Memory Stick Duo" media from a picture recorded on a tape 45 Viewing a still image on a "Memory Stick Duo" media (Memory photo playback 46 Copying still images on the "Memory Stick Duo" media to a computer...47 Deleting recorded still images from the "Memory Stick Duo" media ...50 Printing recorded images (PictBridge compliant printer 51 Customizing your VCR Using the menu items 54 List of the menu items 55 (IN/OUT REC) menu 56 Recording settings, input and output settings (HDV/DV SEL/DV REC MODE/TV TYPE, etc.) Continued , 9

  • 1
  • 2
  • 3
  • 4
  • 5
  • 6
  • 7
  • 8
  • 9
  • 10
  • 11
  • 12
  • 13
  • 14
  • 15
  • 16
  • 17
  • 18
  • 19
  • 20
  • 21
  • 22
  • 23
  • 24
  • 25
  • 26
  • 27
  • 28
  • 29
  • 30
  • 31
  • 32
  • 33
  • 34
  • 35
  • 36
  • 37
  • 38
  • 39
  • 40
  • 41
  • 42
  • 43
  • 44
  • 45
  • 46
  • 47
  • 48
  • 49
  • 50
  • 51
  • 52
  • 53
  • 54
  • 55
  • 56
  • 57
  • 58
  • 59
  • 60
  • 61
  • 62
  • 63
  • 64
  • 65
  • 66
  • 67
  • 68
  • 69
  • 70
  • 71
  • 72
  • 73
  • 74
  • 75
  • 76
  • 77
  • 78
  • 79
  • 80
  • 81
  • 82
  • 83
  • 84
  • 85
  • 86
  • 87
  • 88
  • 89
  • 90
  • 91
  • 92
  • 93
  • 94
  • 95
  • 96
  • 97
  • 98
  • 99
  • 100
  • 101
  • 102
  • 103
  • 104
  • 105
  • 106
  • 107
  • 108
  • 109
  • 110
  • 111
  • 112

9
Table of Contents
IMPORTANT SAFETY
INSTRUCTIONS
...........................
3
Read this first
..................................
4
What you can do with your VCR
.....................................................
11
Step 1: Checking supplied items
.....................................................
12
Step 2: Preparing the power supply
.....................................................
13
Step 3: Turning the power on, and
setting the date and time
............
18
Changing the language setting
...................................................
19
Step 4: Inserting a cassette tape or a
“Memory Stick Duo” media
..........
19
Playback on your VCR
.................
21
Using the Remote Commander
...................................................
22
Playing the picture on a TV
..........
24
Recording the picture from TV, VCR,
etc.
..............................................
29
Locating a scene on the tape
.......
32
Locating a desired scene quickly
(Zero set memory)
....................
32
Searching for the last scene of the
most recent recording (End
search)
.....................................
33
Searching for a scene by date of
recording (Date search)
...........
33
Searching for the point where the
index signal is recorded (Index
search)
.....................................
34
Changing/checking the settings in
your VCR
....................................
35
Turning off the LCD screen
.........
35
Switching the information display on
the screen
.................................
35
Displaying the settings in your VCR
(Status check)
...........................
35
Displaying all area surrounding the
picture frame (All scan)
............
36
Assigning the functions to the
ASSIGN buttons
..........................
36
Using PB zoom
...........................
37
Recording an index signal
..........
38
Dubbing to VCR, DVD/HDD recorder,
etc.
..............................................
39
Using with an analog video unit and
your computer (Signal convert
function)
......................................
43
Capturing a still image to a “Memory
Stick Duo” media from a picture
recorded on a tape
......................
45
Viewing a still image on a “Memory
Stick Duo” media (Memory photo
playback)
......................................
46
Copying still images on the “Memory
Stick Duo” media to a computer...47
Deleting recorded still images from
the “Memory Stick Duo” media ...50
Printing recorded images (PictBridge
compliant printer)
........................
51
Using the menu items
...................
54
List of the menu items
...................
55
(IN/OUT REC) menu
.............
56
Recording settings, input and output
settings (HDV/DV SEL/DV REC
MODE/TV TYPE, etc.)
Getting Started
Basic Operations
Dubbing/Editing
Using a “Memory Stick Duo”
media
Customizing your VCR
Continued
,