Sony GV-HD700/1 Operating Guide - Page 21

Basic Operations, Playback on your VCR, To stop playback - hdv vcr player w 7 screen
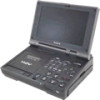
Page 21 highlights

Basic Operations Playback on your VCR You can play back movies as follows. 5 6 3 2 1 POWER switch Video control buttons Basic Operations POWER/CHARGE lamp 4 1 Prepare the power supply (p. 13). 2 Insert a cassette tape for playback (p. 19). 3 While pressing the green button, set the POWER switch to ON. The POWER/CHARGE lamp on the front turns on green. 4 Press PLAY N. Playback starts. 5 Adjust the sound volume using VOLUME/MEMORY (-/+). 6 Adjust the brightness of the LCD screen using LCD BRIGHT (-/+). b Notes • When you play back a tape recorded in the HDV and DV formats, the picture and sound are temporarily interrupted when the signal switches between the HDV and DV formats. • The tape recorded in the HDV format cannot be played back on a video camera only compatible with the DV format or a mini-DV player. z Tips • Indicators displayed on the screen during playback are shown on page 35, 94. • You can also adjust the brightness of the LCD screen by setting (DISPLAY SET) t [LCD SET] t [BRIGHTNESS] (p. 58). • If you adjust the brightness of the LCD screen during recording or playback, the recorded and original picture will not be affected. • To play back the tape recorded on the other VCR using an external monaural microphone connected, see [MULTI-SOUND] (p. 61). • When using headphones (optional), connect headphones to the i (headphones) jack (p. 91). To stop playback Press STOP x. Continued , 21

  • 1
  • 2
  • 3
  • 4
  • 5
  • 6
  • 7
  • 8
  • 9
  • 10
  • 11
  • 12
  • 13
  • 14
  • 15
  • 16
  • 17
  • 18
  • 19
  • 20
  • 21
  • 22
  • 23
  • 24
  • 25
  • 26
  • 27
  • 28
  • 29
  • 30
  • 31
  • 32
  • 33
  • 34
  • 35
  • 36
  • 37
  • 38
  • 39
  • 40
  • 41
  • 42
  • 43
  • 44
  • 45
  • 46
  • 47
  • 48
  • 49
  • 50
  • 51
  • 52
  • 53
  • 54
  • 55
  • 56
  • 57
  • 58
  • 59
  • 60
  • 61
  • 62
  • 63
  • 64
  • 65
  • 66
  • 67
  • 68
  • 69
  • 70
  • 71
  • 72
  • 73
  • 74
  • 75
  • 76
  • 77
  • 78
  • 79
  • 80
  • 81
  • 82
  • 83
  • 84
  • 85
  • 86
  • 87
  • 88
  • 89
  • 90
  • 91
  • 92
  • 93
  • 94
  • 95
  • 96
  • 97
  • 98
  • 99
  • 100
  • 101
  • 102
  • 103
  • 104
  • 105
  • 106
  • 107
  • 108
  • 109
  • 110
  • 111
  • 112

21
Basic Operations
Basic Operations
Playback on your VCR
You can play back movies as follows.
1
Prepare the power supply (p. 13).
2
Insert a cassette tape for
playback (p. 19).
3
While pressing the green button,
set the POWER switch to ON.
The POWER/CHARGE lamp on the
front turns on green.
4
Press PLAY
N
.
Playback starts.
5
Adjust the sound volume using
VOLUME/MEMORY (–/+).
6
Adjust the brightness of the LCD
screen using LCD BRIGHT (–/+).
b
Notes
When you play back a tape recorded in the HDV
and DV formats, the picture and sound are
temporarily interrupted when the signal
switches between the HDV and DV formats.
The tape recorded in the HDV format cannot be
played back on a video camera only compatible
with the DV format or a mini-DV player.
z
Tips
Indicators displayed on the screen during
playback are shown on page 35, 94.
You can also adjust the brightness of the LCD
screen by setting
(DISPLAY SET)
t
[LCD SET]
t
[BRIGHTNESS] (p. 58).
If you adjust the brightness of the LCD screen
during recording or playback, the recorded and
original picture will not be affected.
To play back the tape recorded on the other
VCR using an external monaural microphone
connected, see [MULTI-SOUND] (p. 61).
When using headphones (optional), connect
headphones to the
i
(headphones) jack (p. 91).
To stop playback
Press STOP
x
.
POWER/CHARGE lamp
Video control buttons
1
2
3
4
POWER switch
6
5
Continued
,