Sony VGX-XL2 User Guide (Computer Component) - Page 129
Restore Windows Only, Finish, Start, More Programs, Manage Discs, Eject - vaio review
 |
View all Sony VGX-XL2 manuals
Add to My Manuals
Save this manual to your list of manuals |
Page 129 highlights
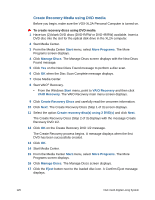
18 Click Yes. Remove the disc from the optical drive slot and label it VGX-XL2A Recovery DVD 1/2. Then confirm that blank DVD disc 2 is loaded. 19 Close Media Center. Note: If Media Center does not close using the mouse, press Alt + F4 on your keyboard. 20 Return to the VAIO® Recovery Create Recovery Discs (Step 2 of 3) screen and click OK on the message. The Create DVD process continues. When complete, the Create Recovery Discs (Step 3 of 3) screen displays infoming you that the final DVD disc was created successfully. 21 Click Finish. 22 Start Media Center. 23 From the Media Center Start menu, select More Programs. The More Programs screen displays. 24 Click Manage Discs. The Manage Discs screen displays. 25 Click the Eject button next to the loaded disc icon. A Confirm Eject message displays. 26 Click Yes. Remove the disc from the optical drive slot and label it VGX-XL2A Recovery DVD 2/2. 27 Close Media Center and store the Recovery DVD Discs in a safe location. Restore Windows Only This is a feature of Microsoft® Windows® operating system for restoring your computer to a previous working configuration from a designated point in time. Before performing any restore or recovery options, go to the Sony online support Web site at www.esupport.sony.com and review your modelspecific support page. Look for software driver updates, or check for knowledge base solutions that may help solve your computer's problems. VGX-XL2A Digital Living System 126
-
 1
1 -
2
-
3
-
4
-
5
-
6
-
7
-
8
-
9
-
10
-
11
-
12
-
13
-
14
-
15
-
16
-
17
-
18
-
19
-
20
-
21
-
22
-
23
-
24
-
25
-
26
-
27
-
28
-
29
-
30
-
31
-
32
-
33
-
34
-
35
-
36
-
37
-
38
-
39
-
40
-
41
-
42
-
43
-
44
-
45
-
46
-
47
-
48
-
49
-
50
-
51
-
52
-
53
-
54
-
55
-
56
-
57
-
58
-
59
-
60
-
61
-
62
-
63
-
64
-
65
-
66
-
67
-
68
-
69
-
70
-
71
-
72
-
73
-
74
-
75
-
76
-
77
-
78
-
79
-
80
-
81
-
82
-
83
-
84
-
85
-
86
-
87
-
88
-
89
-
90
-
91
-
92
-
93
-
94
-
95
-
96
-
97
-
98
-
99
-
100
-
101
-
102
-
103
-
104
-
105
-
106
-
107
-
108
-
109
-
110
-
111
-
112
-
113
-
114
-
115
-
116
-
117
-
118
-
119
-
120
-
121
-
122
-
123
-
 124
124 -
 125
125 -
 126
126 -
 127
127 -
 128
128 -
 129
129 -
 130
130 -
 131
131 -
 132
132 -
 133
133 -
 134
134 -
135
-
136
-
137
-
138
-
139
-
140
-
141
-
142
-
143
-
144
-
145
-
146
-
147
-
148
-
149
-
150
-
151
-
152
-
153
-
154
-
155
-
156
-
157
-
158
-
159
-
160
-
161
-
162
-
163
-
164
-
165
-
166
-
167
-
168
-
169
-
170
-
171
-
172
-
173
-
174
-
175
-
176
-
177
-
178
-
179
-
180
-
181
-
182
 |
 |
