Synology DS720 Synology NAS Users Guide - Based on DSM 7.1 - Page 10
Navigate your DSM desktop, Control Panel, Synology Account
 |
View all Synology DS720 manuals
Add to My Manuals
Save this manual to your list of manuals |
Page 10 highlights
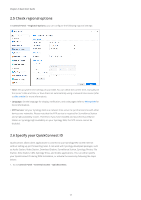
Chapter 2: Quick Start Guide 6. Go to Control Panel > Synology Account, and click Sign in or sign up for a Synology Account. 7. In the pop-up window, enter the credentials of your Synology Account and click Sign In. 8. Now you have successfully registered for a Synology Account and bound your NAS to it. 2.4 Navigate your DSM desktop After installing DSM on your Synology NAS, you can sign in to DSM using the DSM user account you have just added during the first-time installation. Follow the steps below to sign in via a web browser: 1. Make sure your computer and Synology NAS are connected to the same local network. 2. Open a browser on your computer and enter one of the following in the address bar: • find.synology.com: Enter this URL only if your computer and Synology NAS are connected to the same local area network. • IP address of your NAS:5000: If the IP address of your Synology NAS is "192.168.48.14", type "192.168.48.14:5000". The IP address depends on the settings made during the initial setup. 3. Enter your username and click the rightward arrow. 4. Enter your password and click the rightward arrow again to sign in. 07
-
 1
1 -
2
-
3
-
4
-
 5
5 -
 6
6 -
 7
7 -
 8
8 -
 9
9 -
 10
10 -
 11
11 -
 12
12 -
 13
13 -
 14
14 -
 15
15 -
16
-
17
-
18
-
19
-
20
-
21
-
22
-
23
-
24
-
25
-
26
-
27
-
28
-
29
-
30
-
31
-
32
-
33
-
34
-
35
-
36
-
37
-
38
-
39
-
40
-
41
-
42
-
43
-
44
-
45
-
46
-
47
-
48
-
49
-
50
-
51
-
52
-
53
-
54
-
55
-
56
-
57
-
58
-
59
-
60
-
61
-
62
-
63
-
64
-
65
-
66
-
67
-
68
-
69
-
70
-
71
-
72
-
73
-
74
-
75
-
76
-
77
-
78
-
79
-
80
-
81
-
82
-
83
 |
 |
