Synology DS720 Synology NAS Users Guide - Based on DSM 7.1 - Page 56
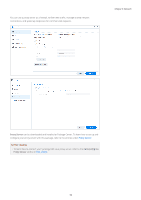
Specify DNS servers
 |
View all Synology DS720 manuals
Add to My Manuals
Save this manual to your list of manuals |
Page 56 highlights
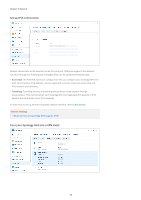
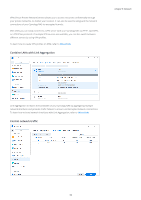
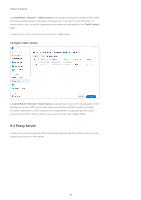
Chapter 9: Network The following introduces some generic network options available in Control Panel > Network > General: • Change the hostname: A hostname is a unique and absolute label for a device on a network and is used to identify the device during network communication. To edit the hostname of your Synology NAS, enter a new name in the Server name field under the General section. • Assign the default gateway: A gateway connects multiple different networks so that the data from your Synology NAS can be transmitted to other networks. The default gateway will be the device used if no alternative routes are specified. To assign the default gateway, click the Edit button beside Default gateway and arrange the priority order of connected gateways. • Specify DNS servers: The Domain Name System (DNS) resolves easy-to-memorize Internet addresses to the numeric addresses that Internet-connected devices use. When your Synology NAS connects to a domain name such as "www.synology.com", its DNS server is responsible for querying the site's IP address "210.61.203.200", allowing your Synology NAS to access the website's information. Under the General section, you can tick Manually configure DNS server and specify a preferred DNS server along with an alternative one. • Connect via a proxy server: A proxy server functions on behalf of client devices to access resources on the Internet. To specify a proxy for your Synology NAS, tick Connect via a proxy server under the Proxy section, enter the Address and Port, and then click Apply. For more information about general network settings, refer to this article. 53
-
 1
1 -
2
-
3
-
4
-
5
-
6
-
7
-
8
-
9
-
10
-
11
-
12
-
13
-
14
-
15
-
16
-
17
-
18
-
19
-
20
-
21
-
22
-
23
-
24
-
25
-
26
-
27
-
28
-
29
-
30
-
31
-
32
-
33
-
34
-
35
-
36
-
37
-
38
-
39
-
40
-
41
-
42
-
43
-
44
-
45
-
46
-
47
-
48
-
49
-
50
-
 51
51 -
 52
52 -
 53
53 -
 54
54 -
 55
55 -
 56
56 -
 57
57 -
 58
58 -
 59
59 -
 60
60 -
 61
61 -
62
-
63
-
64
-
65
-
66
-
67
-
68
-
69
-
70
-
71
-
72
-
73
-
74
-
75
-
76
-
77
-
78
-
79
-
80
-
81
-
82
-
83
 |
 |
