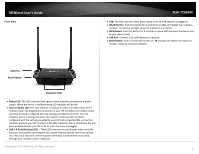
TRENDnet TEW-723BRM Users Guide - Page 11
State, Server, Other, Server2, Interval, Enable your Wireless Network, Wireless Network Name SSID,
 |
View all TRENDnet TEW-723BRM manuals
Add to My Manuals
Save this manual to your list of manuals |
Page 11 highlights
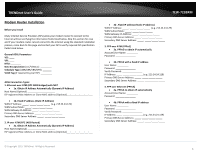
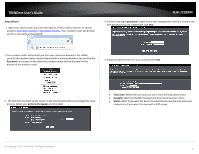
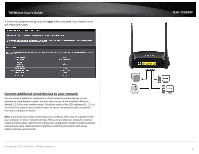
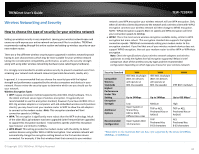
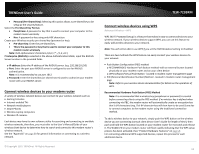
TRENDnet User's Guide TEW-723BRM • State: Enable or Disable the NTP server • Server: Select from the drop-down menu what server to connect to o If Other is selected, input the location of the server in the field below • Server2: Select from the drop-down menu what server to connect to o If Other is selected, input the location of the server in the field below • Interval: Input the length of time (in hours) that the unit will sync with the server. 5. Configure your internet service provider settings. • Enable your Wireless Network: Check the box to turn on your wireless network. • Wireless Network Name (SSID): Enter the name of your wireless network in this field • Visibility Status: Enable clients connecting to the unit to search for it. If Invisible is selected, you would need to manually input the wireless network name (SSID) 6. Configure your wireless network settings and click next. © Copyright 2015 TRENDnet. All Rights Reserved. • Security Level: Select the type of security for your wireless network. Please see the section on Wireless Networking and Security on page 9 for definition on the security modes. • Pre-Shared Key: Input the desired password to secure your wireless network. 8
-
 1
1 -
2
-
3
-
4
-
5
-
 6
6 -
 7
7 -
 8
8 -
 9
9 -
 10
10 -
 11
11 -
 12
12 -
 13
13 -
 14
14 -
 15
15 -
 16
16 -
17
-
18
-
19
-
20
-
21
-
22
-
23
-
24
-
25
-
26
-
27
-
28
-
29
-
30
-
31
-
32
-
33
-
34
-
35
-
36
-
37
-
38
-
39
-
40
-
41
-
42
-
43
-
44
-
45
-
46
-
47
-
48
-
49
-
50
-
51
-
52
-
53
-
54
-
55
-
56
-
57
-
58
-
59
-
60
-
61
 |
 |
