Thermador PRG366EG User Manual - Page 43
Do-It-Yourself Maintenance
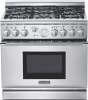 |
View all Thermador PRG366EG manuals
Add to My Manuals
Save this manual to your list of manuals |
Page 43 highlights
SECTION SIX: CARE AND MAINTENANCE Do-It-Yourself Maintenance OVEN LIGHT BULB REPLACEMENT Replace only with a 5-watt, halogen appliance light bulb. DO NOT USE a standard household light bulb in any oven or any bulb over 5 watts. TO REPLACE THE LIGHT BULB: 1. Turn oven light switch to the off position. Let bulb and cover cool completely. 2. Remove the light cover. 3. Remove the burned-out bulb. Replace it with a 5-watt halogen appliance light bulb only. Don't touch bulb with greasy fingers. Follow bulb manufacturer's instructions. 4. Replace cover. Turn circuit back on, if need be. (See Caution.) CAUTION: Before replacing the light bulb, be certain the Oven Light Switch is in the off position. Let bulb and cover cool completely before touching. If the light bulb glass comes loose from the base, turn the power to the oven OFF at the circuit breaker panel, before attempting to remove the bulb base from the socket. POWER FAILURE In the event of a power failure, only the standard burners can be lighted manually. It is necessary to light each standard burner individually. If the range's cooktop is being used when the power failure occurs, turn all of the burner control knobs to the OFF position. Then, the standard burners can be lighted by holding a match at the ports and turning the control knob to the HI position. Wait until the flame is burning all the way around the burner cap before adjusting the flame to the desired height. The two ExtraLow® burners on the far left side cannot be used during a power failure. Be sure to turn them OFF if a power failure occurs because they will not turn back on until both control knobs are turned OFF and then turned back on again. See "What to do if you Smell Gas", inside front cover. If you have low gas pressure, contact your gas company. INTERMITTENT OR CONSTANT IGNITER SPARKING Intermittent or constant sparking of the sealed gas surface burners can result from a number of preventable conditions. Eliminate these conditions as indicated in the chart. SYMPTOM Intermittent sparking CAUSE REMEDY • Ceramic igniter is wet or dirty. • Carefully dry or clean igniter. More than four clicks of igniter before lighting • Burner ports are clogged. • Improper fit of burner cap onto burner base. • Clean ports on burner cap with a wire, a needle or straightened paper clip. • Align burner cap properly on burner base. Constant Sparking • Range is not properly grounded. • Refer to Installation Instructions. Have a qualified electrician ground the range properly. • Electrical power supply is incorrectly polarized. • Refer to Installation Instructions. Have a qualified electrician ground the range properly. 41
-
 1
1 -
2
-
3
-
4
-
5
-
6
-
7
-
8
-
9
-
10
-
11
-
12
-
13
-
14
-
15
-
16
-
17
-
18
-
19
-
20
-
21
-
22
-
23
-
24
-
25
-
26
-
27
-
28
-
29
-
30
-
31
-
32
-
33
-
34
-
35
-
36
-
37
-
 38
38 -
 39
39 -
 40
40 -
 41
41 -
 42
42 -
 43
43 -
 44
44 -
 45
45 -
 46
46 -
 47
47 -
 48
48 -
49
-
50
-
51
-
52
-
53
-
54
-
55
-
56
-
57
-
58
-
59
-
60
-
61
-
62
-
63
-
64
-
65
-
66
-
67
-
68
-
69
-
70
-
71
-
72
-
73
-
74
-
75
-
76
-
77
-
78
-
79
-
80
-
81
-
82
-
83
-
84
-
85
-
86
-
87
-
88
-
89
-
90
-
91
-
92
 |
 |
