Toshiba Excite AT205-SP0101M User Guide 2 - Page 72
Accounts & sync settings, Backup & reset settings, Accounts & sync, Settings, Sync Calendar
 |
View all Toshiba Excite AT205-SP0101M manuals
Add to My Manuals
Save this manual to your list of manuals |
Page 72 highlights
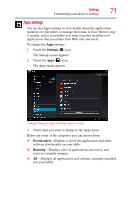
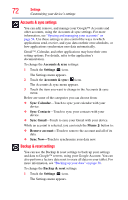
72 Settings Customizing your device's settings Accounts & sync settings You can add, remove, and manage your Google™ Accounts and other accounts, using the Accounts & sync settings. For more information, see "Syncing and managing your accounts" on page 54. Use these settings to also control the ways in which applications send, receive, and sync data on their own schedules, or how applications synchronize user data automatically. Gmail™, Calendar, and other applications may have their own setting options. For details, refer to the application's documentation. To change the Accounts & sync settings: 1 Touch the Settings ( ) icon. The Settings menu appears. 2 Touch the Accounts & sync ( ) icon. The Accounts & sync menu appears. 3 Touch the item you want to change in the Accounts & sync menu. Below are some of the categories you can choose from: ❖ Sync Calendar-Touch to sync your calendar with your device. ❖ Sync Contacts-Touch to sync your contacts with your device. ❖ Sync Gmail-Touch to sync your Gmail with your device. While an account is selected, you can touch the Menu ( ) button to: ❖ Remove account-Touch to remove the account and all of its data. ❖ Sync Now-Touch to synchronize your data now. Backup & reset settings You can use the Backup & reset settings to back up your settings and data to Google™ servers, using your Google Account. You can also perform a factory data reset to erase all data on your tablet. For more information, see "Backing up your data" on page 38. To change the Backup & reset settings: 1 Touch the Settings ( ) icon. The Settings menu appears.
-
 1
1 -
2
-
3
-
4
-
5
-
6
-
7
-
8
-
9
-
10
-
11
-
12
-
13
-
14
-
15
-
16
-
17
-
18
-
19
-
20
-
21
-
22
-
23
-
24
-
25
-
26
-
27
-
28
-
29
-
30
-
31
-
32
-
33
-
34
-
35
-
36
-
37
-
38
-
39
-
40
-
41
-
42
-
43
-
44
-
45
-
46
-
47
-
48
-
49
-
50
-
51
-
52
-
53
-
54
-
55
-
56
-
57
-
58
-
59
-
60
-
61
-
62
-
63
-
64
-
65
-
66
-
 67
67 -
 68
68 -
 69
69 -
 70
70 -
 71
71 -
 72
72 -
 73
73 -
 74
74 -
 75
75 -
 76
76 -
 77
77 -
78
-
79
-
80
-
81
-
82
-
83
-
84
-
85
-
86
-
87
-
88
-
89
-
90
-
91
-
92
-
93
-
94
-
95
-
96
-
97
-
98
-
99
-
100
-
101
-
102
-
103
-
104
-
105
-
106
-
107
-
108
-
109
-
110
-
111
-
112
-
113
-
114
-
115
-
116
-
117
-
118
-
119
-
120
-
121
-
122
-
123
 |
 |