Toshiba TLP-MT7 Owner's Manual - English
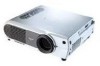
Toshiba TLP-MT7 - LCD Projector - 1000 ANSI Lumens Manual
 |
UPC - 022265950821
View all Toshiba TLP-MT7 manuals
Add to My Manuals
Save this manual to your list of manuals |
Toshiba TLP-MT7 manual content summary:
- Toshiba TLP-MT7 | Owner's Manual - English - Page 1
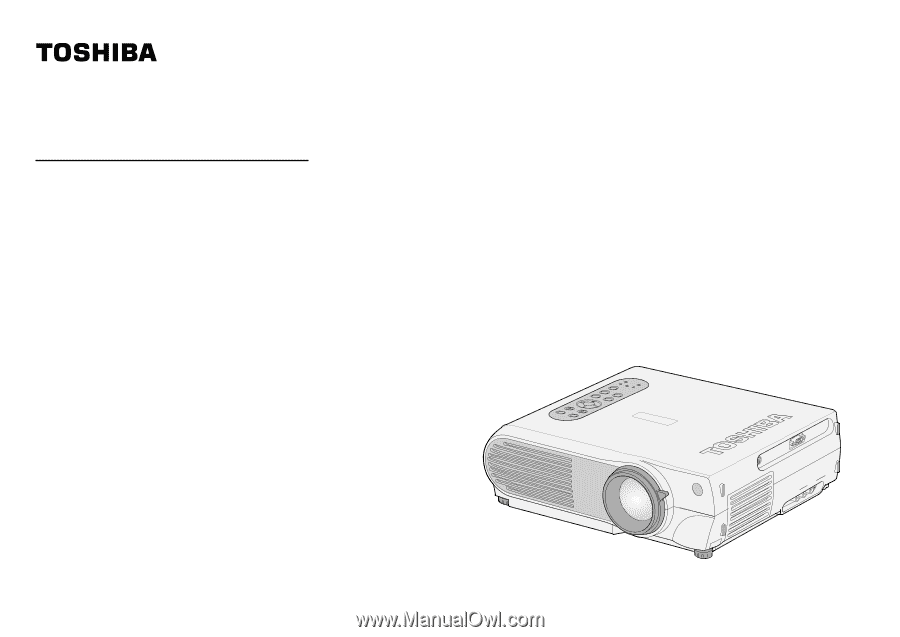
OWNER'S MANUAL 3LCD PROJECTOR TLP-MT7E 23565376 SAEUTTO KEYSATUOTNOE VOL/ADJ. EXIT ENTER MENU INPUT ON/STANDBY ON LAMP FAN TEMP BUSY 1 CONTENTS Before use CONTROL C(OYM/PPBU/PTERR) IN 1 AUINDIO VIDEOVIIDNEO S-VIDEO R - AUDIO - L - Toshiba TLP-MT7 | Owner's Manual - English - Page 2
. REFER SERVICING TO QUALIFIED PERSONNEL ONLY. CAUTION: Laser beam is emitted when the laser button of the remote control is pressed. Do not look from the front of the remote control. Do important operating and maintenance (servicing) instructions in the literature accompanying the appliance. - Toshiba TLP-MT7 | Owner's Manual - English - Page 3
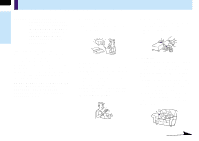
will come in handy if you ever have to ship your LCD projector. For maximum protection, repack the set as it was originally packed exposed to such a change in temperature, moisture may condense on the crucial internal parts. To prevent the unit from possible damage, do not use the unit for at - Toshiba TLP-MT7 | Owner's Manual - English - Page 4
Manual After unpacking this product, read the owner's manual carefully, and follow all the operating and other instructions. 3. Source of Light Do not look into the lens while the lamp is on. The strong light from the lamp servicing. This unit is fully transistorized and does not contain any parts - Toshiba TLP-MT7 | Owner's Manual - English - Page 5
IMPORTANT SAFETY INSTRUCTIONS (continued) 5 CONTENTS 5. Heat The product should be situated away from heat sources such as radiators, heat registers, stoves, or other products (including amplifiers) that produce - Toshiba TLP-MT7 | Owner's Manual - English - Page 6
Before use 6 IMPORTANT SAFETY INSTRUCTIONS (continued) 11. Object and Liquid Entry Never push objects of any kind into this product through openings as they may touch dangerous voltage points or shortout parts that could result in a fire or electric shock. Never spill liquid of any kind on the - Toshiba TLP-MT7 | Owner's Manual - English - Page 7
, including a lens and a lamp. If such parts should break, please handle with care to avoid injury and contact your dealer for repair service. The broken pieces of glass may cause to injury. In the unlikely event of the lamp rupturing, thoroughly clean the area around the projector and discard any - Toshiba TLP-MT7 | Owner's Manual - English - Page 8
Before use 8 Power supply cord selection If your line voltage is 220 to 240V, use one of the following types of cable. In Singapore, use the UK type plug cable. (The UK type plug [MP5004] of this model is approved by PSB.) Plug configuration Plug type EURO Line voltage 220 - 240V UK 220 - 240V - Toshiba TLP-MT7 | Owner's Manual - English - Page 9
SAFETY INSTRUCTIONS 4 Power supply cord selection 8 Contents 9 Names of each part on the main unit 10 Names of each part on the remote control 13 Loading batteries 14 Remote control operation 15 Installation and connections Floor-mounted projector placement 16 Projector placement angle - Toshiba TLP-MT7 | Owner's Manual - English - Page 10
part on the main unit Before use CAUTION Openings in the cabinet are provided for ventilation and to ensure reliable operation of the product and to protect it from overheating, and these openings must not be blocked or covered. Control panel 11 LAMP FAN TEMP BUSY Infrared remote projector. - Toshiba TLP-MT7 | Owner's Manual - English - Page 11
Names of each part on the main unit (continued) 11 CONTENTS Before use Top side ON/STANDBY button 25 28 To turn the projector on or off (standby). ON indicator 25 28 FAN indicator 25 LAMP indicator 25 28 To indicate the status of the projector. TEMP indicator 64 BUSY indicator This indicator - Toshiba TLP-MT7 | Owner's Manual - English - Page 12
12 Names of each part on the main unit (continued) Before use CONTROL connector 24 (RS-232C connector) To connect a computer to control the projector. - Toshiba TLP-MT7 | Owner's Manual - English - Page 13
Names of each part on the remote control 13 CONTENTS Remote control transmission part Before use INPUT button 26 To select the input source. AUTO KEYSTONE button 29 To correct the keystone distortion of the picture automatically. FREEZE button - Toshiba TLP-MT7 | Owner's Manual - English - Page 14
not mix different types of batteries or new and old batteries. • When you will not be using the remote control for a prolonged period, take the batteries out of the remote control. • When the remote control stops working or only works from very close distance, replace all the batteries with new ones - Toshiba TLP-MT7 | Owner's Manual - English - Page 15
sunlight or other strong light such as a fluorescent lamp shining on the remote sensor. • Operate the remote control from a position where the remote sensor is visible. • Do not drop the remote control or otherwise jolt it. • Keep the remote control out of locations with excessively high temperature - Toshiba TLP-MT7 | Owner's Manual - English - Page 16
Perform the "Projection mode" setting on the menu screen for the projection method. 59 For the ceiling-mounted projector placement, refer to the page 20 . Floor-mounted front projection Viewing a picture projected on the front of the screen from a floor installation. Floor-mounted rear - Toshiba TLP-MT7 | Owner's Manual - English - Page 17
on a steady, level surface such as a table. To obtain proper screen projected, place the projector so that the projecting light hits the screen squarely. Screen Top view Side view Screen 17 CONTENTS FAN TEMP LAMP ON ON/STANDBY INPUT EXIT AUTO SET VOL/ADJ. BUSY MENU ENTER AUTO KEYSTONE - Toshiba TLP-MT7 | Owner's Manual - English - Page 18
the power cord. • Insert one end in the AC IN socket on the projector. • Insert the other end in a wall outlet. ENTER MENU INPUT TEMP BUSY LAMP FAN ON/STANDBY ON EXIT KEYASUTOTONE VOL/ADJ. SAEUTTO TEMP LAMP ON BUSY FAN Power cord (Supplied) Light (Orange) The three indicators, TEMP - Toshiba TLP-MT7 | Owner's Manual - English - Page 19
using the foot adjuster. 19 CONTENTS 1 Lift the front of the projector until a tilt angle desired is obtained and hold down the foot release button and lower the front slowly. • Be sure to hold the projector when putting the foot adjuster back so as not to let the front fall on your fingers. • - Toshiba TLP-MT7 | Owner's Manual - English - Page 20
20 Ceiling-mounted projector placement CAUTION When a ceiling mount is required, please consult with the dealer. Ceiling-mounted front projection Viewing a picture projected on the front of the screen - Toshiba TLP-MT7 | Owner's Manual - English - Page 21
Connecting video equipment You can project the picture from video equipment with component video output jack. Check that the power for the projector and video equipment is off before connecting the cables. 21 CONTENTS Installation and connection CONTROL COMPONENT IN ( COMPUTER ) AUDIO IN VIDEO - Toshiba TLP-MT7 | Owner's Manual - English - Page 22
cables. Installation and connection CONTROL COMPONENT IN ( COMPUTER ) AUDIO IN VIDEO IN R - AUDIO - L VIDEO S-VIDEO S-VIDEO connector At shipping from factory, the projector is set so that this connector cannot be selected by the INPUT button. Change the setting on the menu screen when using - Toshiba TLP-MT7 | Owner's Manual - English - Page 23
5mm Stereo mini-jack To audio output port Notes • The projector cannot be connected to a computer without an analog RGB connector. For details, refer to the computer manual. • You may not be able to connect some computers to the projector. For details, consult the dealer. • Some computers may have - Toshiba TLP-MT7 | Owner's Manual - English - Page 24
by a computer connected with the control cable supplied. 75 Check that the power for the projector and computer is off before connecting the cables. CONTROL COMPONENT IN ( COMPUTER ) AUDIO IN VIDEO IN R - AUDIO - L VIDEO S-VIDEO CONTROL C(OCMOPMOPNUETNETRI)N AUINDIO VIDEOVIIDNEO S-VIDEO - Toshiba TLP-MT7 | Owner's Manual - English - Page 25
Take off the lens cover. Control panel Remote control (Main unit side) AUTO KEYSTONE AUTO SET INPUT ON / STANDBY KEYSTONE AUTO SET FREEZE MUTE PIP CALL RESIZE 1 VOL/ADJ. 1 ON/STANDBY ON/ STANDBY Press ON/STANDBY. The projector turns on and the ON, LAMP and FAN indicators light in green - Toshiba TLP-MT7 | Owner's Manual - English - Page 26
Remote control (Main unit side) 3 INPUT ON / STANDBY KEYSTONE AUTO SET FREEZE MUTE PIP CALL RESIZE MENU VOL/ADJ ENTER CT-90072 EXIT AUTO KEYSTONE AUTO SET VOL/ADJ. ENTER EXIT MENU INPUT ON/STANDBY TEMP LAMP with an LCD screen while computer's manual and . • The projector can be also - Toshiba TLP-MT7 | Owner's Manual - English - Page 27
is too high or if the air filter is clogged with dust. 64 • Due to the lamp characteristic, flickers may occasionally occur in a picture. This is not malfunction of the unit. • The projector's liquid crystal panel is made using extremely advanced technology, but there may be black spots (pixels - Toshiba TLP-MT7 | Owner's Manual - English - Page 28
KEYASUTOTONE VOL/ADJ. SAEUTTO 1 ON/STANDBY Press ON/STANDBY after using the projector. An instruction message appears. ON/ STANDBY 2 ON/STANDBY ON/ STANDBY Press ON/STANDBY again. Cooling starts. Once cooling is completed, the LAMP and FAN indicators turn off and the standby mode is set. (The - Toshiba TLP-MT7 | Owner's Manual - English - Page 29
projector lifted up by the foot adjuster. The projector can correct this keystone distortion automatically. Before correcting After correcting Operations Remote CT-90072 EXIT ON/STANDBY TEMP LAMP ON BUSY FAN ENTER MENU INPUT TEMP BUSY LAMP FAN ON/STANDBY ON EXIT KEYASUTOTONE VOL - Toshiba TLP-MT7 | Owner's Manual - English - Page 30
30 Enlarging the picture size Remote control You can enlarge (resize) the picture size projected. RESIZE is cancelled if any operation other than setting the freeze mode is performed. • This projector uses electrical digital resizing, so the picture quality degrades when images are enlarged. • In - Toshiba TLP-MT7 | Owner's Manual - English - Page 31
Cutting off the picture and sound temporarily 31 The image and sound of this projector can be turned off if you wish to temporarily project the image of another projector or a OHP, etc., on the screen. Remote control MUTE Press MUTE. The sound and picture are cut off temporarily. To cancel the - Toshiba TLP-MT7 | Owner's Manual - English - Page 32
projected. Use this function to stop images from a video recorder to make presentations. Remote control FREEZE Press FREEZE. The picture freezes. To release the picture, press FREEZE 's image continues to play even when the projector is set to the freeze mode. MENU VOL/ADJ ENTER CT-90072 EXIT - Toshiba TLP-MT7 | Owner's Manual - English - Page 33
computer's signals at the touch of a button. Remote control Control panel (Main unit side) INPUT ON LAMP FAN ON/STANDBY ON EXIT KEYASUTOTONE VOL/ADJ. SAEUTTO Notes • Automatic adjustment may not be performed properly for signals other than the computer's signals with which the projector - Toshiba TLP-MT7 | Owner's Manual - English - Page 34
PIP Sub-pictures Video or S-video images can be displayed as small images on the computer's image. (Referred to as "sub-pictures" in this manual.) Remote control PIP Press PIP. A sub-picture is displayed. Press the PIP button again to turn off the sub-picture. Operations PIP INPUT ON - Toshiba TLP-MT7 | Owner's Manual - English - Page 35
input signal source, etc., can be displayed. Remote control INPUT ON / STANDBY KEYSTONE AUTO SET FREEZE lamp (TLPLX10, sold separately). • The "Lamp time" can be reset when the lamp is replaced. • The "Version" is the version of the control program used in the projector and is used for servicing - Toshiba TLP-MT7 | Owner's Manual - English - Page 36
screen QUICK MENU 38 Item Meaning Contrast Adjust the image contrast Brightness Adjust the image brightness (paying attention to the dark parts) Color Adjust the image color (except for Computer inputs) Phase Adjust the image flicker (Computer input) Picture mode Computer input: Set - Toshiba TLP-MT7 | Owner's Manual - English - Page 37
operation guide is displayed here. Remote control Control panel (Main unit side) AUTO KEYSTONE AUTO SET The contents of the operation guide differ ENTER CT-90072 EXIT EXIT ENTER ENTER EXIT MENU INPUT ON/STANDBY TEMP LAMP ON BUSY FAN Use the VOL/ADJ (+/-) buttons to adjust or set - Toshiba TLP-MT7 | Owner's Manual - English - Page 38
on the screen". 25 1 MENU Press MENU. The QUICK MENU appears. Remote control Control panel (Main unit side) INPUT ON / STANDBY KEYSTONE AUTO SET EXIT MENU INPUT ON/STANDBY 1 TEMP LAMP ON BUSY FAN ENTER MENU INPUT TEMP BUSY LAMP FAN ON/STANDBY ON EXIT KEYASUTOTONE VOL - Toshiba TLP-MT7 | Owner's Manual - English - Page 39
and settings (continued) 39 Remote control Control panel (Main unit side) AUTO KEYSTONE AUTO SET INPUT ON / STANDBY KEYSTONE AUTO SET FREEZE MUTE PIP CALL RESIZE MENU VOL/ADJ ENTER CT-90072 EXIT VOL/ADJ. ENTER EXIT 2 MENU INPUT ON/STANDBY TEMP LAMP ON BUSY FAN 2 ENTER - Toshiba TLP-MT7 | Owner's Manual - English - Page 40
Brightness", "Color", "Phase", "Keystone", "Picture mode", in step 2. Remote control Control panel (Main unit side) AUTO KEYSTONE AUTO SET INPUT ON EXIT VOL/ADJ. 3-a ENTER EXIT 3-a MENU INPUT ON/STANDBY TEMP LAMP ON BUSY FAN 3-a Press VOL/ADJ (+/-) to adjust and set. Adjustments - Toshiba TLP-MT7 | Owner's Manual - English - Page 41
(Set the input source that can be selected by the INPUT button.) Remote control Control panel (Main unit side) AUTO KEYSTONE AUTO SET 3-b ENTER ENTER CT-90072 EXIT 3-b ON/STANDBY TEMP LAMP ON BUSY FAN ENTER MENU INPUT TEMP BUSY LAMP FAN ON/STANDBY ON EXIT KEYASUTOTONE VOL/ADJ. - Toshiba TLP-MT7 | Owner's Manual - English - Page 42
in step 2. (Set the language used in the menu display.) Remote control Control panel (Main unit side) 3-c ENTER ENTER Press ENTER AUTO KEYSTONE AUTO SET VOL/ADJ. ENTER EXIT MENU INPUT 3-c ON/STANDBY TEMP LAMP ON BUSY FAN MENUFULL Select EXIT Back Use the selection buttons ( / ) - Toshiba TLP-MT7 | Owner's Manual - English - Page 43
Remote control Control panel (Main unit side) AUTO KEYSTONE AUTO SET INPUT ON / STANDBY KEYSTONE AUTO SET FREEZE MUTE PIP CALL RESIZE MENU VOL/ADJ VOL/ADJ. ENTER EXIT MENU INPUT 4 ENTER CT-90072 EXIT 4 ON/STANDBY TEMP LAMP occurs while the projector is on, the adjustments or settings - Toshiba TLP-MT7 | Owner's Manual - English - Page 44
screen as explained in the step "Projection on the screen". 25 Remote control Control panel (Main unit side) AUTO KEYSTONE AUTO SET INPUT ENTER EXIT MENU INPUT ON/STANDBY 2 1 TEMP LAMP ON BUSY FAN ENTER MENU INPUT TEMP BUSY LAMP FAN ON/STANDBY ON EXIT KEYASUTOTONE VOL/ADJ. - Toshiba TLP-MT7 | Owner's Manual - English - Page 45
MENU adjustments and settings picture (Continued) 45 Remote control Control panel (Main unit side) (Continued EXIT 3-a 2 ENTER EXIT MENU INPUT ON/STANDBY TEMP LAMP ON BUSY FAN 3-a 2 ENTER MENU INPUT TEMP BUSY LAMP FAN ON/STANDBY ON EXIT KEYASUTOTONE VOL/ADJ. SAEUTTO When - Toshiba TLP-MT7 | Owner's Manual - English - Page 46
46 FULL MENU adjustments and settings - Picture (continued) 33--aa Screen size (Computer input) Resolution under SVGA Thru Full Resolution over XGA Thru Full (C(oCnotinntiuneude)d) Adjustments & Settings Screen size (Video input, S-Video input, Y/PB/PR input) Icon Type Signal of 4:3 Vista - Toshiba TLP-MT7 | Owner's Manual - English - Page 47
(continued) When selecting "Position" or "Level" in step 2. Remote control Control panel (Main unit side) AUTO KEYSTONE AUTO SET 3-b CT-90072 EXIT VOL/ADJ. ENTER EXIT 3-b MENU INPUT ON/STANDBY TEMP LAMP ON BUSY FAN 3-b MENU QUICK Item Adjust EXIT Back MENU QUICK Item Adjust - Toshiba TLP-MT7 | Owner's Manual - English - Page 48
"Signal format", "Video mode" or "Interval" in step 2. Remote control Control panel (Main unit side) AUTO KEYSTONE AUTO SET INPUT ON VOL/ADJ ENTER CT-90072 EXIT ENTER EXIT 3-c MENU INPUT ON/STANDBY TEMP LAMP ON BUSY FAN Signal format (Y/PB/PR input) Auto: Determine the type of - Toshiba TLP-MT7 | Owner's Manual - English - Page 49
Remote control Control panel (Main unit side) AUTO KEYSTONE AUTO SET INPUT ON / STANDBY KEYSTONE AUTO SET FREEZE MUTE PIP CALL RESIZE MENU VOL/ADJ VOL/ADJ. ENTER EXIT MENU INPUT 4 ENTER CT-90072 EXIT 4 ON/STANDBY TEMP LAMP occurs while the projector is on, the adjustments or settings - Toshiba TLP-MT7 | Owner's Manual - English - Page 50
signals developed from the speaker. (The speaker output is monaural.) Remote control Control panel (Main unit side) AUTO KEYSTONE AUTO SET INPUT CT-90072 EXIT VOL/ADJ. 1 2,3 ENTER EXIT MENU INPUT ON/STANDBY TEMP LAMP ON BUSY FAN 2,3 1 Preparation 1 Project a picture on the screen as - Toshiba TLP-MT7 | Owner's Manual - English - Page 51
Remote control Control panel (Main unit side) AUTO KEYSTONE AUTO SET INPUT ON / STANDBY KEYSTONE AUTO SET FREEZE MUTE PIP CALL RESIZE MENU VOL/ADJ ENTER CT-90072 EXIT VOL/ADJ. 4 ENTER EXIT 4 5 MENU INPUT ON/STANDBY TEMP LAMP failure occurs while the projector is on, the settings - Toshiba TLP-MT7 | Owner's Manual - English - Page 52
manually. • The projector stores the standard conditions of horizontal installation, but depending on the usage environment (if the projector ENTER EXIT MENU INPUT ON/STANDBY TEMP LAMP ON BUSY FAN 2,3 1 ENTER MENU INPUT TEMP BUSY LAMP FAN ON/STANDBY ON EXIT KEYASUTOTONE VOL/ADJ - Toshiba TLP-MT7 | Owner's Manual - English - Page 53
Remote control Control panel (Main unit side) AUTO KEYSTONE AUTO SET INPUT ON / STANDBY KEYSTONE AUTO SET FREEZE MUTE PIP CALL RESIZE MENU VOL/ADJ ENTER CT-90072 EXIT VOL/ADJ. 4-a 4-a 4-b 5 ENTER EXIT MENU INPUT ON/STANDBY TEMP LAMP failure occurs while the projector is on, the - Toshiba TLP-MT7 | Owner's Manual - English - Page 54
the screen as explained in the step "Projection on the screen". 25 Remote control Control panel (Main unit side) AUTO KEYSTONE AUTO SET INPUT ON CT-90072 EXIT VOL/ADJ. 1 2,3 ENTER EXIT MENU INPUT ON/STANDBY TEMP LAMP ON BUSY FAN 2,3 1 1 MENU MENU Press MENU twice. When pressed - Toshiba TLP-MT7 | Owner's Manual - English - Page 55
(continued) 55 When selecting "Language" in step 3. Remote control Control panel (Main unit side) 4-a ENTER ENTER Press AUTO KEYSTONE AUTO SET VOL/ADJ. ENTER EXIT MENU INPUT 4-a ON/STANDBY TEMP LAMP ON BUSY FAN MENUQUICK Select EXIT Back Use the selection buttons ( / ) to - Toshiba TLP-MT7 | Owner's Manual - English - Page 56
LAMP ON BUSY FAN 5 When selecting setting items other than "Language" in step 3. 4-b Press VOL/ADJ (+/-) to adjust and set. No signal background (Setting of screen of no signal input) Logo: The TOSHIBA or if a power failure occurs while the projector is on, the settings are not stored in - Toshiba TLP-MT7 | Owner's Manual - English - Page 57
the projection mode, power off at no signal status, power on mode and lamp power. Remote control Control panel (Main unit side) AUTO KEYSTONE AUTO SET INPUT ON / Power on Manual [ENTER] [ENTER] 5 min. Auto. MENUQUICK Item Page EXIT Quit 57 ENTER MENU INPUT TEMP BUSY LAMP FAN ON/ - Toshiba TLP-MT7 | Owner's Manual - English - Page 58
the input that can be selected using INPUT button.) Control panel Remote control (Main unit side) AUTO KEYSTONE AUTO SET 4-a ENTER ENTER displayed in yellow is the one currently set. ENTER MENU INPUT TEMP BUSY LAMP FAN ON/STANDBY ON EXIT KEYASUTOTONE VOL/ADJ. SAEUTTO Press EXIT to - Toshiba TLP-MT7 | Owner's Manual - English - Page 59
sub-menu of "Projection mode" appears. Control panel Remote control (Main unit side) AUTO KEYSTONE AUTO SET EXIT 4-b MENU INPUT ON/STANDBY TEMP LAMP ON BUSY FAN 4-b ENTER EXIT EXIT Default mode. Select the installation position of the projector. Confirm by referring to the chart on - Toshiba TLP-MT7 | Owner's Manual - English - Page 60
on" in step 3. Remote control Control panel (Main /STANDBY TEMP LAMP ON BUSY FAN ENTER MENU INPUT TEMP BUSY LAMP FAN ON/ continues for approx. 5 min. Power on Manual: The power turns on by pressing the or if a power failure occurs while the projector is on, the settings are not stored - Toshiba TLP-MT7 | Owner's Manual - English - Page 61
screen as explained in the step "Projection on the screen". 25 Remote control Control panel (Main unit side) AUTO KEYSTONE AUTO SET INPUT ON CT-90072 EXIT VOL/ADJ. 1 2,3 ENTER EXIT MENU INPUT ON/STANDBY TEMP LAMP ON BUSY FAN 2,3 1 1 2 MENU MENU Press MENU twice. When pressed - Toshiba TLP-MT7 | Owner's Manual - English - Page 62
to the conditions selected in step 3. Remote control Control panel (Main unit side . ENTER EXIT MENU INPUT 4 5 ON/STANDBY TEMP LAMP ON BUSY FAN ENTER 5 EXIT After the settings are is unplugged or if a power failure occurs while the projector is on, the setting is not stored in the - Toshiba TLP-MT7 | Owner's Manual - English - Page 63
settings when a PIP subpicture is displayed. Remote control Control panel (Main unit side) MENU INPUT ON/STANDBY TEMP LAMP ON BUSY FAN 3 1 ENTER MENU INPUT TEMP BUSY LAMP FAN ON/STANDBY ON EXIT projector is on, the settings are not stored in the memory. Adjustments & Settings - Toshiba TLP-MT7 | Owner's Manual - English - Page 64
Maintenance 64 Trouble indications If there is some problem inside the projector, the indicators light up or blink. Control panel (Main unit side) AUTO KEYSTONE AUTO SET VOL/ADJ. ENTER EXIT MENU INPUT ON/STANDBY TEMP LAMP ON BUSY FAN Indicator ENTER MENU INPUT TEMP BUSY LAMP FAN - Toshiba TLP-MT7 | Owner's Manual - English - Page 65
filter inside the air filter cover is the part to shut out dusts or dregs. Do not use the projector with the filter taken off. We recommend you Take off the air filter cover. The filter is on the right side of the projector. R AUDIO IN Pull the bottom side of the cover upward to remove the filter - Toshiba TLP-MT7 | Owner's Manual - English - Page 66
is dusty, the ventilation is impaired. This causes the temperature inside the projector to rise, and may damage the unit. • Attach the air filter Using a damaged air filter will cause dust or dirt to get inside the projector and onto the images. 5 Assemble the air filter. Place the air filter in - Toshiba TLP-MT7 | Owner's Manual - English - Page 67
Lens and main unit cleaning CAUTION If you use the projector mounted on the ceiling, ask the dealer to carry out the intake, exhaust fans and air filter To maintain the efficiency of the projector, replace the intake and exhaust fans about every two to three years. Ask the dealer for - Toshiba TLP-MT7 | Owner's Manual - English - Page 68
the dealer to carry out the maintenance such as cleaning or replacement of the lamp. • When replacing, always use lamp "TLPLX10" (sold separately). For detail, refer to the lamp instruction. • If you have been using the projector, the lamp will be very hot, and may cause burn injuries. Wait for the - Toshiba TLP-MT7 | Owner's Manual - English - Page 69
lamp. • Dispose the exhausted lamp as toxic wastes. 5 Load a new lamp. Slide until it hits the bottom and tighten the two fixed screws. 6 3 Attach the lamp cover. Slide the cover in place and tighten two screws. 21 Maintenance AC IN 7 Reset the lamp timer. Refer to the lamp instructions - Toshiba TLP-MT7 | Owner's Manual - English - Page 70
support service. Refer also to "Trouble indications". 64 Symptom The power does not come on. The power turns off while using the projector . The picture is dim. Cause • The power cord is disconnected. • The lamp cover is not attached correctly. • The ambient temperature of the projection room is - Toshiba TLP-MT7 | Owner's Manual - English - Page 71
too far. • There is an obstruction between the remote control and the remote sensor. • The batteries are exhausted. Correction Make the "Picture" adjustments. Replace the lamp. Face the remote control transmitter toward the remote sensor on the projector. Operate within about 5 meters. Remove the - Toshiba TLP-MT7 | Owner's Manual - English - Page 72
72 Pin assignment of COMPONENT IN connector COMPONENT IN 11 15 6 10 1 5 Input signal • Y/PB/PR input Y signal: PB, PR signal: • Computer input R, G, B signal: H.sync signal: V.sync signal: 1.0V(p-p) 75Ω 0.7V(p-p) 75Ω 0.7V(p-p) 75Ω TTL level (positive/negative polarity) TTL level (positive/ - Toshiba TLP-MT7 | Owner's Manual - English - Page 73
Applicable signal Applicable computer signal The unit is applicable to the following signals. However, some computers may have different timings than those in the chart. Make the necessary adjustments if the picture has flickers or is blurred. Signal Timing (Horizontal) A Video H.Sync B C D E - Toshiba TLP-MT7 | Owner's Manual - English - Page 74
74 Applicable signal (continued) Timing chart (Continued) Mode *SXGA1152x864 75Hz *SXGA1280x960 60Hz *SXGA1280x960 85Hz *SXGA1280x1024 60Hz *SXGA1280x1024 75Hz *SXGA1280x1024 85Hz *UXGA60 *UXGA65 *UXGA70 *UXGA75 Resolution 1152 x 864 1280 x 960 1280 x 960 1280 x 1024 1280 x 1024 1280 x 1024 1600 - Toshiba TLP-MT7 | Owner's Manual - English - Page 75
by using RS-232C 75 75 You can also control the projector by entering the command from a computer via RS-232C. Signal assignment of RS-232C 12 4 3 5 6 8 7 CONTROL RS-232C Pin No. 1 2 3 4 5 6 7 8 Signal RXD CTS DSR GND - Toshiba TLP-MT7 | Owner's Manual - English - Page 76
76 Controlling the projector by using RS-232C (continued) Classification Items/Status Picture Position Picture mode (Computer) Picture mode (Component, Video, S-Video) Video mode Signal format Screen size (Computer) - Toshiba TLP-MT7 | Owner's Manual - English - Page 77
Controlling the projector by using RS-232C (continued) 77 77 Classification Items/Status Audio Keystone Display Speaker output On Off Channel select (RCA) L+R L R Loudness (RCA) Off On Channel - Toshiba TLP-MT7 | Owner's Manual - English - Page 78
78 Controlling the projector by using RS-232C (continued) Classification Items/Status Display Default Off On Off On Off Computer Component On Off On Off Standard Rear Ceiling Rear ceiling Off 5 min. Manual Auto. Picture only All Selection Command MB1 MB0 MS0 MS1 I10 I11 IS0 IS1 I30 I31 I40 I41 - Toshiba TLP-MT7 | Owner's Manual - English - Page 79
Controlling the projector by using RS-232C (continued) 79 79 Classification Items/Status Volume Increase Decrease Input select Toggle COMPONENT VIDEO S-VIDEO RESIZE Increase the enlargement ratio Decrease - Toshiba TLP-MT7 | Owner's Manual - English - Page 80
operation Accessories Owner's manual 1 Remote control 1 R6 (AA) size battery 2 Power cord 2 AV cable 1 (3m) Audio cable (for Component 1 (3m) Control cable 1 (1.8m) Sold separately Replacement lamp TLPLX10 • The design and specifications are subject to change without notice. Trademarks
-
 1
1 -
 2
2 -
 3
3 -
 4
4 -
 5
5 -
 6
6 -
 7
7 -
8
-
9
-
10
-
11
-
12
-
13
-
14
-
15
-
16
-
17
-
18
-
19
-
20
-
21
-
22
-
23
-
24
-
25
-
26
-
27
-
28
-
29
-
30
-
31
-
32
-
33
-
34
-
35
-
36
-
37
-
38
-
39
-
40
-
41
-
42
-
43
-
44
-
45
-
46
-
47
-
48
-
49
-
50
-
51
-
52
-
53
-
54
-
55
-
56
-
57
-
58
-
59
-
60
-
61
-
62
-
63
-
64
-
65
-
66
-
67
-
68
-
69
-
70
-
71
-
72
-
73
-
74
-
75
-
76
-
77
-
78
-
79
-
80
 |
 |
1
Before use
CONTENTS
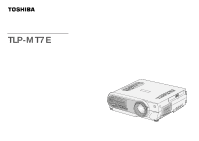
OWNER’S MANUAL
3LCD PROJECTOR
TLP-MT7E
TEMP
LAMP
ON
BUSY
FAN
ON/STANDBY
KEYSTONE
SET
AUTO
AUTO
EXIT
ENTER
MENU
INPUT
VOL/ADJ.
COMPUTER IN 1
(
Y/P
B
/P
R
)
CONTROL
S-VIDEO
VIDEO
VIDEO IN
R - AUDIO - L
AUDIO
IN
23565376