Toshiba TLP-MT7 Owner's Manual - English - Page 33
Adjusting the picture automatically Computer input
 |
UPC - 022265950821
View all Toshiba TLP-MT7 manuals
Add to My Manuals
Save this manual to your list of manuals |
Page 33 highlights
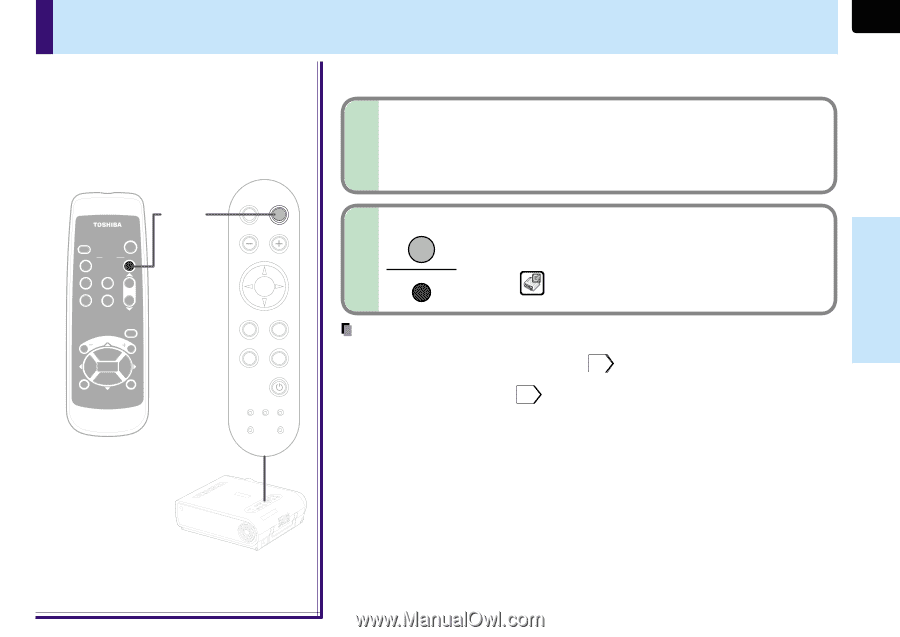
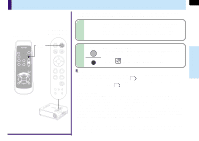
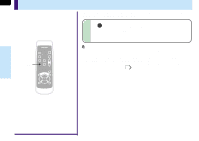
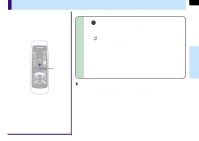
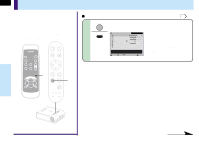
Adjusting the picture automatically (Computer input) 33 You can adjust the optimum horizontal position, vertical position, sampling phase and sampling frequency for projecting computer's signals at the touch of a button. Remote control Control panel (Main unit side) INPUT ON / STANDBY KEYSTONE AUTO SET FREEZE MUTE PIP CALL RESIZE AUTO SET AUTO KEYSTONE AUTO SET VOL/ADJ. 1 Input full screen video signals from the input source (computer) and project the image. Adjustments may not be performed properly for images that are not displayed on the entire screen or extremely dark images. 2 AUTO SET Press AUTO SET. The horizontal position, vertical position, sampling phase and sampling frequency are adjusted automatically. SET The icon appears during signal processing. Operations MENU VOL/ADJ ENTER CT-90072 EXIT ENTER EXIT MENU INPUT ON/STANDBY TEMP LAMP ON BUSY FAN ENTER MENU INPUT TEMP BUSY LAMP FAN ON/STANDBY ON EXIT KEYASUTOTONE VOL/ADJ. SAEUTTO Notes • Automatic adjustment may not be performed properly for signals other than the computer's signals with which the projector is compatible 73 . • The horizontal position, vertical position, sampling phase and sampling frequency can also be adjusted from the menu screen 44 . * Sampling frequency Analog RGB signals input from the computer are converted into digital signals inside the projector. The sampling frequency is the number of times per second the analog signals are converted into digital signals. In order to capture (sample) each individual dot of the computer's signals, the sampling frequency must be adjusted to match the computer's dot clock frequency. If this adjustment is off, details of the image may be blurred, a striped pattern may appear when images with many vertical lines are displayed, or the image's width may change. For computer's signals with which the projector is compatible, the sampling frequency is adjusted automatically even without pressing the AUTO SET button. * Sampling phase The sampling phase is the timing at which the computer's analog RGB signals are sampled. If the sampling phase is off, the individual dots cannot be sampled at the proper timing, resulting in blurred or flickering images.
-
 1
1 -
2
-
3
-
4
-
5
-
6
-
7
-
8
-
9
-
10
-
11
-
12
-
13
-
14
-
15
-
16
-
17
-
18
-
19
-
20
-
21
-
22
-
23
-
24
-
25
-
26
-
27
-
 28
28 -
 29
29 -
 30
30 -
 31
31 -
 32
32 -
 33
33 -
 34
34 -
 35
35 -
 36
36 -
 37
37 -
 38
38 -
39
-
40
-
41
-
42
-
43
-
44
-
45
-
46
-
47
-
48
-
49
-
50
-
51
-
52
-
53
-
54
-
55
-
56
-
57
-
58
-
59
-
60
-
61
-
62
-
63
-
64
-
65
-
66
-
67
-
68
-
69
-
70
-
71
-
72
-
73
-
74
-
75
-
76
-
77
-
78
-
79
-
80
 |
 |