Toshiba TLP-MT7 Owner's Manual - English - Page 27
Operations
 |
UPC - 022265950821
View all Toshiba TLP-MT7 manuals
Add to My Manuals
Save this manual to your list of manuals |
Page 27 highlights
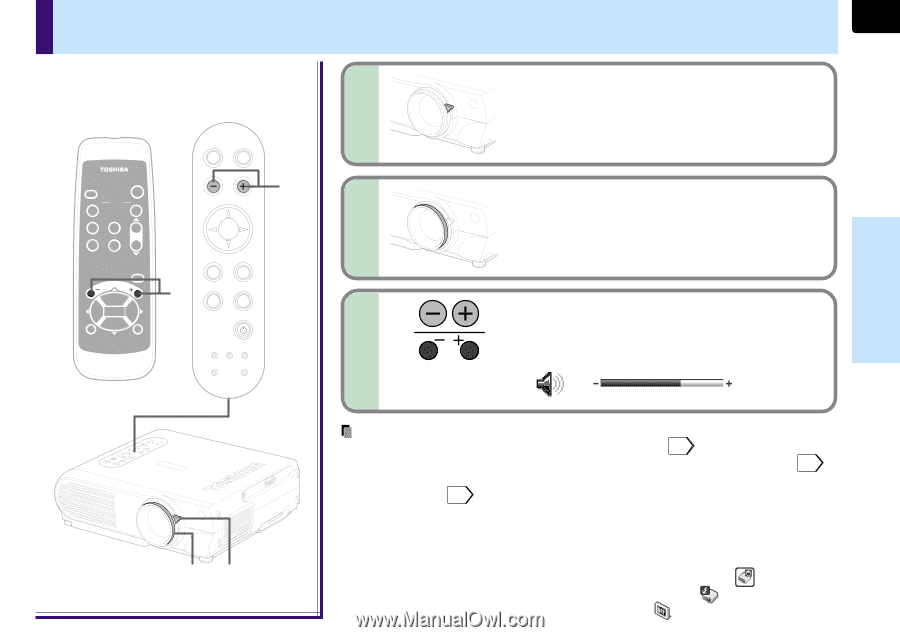
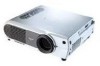
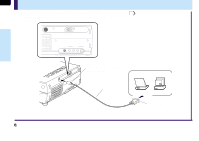
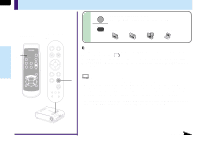
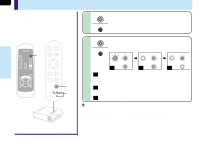
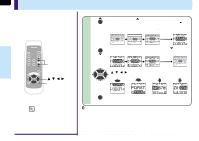
Projection on the screen (continued) 27 Control panel Remote control (Main unit side) AUTO KEYSTONE AUTO SET INPUT ON / STANDBY KEYSTONE AUTO SET FREEZE MUTE PIP CALL RESIZE MENU VOL/ADJ ENTER CT-90072 EXIT VOL/ADJ. 6 ENTER EXIT 6 MENU INPUT ON/STANDBY TEMP LAMP ON BUSY FAN 4 5 6 Adjust the picture size by turning the zooming lever. Turn to the right to enlarge the picture. Turn to the left to reduce the picture. Focus on the picture by turning the focusing ring. A still picture is recommended for focusing. Press VOL/ADJ (+/-) to adjust volume. Press the (+) button to increase volume. Press the (-) button to decrease volume. The volume adjusting bar and the icon appear. 16 Operations FAN TEMP BUSY STOAN/NDBY LAMP ON MENU ENTER INPUT EXIT KEYSATUOTNOE VOL/ADJ. SAEUTTO CONTROL C(OCMOPMOPNUETNETRI)N AUINDIO VIDEOVIIDNEO S-VIDEO R - AUDIO - L 54 Notes • When changing the projecting angle, adjust the foot adjuster. 19 • When the screen image is distorted in keystone, press the AUTO KEYSTONE button. 29 • The projector may stop operating if the surrounding temperature is too high or if the air filter is clogged with dust. 64 • Due to the lamp characteristic, flickers may occasionally occur in a picture. This is not malfunction of the unit. • The projector's liquid crystal panel is made using extremely advanced technology, but there may be black spots (pixels that do not light) or bright spots (pixels that are constantly lit) on the panel. Please note that these are not malfunctions. • When trying to press the button whose operation is not available, the icon appears. • When supplying the signal not compatible to the projector, the icon appears. • When signals are not input from the input source, the icon appears.
-
 1
1 -
2
-
3
-
4
-
5
-
6
-
7
-
8
-
9
-
10
-
11
-
12
-
13
-
14
-
15
-
16
-
17
-
18
-
19
-
20
-
21
-
 22
22 -
 23
23 -
 24
24 -
 25
25 -
 26
26 -
 27
27 -
 28
28 -
 29
29 -
 30
30 -
 31
31 -
 32
32 -
33
-
34
-
35
-
36
-
37
-
38
-
39
-
40
-
41
-
42
-
43
-
44
-
45
-
46
-
47
-
48
-
49
-
50
-
51
-
52
-
53
-
54
-
55
-
56
-
57
-
58
-
59
-
60
-
61
-
62
-
63
-
64
-
65
-
66
-
67
-
68
-
69
-
70
-
71
-
72
-
73
-
74
-
75
-
76
-
77
-
78
-
79
-
80
 |
 |