Weider Pro 9020 English Manual
Weider Pro 9020 Manual
 |
View all Weider Pro 9020 manuals
Add to My Manuals
Save this manual to your list of manuals |
Weider Pro 9020 manual content summary:
- Weider Pro 9020 | English Manual - Page 1
space above for reference. WEIGHT SYSTEM EXERCISER User’'s Manual Serial Number Decal •• Assembly •• Operation •• Maintenance •• Part List and Drawing Sears, Roebuck and Co. Hoffman Estates, IL 60179 CAUTION Read all precautions and instructions in this manual before using this equipment. Keep - Weider Pro 9020 | English Manual - Page 2
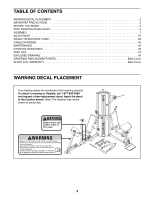
TABLE OF CONTENTS WARNING DECAL PLACEMENT 2 IMPORTANT PRECAUTIONS 3 BEFORE YOU BEGIN 4 PART IDENTIFICATION CHART 5 ASSEMBLY 7 ADJUSTMENT 37 WEIGHT RESISTANCE CHART 39 CABLE DIAGRAMS 40 MAINTENANCE 42 EXERCISE GUIDELINES 43 PART LIST 47 EXPLODED DRAWING 49 ORDERING REPLACEMENT PARTS Back - Weider Pro 9020 | English Manual - Page 3
read all important precautions and instructions in this manual and all warnings on your weight system before using your weight sys -existing health problems. 3. Use the weight system only as described in this manual. 11. Keep hands and feet away from moving parts. 12. The weight system is designed - Weider Pro 9020 | English Manual - Page 4
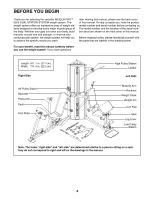
selecting the versatile WEIDER PRO™™ 9020 DUAL STATION SYSTEM weight system. The weight system offers an impressive array of weight stations designed to develop number decal are shown on the front cover of this manual. Before reading further, please familiarize yourself with the parts that are - Weider Pro 9020 | English Manual - Page 5
for assembly. The number in parentheses below each drawing is the key number of the part, from the PART LIST near the end of this manual. Note: If a part is not in the hardware kit, check to see if it has been preassembled. Extra parts may be included. If a part is - Weider Pro 9020 | English Manual - Page 6
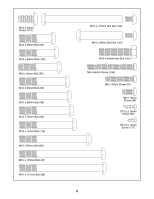
M10 x 20mm Screw (101) M10 x 45mm Bolt (95) M10 x 50mm Bolt (102) M10 x 55mm Bolt (82) M10 x 65mm Bolt (85) M10 x 68mm Bolt (98) M10 x 70mm Bolt (99) M10 x 75mm Bolt (113) M10 x 95mm Bolt (83) M10 x 115mm Bolt (97) M10 x 117mm Bolt (89) M10 x 107mm Bolt Set (104) M10 x 59mm Bolt Set (115) M10 x - Weider Pro 9020 | English Manual - Page 7
watch an assembly video, go to http://productvideo.co/ assembly/sears/weider or use your mobile phone or smartphone to read the QR code at the right. •• Assembly requires two persons. •• Because of its weight and size, assemble the weight system in the location where it will be used. Make sure that - Weider Pro 9020 | English Manual - Page 8
2. Identify the Short Base (17) and the Weight Stack Base (109). Orient both parts as shown. 2 Attach the Short Base (17) to the Weight Stack Base (109) with two M10 x 68mm Bolts (98), two M10 Washers (93), and an M10 Locknut (84); do 84 not tighten the Bolts yet. 109 93 98 93 17 3. See - Weider Pro 9020 | English Manual - Page 9
4. Identify the Right and Left Uprights (2, 14). Orient both parts as shown. 4 Attach the Left Upright (14) to the Short Base (17) with two M10 x 115mm Bolts (97), four M10 Washers (93), and two M10 Locknuts (84); do not tighten the Bolts yet. Attach the Right Upright (2) to the Long Base (1) in - Weider Pro 9020 | English Manual - Page 10
an M10 Locknut (84); do not tighten the Bolt yet. Attach the other Weight Guide (29) in the same way. Holes 29 84 93 29 86 93 85 109 7. Slide hole in the fifteenth Weight (30). Then, slide the Weight onto the Weight Guides (29); make sure that the Plastic Bushing is turned so that one of the - Weider Pro 9020 | English Manual - Page 11
Top (13) as shown. Set the Weight Stack Top on the Weight Guides (29). Attach the Weight Stack Top (13) to the Right and ); do not tighten the Bolts yet. 8 98 93 2 13 84 29 93 98 14 9. Attach a Weight Guide (29) to the Weight Stack Top (13) with an M10 x 65mm Bolt (85), two M10 9 Washers - Weider Pro 9020 | English Manual - Page 12
the M10 x 95mm Bolt (83) and an M10 Locknut (84). Do not overtighten the Locknut; the Press Frame must pivot easily. 10 5 84 1 83 Grease 11. While a second person holds the Foot Plate (6) against the Leg Press Frame (5), insert the Foot Plate Tube (7) through the Foot Plate and the Leg Press - Weider Pro 9020 | English Manual - Page 13
). Orient the parts 12 as shown. Attach the Right and Left Press Arms (11, 12) to the Press Arm Bracket (25) with three M10 x 70mm Bolts (99) and three M10 Locknuts (84); do not tighten the Bolts yet. 11 84 25 84 12 99 99 13. Apply grease to an M10 x 95mm - Weider Pro 9020 | English Manual - Page 14
Press Handle (10) to the Left Press Arm (12) with the M10 x 59mm Bolt Set (115). Attach the Right Press Handle (9) to the Right 11 Press Arm (11) in the same way. 15. Attach the Right Seat Frame (4) to the Long Base (1) with two M10 x 115mm Bolts (97), four 15 M10 Washers - Weider Pro 9020 | English Manual - Page 15
16. Attach the Right Seat Frame (4) to the Right Upright (2) with two M10 x 68mm Bolts (98) 16 and two M10 Washers (93); do not tighten the Bolts yet. 2 98 4 93 17. Attach the Right and Left Seat Handles (8, 32) to the Right Seat Frame (4) with two M10 x 117mm 17 Bolts (89) and two M10 - Weider Pro 9020 | English Manual - Page 16
18. Attach the Lat Bar Bracket (15) to the Left Upright (14) with two M10 x 68mm Bolts (98) 18 and two M10 Washers (93). 98 93 14 15 19. See the CABLE DIAGRAMS starting on page 40 to identify the cables. 19 Locate Cable B (64). Hold the ends of Cable B near the center of the Butterfly Arm ( - Weider Pro 9020 | English Manual - Page 17
20. While a second person holds the Butterfly Arm (23) near the Left Upright (14), insert the loop of 20 Cable B (64) through the hole in the Left Upright. Attach the Butterfly Arm (23) to the Left Upright (14) with two M10 x 68mm Bolts (98), two M10 Washers (93), two 48mm Spacers (81), an M10 - Weider Pro 9020 | English Manual - Page 18
23. Route Cable B (64) over two Pulleys (46). Then, insert the Pulleys into the Left 23 Upright (14). Make sure that Cable B is not twisted. Attach the Pulleys (46) with an M10 x 70mm Bolt (99) and an M10 Locknut (84). 24. Route Cable B (64) around a Pulley (46). 24 Attach the Pulley (46) - Weider Pro 9020 | English Manual - Page 19
25. Attach the Left Seat Frame (18) to the Short Base (17) with two M10 x 115mm Bolts (97), four 25 M10 Washers (93), and two M10 Locknuts (84); do not tighten the Bolts yet. 26. Attach the Left Seat Frame (18) to the Butterfly Arm (23) with two M10 x 20mm Screws (101). 26 See steps 2–-9, 15, - Weider Pro 9020 | English Manual - Page 20
27. Apply grease to an M10 x 107mm Bolt Set (104). 27 Attach the Leg Lever (20) to the Left Seat Frame (18) with the M10 x 107mm Bolt Set (104). 104 18 Grease 104 20 28. See the CABLE DIAGRAMS starting on page 40 to identify the cables. 28 Locate Cable C (65). Route Cable C through the Lat Bar - Weider Pro 9020 | English Manual - Page 21
30. Route Cable C (65) over a Pulley (46). 30 Attach the Pulley (46) and a Cable Trap (49) to the Left Upright (14) with an M10 x 45mm Bolt (95) and an M10 Locknut (84). Make sure that the Cable Trap is oriented as shown. 14 84 65 49 46 95 31. Route Cable C (65) under a Pulley (46). 31 Attach - Weider Pro 9020 | English Manual - Page 22
32. Route Cable C (65) over a Pulley (46). 32 Attach the Pulley (46) and a Cable Trap (49) to the Left Upright (14) with an M10 x 45mm Bolt (95) and an M10 Locknut (84). Make sure that the Cable Trap is oriented as shown. 14 49 46 84 95 65 33. Insert the end of Cable C (65) into a U-bracket (27 - Weider Pro 9020 | English Manual - Page 23
64 27 47 84 35. See the CABLE DIAGRAMS starting on page 40 to identify the cables. Locate Cable D (66). Route Cable D through the Ab Station Bracket (45). Insert a Pulley (46) into the Right Upright (2) under Cable D (66). Attach the Pulley (46) with an M10 x 115mm Bolt (97), two M10 Washers - Weider Pro 9020 | English Manual - Page 24
36. Route Cable D (66) under a Pulley (46). Attach the Pulley (46), a Cable Trap (49), and two Half Guards (47) to the first set of holes in a U-bracket (27) with an M10 x 50mm Bolt (102) and an M10 Locknut (84). Make sure that the Cable Trap and the Half Guards are oriented as shown. 36 66 49 84 - Weider Pro 9020 | English Manual - Page 25
39. Route Cable D (66) over a Pulley (46). Attach the Pulley (46) to the Left Upright (14) with an M10 x 45mm Bolt (95) and an M10 Locknut (84). 39 84 14 95 46 66 40. Route Cable D (66) through the bracket on the Weight Stack Top (13) and over a Pulley (46). 40 Attach the Pulley (46) to the - Weider Pro 9020 | English Manual - Page 26
42. See the CABLE DIAGRAMS starting on page 40 to identify the cables. 42 Locate Cable E (67). Route Cable E through the Long Base (1) as shown. Then, insert a Pulley (46) into the Long Base over Cable E. Attach the Pulley (46) with an M10 x 65mm Bolt (85), two M10 Washers (93), two 13mm Spacers - Weider Pro 9020 | English Manual - Page 27
44. Insert a Pulley (46) into the Leg Press Frame (5) under Cable E (67). Attach the Pulley (46) with an M10 x 65mm Bolt (85), two M10 Washers (93), two 13mm Spacers (86), and an M10 Locknut (84). See the inset drawing. Attach a Frame Cap (40) to the Leg Press Frame (5) with four ST4.2 x 10mm Screws - Weider Pro 9020 | English Manual - Page 28
47. Route Cable E (67) through the bracket on the Long Base (1). 47 Attach a Pulley (46) and two Half Guards (47) to the bracket on the Long Base (1) with an M10 x 45mm Bolt (95) and an M10 Locknut (84). Make sure that the Half Guards are oriented as shown. 84 47 46 1 67 47 95 48. Route Cable E - Weider Pro 9020 | English Manual - Page 29
50. Locate Cable A (63). Route Cable A through the Leg Lever (20) and the Left Seat Frame (18). 50 Insert a Pulley (46) into the Leg Lever (20) over Cable A (63). Attach the Pulley (46) with an M10 x 45mm Bolt (95) and an M10 Locknut (84). 20 18 84 46 63 95 51. Insert a Pulley (46) into the - Weider Pro 9020 | English Manual - Page 30
53. Route Cable A (63) over a Pulley (46). 53 Attach the Pulley (46), a Cable Trap (49), and two Half Guards (47) to the third set of holes in two Pulley Plates (26) with an M10 x 50mm Bolt (102) and an M10 Locknut (84). Make sure that the Cable Trap and the Half Guards are oriented as shown. 26 - Weider Pro 9020 | English Manual - Page 31
55. Route Cable A (63) over a Pulley (46). 55 Attach the Pulley (46), a Cable Trap (49), and two Half Guards (47) to the third set of holes in two Pulley Plates (26) with an M10 x 50mm Bolt (102) and an M10 Locknut (84). Make sure that the Cable Trap and the Half Guards are oriented as shown. 84 - Weider Pro 9020 | English Manual - Page 32
57. Identify the Narrow Seat (35). Attach the Narrow Seat to the Right Seat Frame (4) with three M6 x 57 16mm Screws (88). 35 4 88 58. Identify the Long Backrest (39). Orient the Long Backrest and the Backrest Frame (3) as shown. Attach the Long Backrest (39) to the Backrest Frame (3) with two - Weider Pro 9020 | English Manual - Page 33
60. Attach the Wide Seat (36) to the Left Seat Frame (18) with two M6 x 16mm Screws (88), an M6 x 60 65mm Screw (106), and an M6 Washer (92). 36 18 92 88 106 61. Attach the Short Backrest (34) to the Left Seat Frame (18) with two M6 x 65mm Screws (106) 61 106 92 and two M6 Washers (92). 34 - Weider Pro 9020 | English Manual - Page 34
63. Insert a Foam Pad Tube (19) into the Left Seat Frame (18). Slide a Foam Pad (59) onto each side of the Foam Pad Tube (19). Press a Foam Pad Cap (58) into each end of the Foam Pad Tube. Repeat this step with the other Foam Pad Tube (19), Foam Pads (59), and Foam Pad Caps (58). 63 58 59 59 19 - Weider Pro 9020 | English Manual - Page 35
66. Identify the Lower Shroud (33), which has a “"9020 DUAL STATION SYSTEM”" decal; the Upper Shroud (not shown) has a “"WEIDER PRO”" decal. While a second person holds the Lower Shroud (33) against the Right and Left Uprights (2, 14), attach two Shroud Fasteners (44) in the indicated locations - Weider Pro 9020 | English Manual - Page 36
will be explained in ADJUSTMENT beginning on page 37. Before using the weight system, pull each cable a few times to make sure that the cables move If one of the cables does not move smoothly, find and correct the problem. IMPORTANT: If the cables are not properly installed, they may be damaged - Weider Pro 9020 | English Manual - Page 37
guide to see the correct form for several exercises. Make sure all parts are properly tightened each time the weight system is used. Replace any worn parts immediately. The weight system and pulleys, the amount of resistance at each exercise station may 30 vary from the weight setting. Use the - Weider Pro 9020 | English Manual - Page 38
Curl Pad (37), remove the Curl Pad Frame (21). Store the Curl Pad away from the weight system. LOCKING THE WEIGHT STACK To lock the weight stack, insert the Lock Pin (73) through a Weight Guide (29), and secure the Lock (74) onto the Lock Pin. 38 37 21 42 18 29 73 - Weider Pro 9020 | English Manual - Page 39
vary due to differences in individual weights as well as friction between the cables, pulleys, and weight guides. WEIGHT 1 2 3 4 5 6 7 8 9 10 11 12 13 14 15 AB STATION (lbs./kg) BUTTERFLY ARM (lbs./kg) 20 / 9 31 / 14 42 / 19 53 / 24 66 / 30 80 / 36 93 / 42 101 / 46 113 / 51 124 / 56 - Weider Pro 9020 | English Manual - Page 40
the drawings to make sure that the cables, cable traps, and half guards are assembled correctly. If the cables are not assembled correctly, the weight system will not function properly and damage may occur. Make sure that the cable traps do not touch or bind the cables. 7 2 Cable A (63 - Weider Pro 9020 | English Manual - Page 41
4 6 7 5 Cable D (66) 2 1 3 4 3 2 6 7 1 Cable C (65) 5 4 2 3 1 8 Cable E (67) 7 6 8 5 41 - Weider Pro 9020 | English Manual - Page 42
a mild, non-abrasive detergent. Do not use solvents to clean the weight system. TIGHTENING THE CABLES Woven cable, the type of cable used on the weight system, can stretch slightly when it is first used. If there is slack in , see HOW TO ORDER REPLACEMENT PARTS on the back cover of this manual. 42 - Weider Pro 9020 | English Manual - Page 43
. Cooling Down—-Finish with 5 to 10 minutes of stretching. Stretching increases the flexibility of your muscles and helps to prevent post-exercise problems. Toning—-Tone your muscles by working them to a moderate percentage of their capacity. Select a moderate amount of resistance and increase the - Weider Pro 9020 | English Manual - Page 44
EXERCISE LOG Make copies of this page, and use the copies to schedule and record your strength and aerobic workouts. Scheduling and recording your workouts will help you to make exercise a regular and enjoyable part of your life. Strength Date: Exercise 1. Lbs. Sets Reps Exercise 6. Lbs. Sets - Weider Pro 9020 | English Manual - Page 45
NOTES 45 - Weider Pro 9020 | English Manual - Page 46
NOTES 46 - Weider Pro 9020 | English Manual - Page 47
Plate U-bracket Weight Selector Weight Guide Weight Upper Shroud Left Seat Knob Round Bumper Shroud Fastener Ab Station Bracket Pulley Half Guard Round Weight Bumper 4 80 2 81 2 82 2 83 2 84 58 85 7 86 10 87 4 88 11 89 2 90 26 91 2 92 9 93 60 94 4 95 13 96 4 97 10 98 - Weider Pro 9020 | English Manual - Page 48
Hex Bolt M10 x 75mm Bolt Press Arm Bracket Cap M10 x 59mm Bolt Set M10 Large Washer ST4.2 x 10mm Screw 28mm Round Cap M8 Locknut User’'s Manual Note: Specifications are subject to change without notice. For information about ordering replacement parts, see the back cover of this - Weider Pro 9020 | English Manual - Page 49
EXPLODED DRAWING A 9 47 26 46 84 26 47 49 47 11 102 46 35 76 92 91 8 84 90 107 41 98 84 93 42 75 90 49 46 84 93 84 100 90 84 79 - Weider Pro 9020 | English Manual - Page 50
50 86 86 93 93 85 85 95 84 46 29 13 16 84 93 93 55 56 118 55 22 118 55 103 93 93 73 50 74 84 30 84 92 28 88 51 53 48 48 52 52 109 30 85 86 85 93 56 55 75 93 93 98 75 98 98 84 93 98 93 84 95 90 49 46 84 44 119 27 47 31 102 95 47 26 49 84 46 - Weider Pro 9020 | English Manual - Page 51
EXPLODED DRAWING C 82 84 51 24 57 95 90 77 36 46 82 92 24 90 106 77 84 75 37 88 21 57 84 84 46 47 47 84 75 95 46 98 116 23 46 84 106 92 59 101 101 58 59 19 108 34 58 47 93 93 98 93 84 17 58 59 18 42 59 92 58 88 106 105 97 93 97 93 19 84 105 93 54 84 78 90 - Weider Pro 9020 | English Manual - Page 52
MY-HOME® (1-800-469-4663) to arrange for free repair (or replacement if repair proves impossible). This warranty does not apply when the Weight System Exerciser is used commercially or for rental purposes. This warranty gives you specific legal rights, and you may also have other rights which vary
-
 1
1 -
 2
2 -
 3
3 -
 4
4 -
 5
5 -
 6
6 -
 7
7 -
8
-
9
-
10
-
11
-
12
-
13
-
14
-
15
-
16
-
17
-
18
-
19
-
20
-
21
-
22
-
23
-
24
-
25
-
26
-
27
-
28
-
29
-
30
-
31
-
32
-
33
-
34
-
35
-
36
-
37
-
38
-
39
-
40
-
41
-
42
-
43
-
44
-
45
-
46
-
47
-
48
-
49
-
50
-
51
-
52
 |
 |
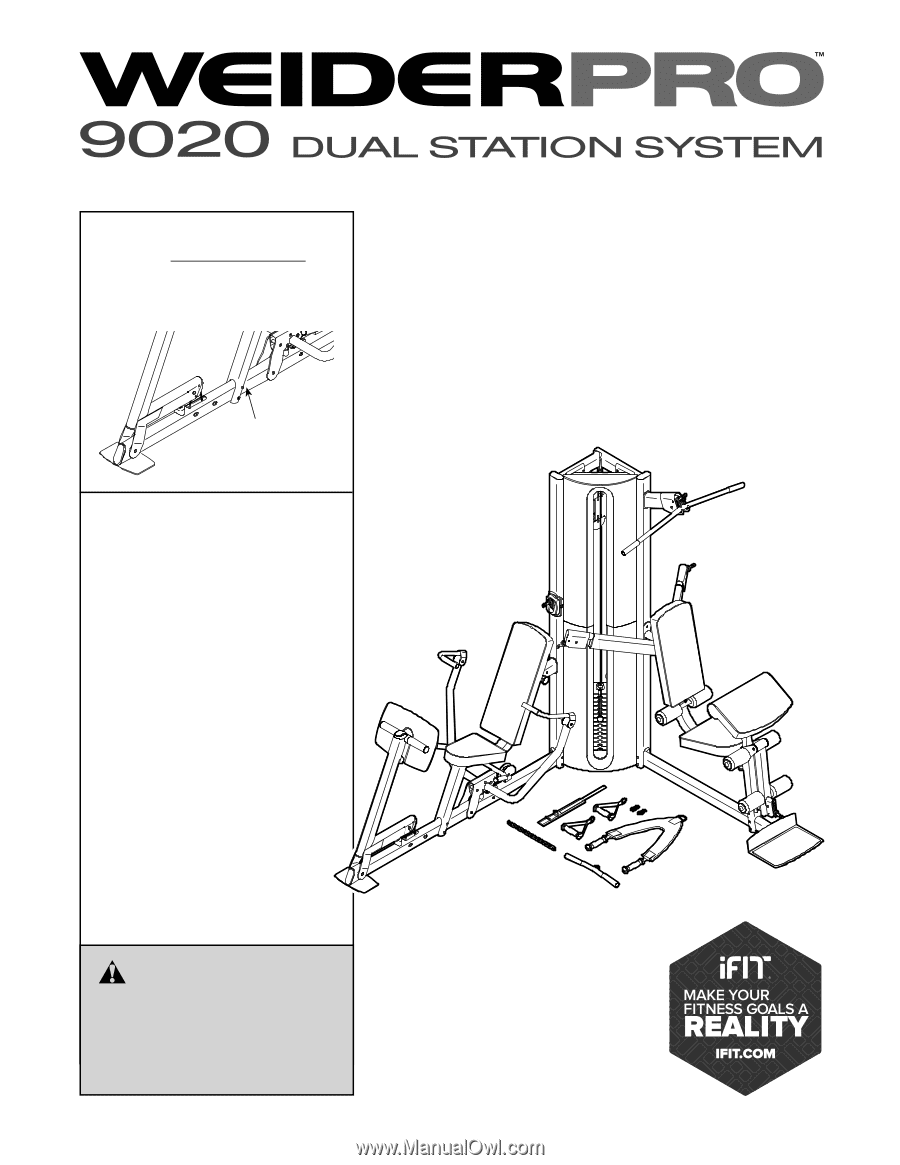
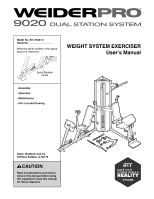
Model No. 831.15501.0
Serial No.
Write the serial number in the space
above for reference.
CAUTION
Read all precautions and instruc-
tions in this manual before using
this equipment. Keep this manual
for future reference.
Serial Number
Decal
° Assembly
° Operation
° Maintenance
° Part List and Drawing
Sears, Roebuck and Co.
Hoffman Estates, IL 60179
WEIGHT SYSTEM EXERCISER
User±s Manual