Xerox 2135N Quick Reference Guide - Page 49
Testing for a shorted motor - phaser drivers
 |
UPC - 042215474689
View all Xerox 2135N manuals
Add to My Manuals
Save this manual to your list of manuals |
Page 49 highlights
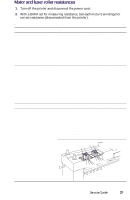
3. Disconnect the POWER wiring harness (red wire bundle) from the engine controller board. Also, disconnect the power wiring harness interconnect connecting the toner sensor board's white wire harness to the low-voltage power supply board's dark-gray wire harness. The interconnect is located by the rear hinge. Run a jumper wire from the +5V pins of the first wiring harness (pins 11 14, red wire bundle) to the +5V pin (pin 9, dark-gray wire bundle) of the second power wiring harness. (With the jumper wire, you are bypassing the engine controller board, the OPTN ribbon cable and the toner sensor board). Turn the printer on. If the jumper connection is correct, the low-voltage power supply will start and the power supply fans will run. This indicates the problem lies with the engine controller board or the toner sensor board or their wiring. If the low-voltage power supply does not turn on, it is probably bad. (Ensure your jumper connection is correct.) Testing for a shorted motor 1. Remove the top and rear covers. 2. Disconnect the motor harnesses and verify motor resistances (see the following topic). 3. Refer to the topic "Wiring Diagram" on page 215 for a diagram that locates each connector. 4. Turn on the printer again to see if it overloads now that the motors are disconnected from the engine driver board. If the power supply still does not function, replace it. 36 Phaser 2135 Color Printer
-
 1
1 -
2
-
3
-
4
-
5
-
6
-
7
-
8
-
9
-
10
-
11
-
12
-
13
-
14
-
15
-
16
-
17
-
18
-
19
-
20
-
21
-
22
-
23
-
24
-
25
-
26
-
27
-
28
-
29
-
30
-
31
-
32
-
33
-
34
-
35
-
36
-
37
-
38
-
39
-
40
-
41
-
42
-
43
-
 44
44 -
 45
45 -
 46
46 -
 47
47 -
 48
48 -
 49
49 -
 50
50 -
 51
51 -
 52
52 -
 53
53 -
 54
54 -
55
-
56
-
57
-
58
-
59
-
60
-
61
-
62
-
63
-
64
-
65
-
66
-
67
-
68
-
69
-
70
-
71
-
72
-
73
-
74
-
75
-
76
-
77
-
78
-
79
-
80
-
81
-
82
-
83
-
84
-
85
-
86
-
87
-
88
-
89
-
90
-
91
-
92
-
93
-
94
-
95
-
96
-
97
-
98
-
99
-
100
-
101
-
102
-
103
-
104
-
105
-
106
-
107
-
108
-
109
-
110
-
111
-
112
-
113
-
114
-
115
-
116
-
117
-
118
-
119
-
120
-
121
-
122
-
123
-
124
-
125
-
126
-
127
-
128
-
129
-
130
-
131
-
132
-
133
-
134
-
135
-
136
-
137
-
138
-
139
-
140
-
141
-
142
-
143
-
144
-
145
-
146
-
147
-
148
-
149
-
150
-
151
-
152
-
153
-
154
-
155
-
156
-
157
-
158
-
159
-
160
-
161
-
162
-
163
-
164
-
165
-
166
-
167
-
168
-
169
-
170
-
171
-
172
-
173
-
174
-
175
-
176
-
177
-
178
-
179
-
180
-
181
-
182
-
183
-
184
-
185
-
186
-
187
-
188
-
189
-
190
-
191
-
192
-
193
-
194
-
195
-
196
-
197
-
198
-
199
 |
 |
