2011 Lexus IS 350 Navigation Manual - Page 212
2011 Lexus IS 350 Manual

Page 212 highlights
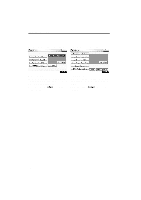
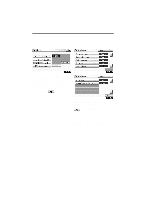
AUDIO/VIDEO SYSTEM D Audio language You can change the audio language. 1. Touch "Audio Language". 2. Touch the language you want to hear on the "Audio Language" screen. If you cannot find the language you want to hear on this screen, touch "Other" and enter a language code. For the entry of language code, see the following "ENTER AUDIO LANGUAGE CODE". To return to the "Setup Menu" screen, . touch D Angle mark The multi−angle mark can be turned on or off on the screen while the disc which is multi−angle compatible is being played. 1. Touch "Angle Mark". 2. Touch "On" or "Off". D Parental lock The level of viewer restrictions can be changed. 1. Touch "Parental Lock". 2. Enter the 4−digit personal code on the "Key code" screen. If you enter the wrong numbers, touch to delete the numbers. To return to the "Setup Menu" screen, touch . 3. Touch a parental level (1 - 8) on the "Select Restriction Level". Touch to return to the "Setup Menu" screen. D Auto start Discs that are inserted while the vehicle is in motion will automatically start playing. Certain discs may not play. 1. Touch "Auto Start". 2. Touch "On" or "Off". D Sound dynamic range (if equipped) The difference between the lowest volume and the highest volume can be adjusted. 1. Touch "Sound Dynamic Range". 2. Touch "MAX", "STD" or "MIN". D Subtitle language You can change the subtitle language. 1. Touch "Subtitle Language". 2. Touch a language you want to read on the "Subtitle Language" screen. If you cannot find the language you want to read on this screen, touch "Other" and enter a language code. For the entry of language code, see the following "ENTER AUDIO LANGUAGE CODE". To return to the "Setup Menu" screen, . touch D DVD language You can change the language on the DVD video menu. 1. Touch "DVD Language". 2. Touch the language you want to read on the "DVD Language" screen. If you cannot find the language you want to read on this screen, touch "Other" and enter a language code. For the entry of language code, see the following "ENTER AUDIO LANGUAGE CODE". To return to the "Setup Menu" screen, . touch 236
-
 1
1 -
2
-
3
-
4
-
5
-
6
-
7
-
8
-
9
-
10
-
11
-
12
-
13
-
14
-
15
-
16
-
17
-
18
-
19
-
20
-
21
-
22
-
23
-
24
-
25
-
26
-
27
-
28
-
29
-
30
-
31
-
32
-
33
-
34
-
35
-
36
-
37
-
38
-
39
-
40
-
41
-
42
-
43
-
44
-
45
-
46
-
47
-
48
-
49
-
50
-
51
-
52
-
53
-
54
-
55
-
56
-
57
-
58
-
59
-
60
-
61
-
62
-
63
-
64
-
65
-
66
-
67
-
68
-
69
-
70
-
71
-
72
-
73
-
74
-
75
-
76
-
77
-
78
-
79
-
80
-
81
-
82
-
83
-
84
-
85
-
86
-
87
-
88
-
89
-
90
-
91
-
92
-
93
-
94
-
95
-
96
-
97
-
98
-
99
-
100
-
101
-
102
-
103
-
104
-
105
-
106
-
107
-
108
-
109
-
110
-
111
-
112
-
113
-
114
-
115
-
116
-
117
-
118
-
119
-
120
-
121
-
122
-
123
-
124
-
125
-
126
-
127
-
128
-
129
-
130
-
131
-
132
-
133
-
134
-
135
-
136
-
137
-
138
-
139
-
140
-
141
-
142
-
143
-
144
-
145
-
146
-
147
-
148
-
149
-
150
-
151
-
152
-
153
-
154
-
155
-
156
-
157
-
158
-
159
-
160
-
161
-
162
-
163
-
164
-
165
-
166
-
167
-
168
-
169
-
170
-
171
-
172
-
173
-
174
-
175
-
176
-
177
-
178
-
179
-
180
-
181
-
182
-
183
-
184
-
185
-
186
-
187
-
188
-
189
-
190
-
191
-
192
-
193
-
194
-
195
-
196
-
197
-
198
-
199
-
200
-
201
-
202
-
203
-
204
-
205
-
206
-
 207
207 -
 208
208 -
 209
209 -
 210
210 -
 211
211 -
 212
212 -
 213
213 -
 214
214 -
 215
215 -
 216
216 -
 217
217 -
218
-
219
-
220
-
221
-
222
-
223
-
224
-
225
-
226
-
227
-
228
-
229
-
230
-
231
-
232
-
233
-
234
-
235
-
236
-
237
-
238
-
239
-
240
-
241
-
242
-
243
-
244
-
245
-
246
-
247
-
248
-
249
-
250
-
251
-
252
-
253
-
254
-
255
-
256
-
257
-
258
-
259
-
260
-
261
-
262
-
263
-
264
-
265
-
266
-
267
-
268
-
269
-
270
-
271
-
272
-
273
-
274
-
275
-
276
-
277
-
278
-
279
-
280
-
281
-
282
-
283
-
284
-
285
-
286
-
287
-
288
-
289
-
290
-
291
-
292
-
293
-
294
-
295
-
296
-
297
-
298
-
299
-
300
-
301
-
302
-
303
-
304
-
305
-
306
-
307
-
308
-
309
-
310
-
311
-
312
-
313
-
314
-
315
-
316
-
317
-
318
-
319
-
320
-
321
-
322
-
323
-
324
-
325
-
326
-
327
-
328
-
329
-
330
-
331
-
332
-
333
-
334
-
335
-
336
-
337
-
338
-
339
-
340
-
341
-
342
-
343
-
344
-
345
-
346
-
347
-
348
-
349
-
350
-
351
-
352
-
353
-
354
-
355
-
356
-
357
-
358
-
359
-
360
-
361
-
362
-
363
-
364
-
365
-
366
-
367
-
368
-
369
-
370
-
371
-
372
-
373
-
374
-
375
-
376
-
377
 |
 |