Asus P5RD1-V Deluxe Motherboard Installation Guide - Page 147
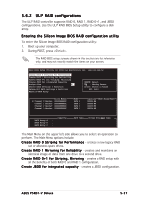
Entering the Silicon Image BIOS RAID configuration utility
 |
View all Asus P5RD1-V Deluxe manuals
Add to My Manuals
Save this manual to your list of manuals |
Page 147 highlights
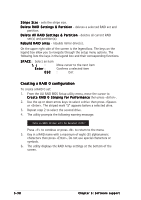
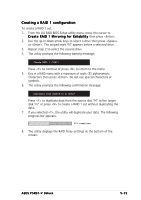
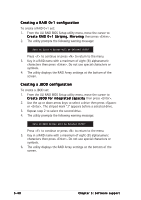
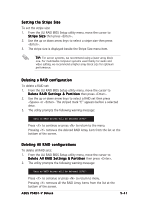
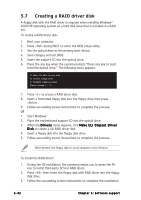
5.6.2 ULI® RAID configurations The ULI® RAID controller supports RAID 0, RAID 1, RAID 0+1, and JBOD configurations. Use the ULI® RAID BIOS Setup utility to configure a disk array. Entering the Silicon Image BIOS RAID configuration utility To enter the Silicon Image BIOS RAID configuration utility: 1. Boot up your computer. 2. During POST, press . The RAID BIOS setup screens shown in this section are for reference only, and may not exactly match the items on your screen. RAID BIOS Setup Utility (c) 2004 ULi Electronics Inc. www.uli.com.tw Create RAID 0 Striping for Performance Create RAID 1 Mirroring for Reliability Create RAID 0+1 for Striping, Mirroring Create JBOD for integrated Capacity Stripe Size 64K Delete RAID Settings & Partition Delete All RAID Settings & Partition Rebuild RAID Array SPACE: Select ↑ ↓ : Moving Cursor Enter: Select & Finish ESC: Exit Drive Model B Channel 0 Master: XXXXXXXXXXX Channel 1 Master: XXXXXXXXXXX Channel 2 Master: XXXXXXXXXXX Channel 3 Master: XXXXXXXXXXX Mode SATA 1 SATA 1 SATA 1 SATA 1 Capacity XXXXX MB XXXXX MB XXXXX MB XXXXX MB RAID Array/Type RAID Array A : RAID Array B : RAID Array C : Capacity RAID Type Stripe Size RAID Name The Main Menu on the upper left side allows you to select an operation to perform. The Main Menu options include: C r e a t e R A I D 0 S t r i p i n g f o r P e r f o r m a n c e - creates a new legacy RAID set or allocates spare drives. C r e a t e R A I D 1 M i r r o r i n g f o r R e l i a b i l i t y - creates and maintains an identical image of data from one drive to a second drive. C r e a t e R A I D 0 + 1 f o r S t r i p i n g , M i r r o r i n g - creates a RAID setup with all the benefits of both RAID 0 and RAID 1 configuration. C r e a te JBOD for integrated capacity - creates a JBOD configuration. ASUS P5RD1-V Deluxe 5-37
-
 1
1 -
2
-
3
-
4
-
5
-
6
-
7
-
8
-
9
-
10
-
11
-
12
-
13
-
14
-
15
-
16
-
17
-
18
-
19
-
20
-
21
-
22
-
23
-
24
-
25
-
26
-
27
-
28
-
29
-
30
-
31
-
32
-
33
-
34
-
35
-
36
-
37
-
38
-
39
-
40
-
41
-
42
-
43
-
44
-
45
-
46
-
47
-
48
-
49
-
50
-
51
-
52
-
53
-
54
-
55
-
56
-
57
-
58
-
59
-
60
-
61
-
62
-
63
-
64
-
65
-
66
-
67
-
68
-
69
-
70
-
71
-
72
-
73
-
74
-
75
-
76
-
77
-
78
-
79
-
80
-
81
-
82
-
83
-
84
-
85
-
86
-
87
-
88
-
89
-
90
-
91
-
92
-
93
-
94
-
95
-
96
-
97
-
98
-
99
-
100
-
101
-
102
-
103
-
104
-
105
-
106
-
107
-
108
-
109
-
110
-
111
-
112
-
113
-
114
-
115
-
116
-
117
-
118
-
119
-
120
-
121
-
122
-
123
-
124
-
125
-
126
-
127
-
128
-
129
-
130
-
131
-
132
-
133
-
134
-
135
-
136
-
137
-
138
-
139
-
140
-
141
-
 142
142 -
 143
143 -
 144
144 -
 145
145 -
 146
146 -
 147
147 -
 148
148 -
 149
149 -
 150
150 -
 151
151 -
 152
152 -
153
-
154
-
155
-
156
-
157
-
158
-
159
-
160
-
161
-
162
 |
 |
