Brother International BAS-375E Programmer Instruction Manual - English - Page 141
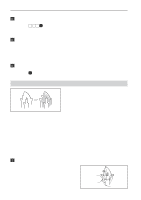
Program the following points up to point, with the curve programming steps.
 |
View all Brother International BAS-375E manuals
Add to My Manuals
Save this manual to your list of manuals |
Page 141 highlights
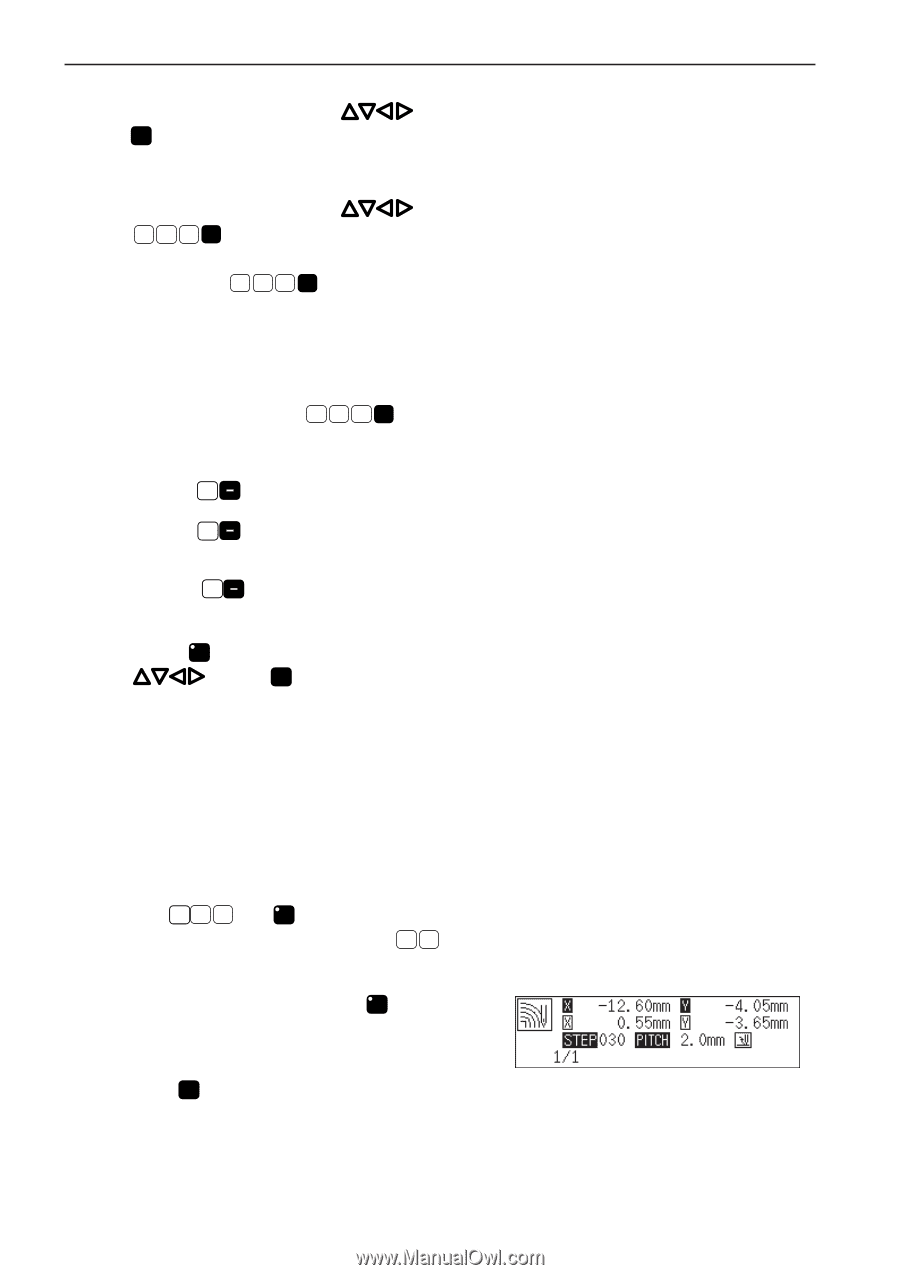
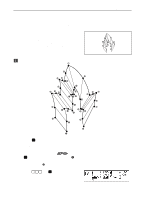
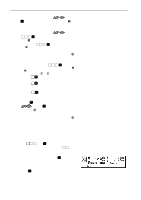
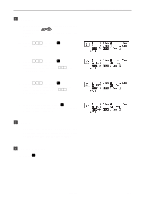
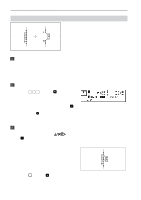
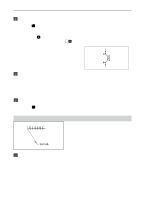
Chapter 3 Programming with Command Function 4. Move the work clamp with . Press L when the needle point is at point w of the pattern. 5. Move the work clamp with . Press 7 8 9 L when the needle point is at point e of the pattern. Be sure to press 7 8 9 L for a split at a corner like point e. If a split is not made, the corner will be round. 6. Program the following points up to point !7 with the curve programming steps. When there is a liner section, move the needle point from the split to the next split, and press 7 8 9 L . In the example, a linear line is programmed between points u and o. Be sure to program a linear line also for the matched section between points @4 and @.6 By pressing 0 , the needle point is returned to the previous point. It cannot be returned beyond the previous split. By pressing 1 , the needle point is returned to the previous split. However, when the needle point is at a split, it cannot be moved. By pressing 2 , the needle point is returned to the split before the previous split. 7. Press F . Move the work clamp with . Press L when the needle point is at point !8 of the pattern. 8. Program the following points up to point #4 in the same manner. When programming, be sure that the points and splits specified on the inside line are paired with those on the outside line respectively. If there are any points or splits not paired, the needle automatically returns to the previous point. Correct the program. 9. Press 5 and M . Input the number of lines for a multiple stitch in . When the number should be "5", input "505". 10. Input the stitch length. Press M . "3.0 mm" is input in the example. Input "030" to make the stitch length to 3.0 mm. 11. Press L . If the number of lines for a multiple stitch has not been input, a buzzer sounds. Repeat step 9. 140 Programmer
-
 1
1 -
2
-
3
-
4
-
5
-
6
-
7
-
8
-
9
-
10
-
11
-
12
-
13
-
14
-
15
-
16
-
17
-
18
-
19
-
20
-
21
-
22
-
23
-
24
-
25
-
26
-
27
-
28
-
29
-
30
-
31
-
32
-
33
-
34
-
35
-
36
-
37
-
38
-
39
-
40
-
41
-
42
-
43
-
44
-
45
-
46
-
47
-
48
-
49
-
50
-
51
-
52
-
53
-
54
-
55
-
56
-
57
-
58
-
59
-
60
-
61
-
62
-
63
-
64
-
65
-
66
-
67
-
68
-
69
-
70
-
71
-
72
-
73
-
74
-
75
-
76
-
77
-
78
-
79
-
80
-
81
-
82
-
83
-
84
-
85
-
86
-
87
-
88
-
89
-
90
-
91
-
92
-
93
-
94
-
95
-
96
-
97
-
98
-
99
-
100
-
101
-
102
-
103
-
104
-
105
-
106
-
107
-
108
-
109
-
110
-
111
-
112
-
113
-
114
-
115
-
116
-
117
-
118
-
119
-
120
-
121
-
122
-
123
-
124
-
125
-
126
-
127
-
128
-
129
-
130
-
131
-
132
-
133
-
134
-
135
-
 136
136 -
 137
137 -
 138
138 -
 139
139 -
 140
140 -
 141
141 -
 142
142 -
 143
143 -
 144
144 -
 145
145 -
 146
146 -
147
-
148
-
149
-
150
-
151
-
152
-
153
-
154
-
155
-
156
-
157
-
158
-
159
-
160
-
161
-
162
-
163
-
164
-
165
-
166
-
167
-
168
-
169
-
170
-
171
-
172
-
173
-
174
-
175
-
176
-
177
-
178
-
179
-
180
-
181
-
182
-
183
-
184
-
185
-
186
-
187
-
188
-
189
-
190
-
191
-
192
-
193
-
194
-
195
-
196
-
197
-
198
-
199
-
200
-
201
-
202
-
203
-
204
-
205
-
206
-
207
-
208
-
209
-
210
-
211
-
212
-
213
-
214
-
215
-
216
-
217
-
218
-
219
-
220
-
221
-
222
-
223
-
224
-
225
-
226
 |
 |