Brother International HL-2170W Quick Setup Guide - English - Page 24
Configuration in Infrastructure mode, using a network cable temporarily - wireless setup
 |
UPC - 012502619468
View all Brother International HL-2170W manuals
Add to My Manuals
Save this manual to your list of manuals |
Page 24 highlights
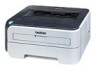
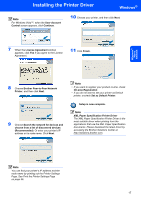
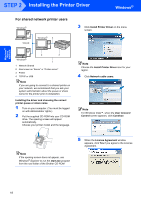
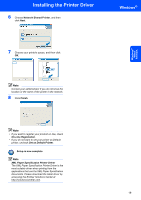
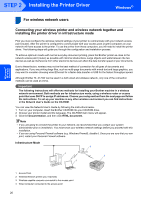
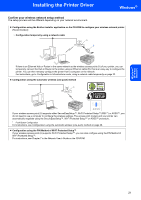
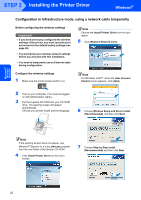
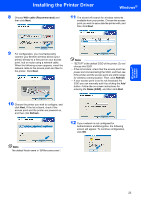
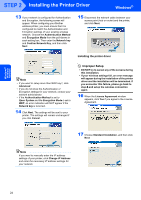
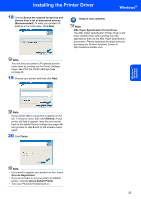
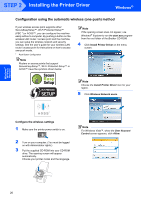
Windows® Wireless Network STEP 2 Installing the Printer Driver Windows® Configuration in Infrastructure mode, using a network cable temporarily Before configuring the wireless settings Important • If you have previously configured the wireless settings of the printer, you must reset the print server back to the default factory settings (see page 46) • You must know your wireless network settings before you proceed with this installation. • You need to temporarily use an Ethernet cable during configuration. Note Choose the Install Printer Driver icon for your region. 5 Click Wireless Network users. Configure the wireless settings 1 Make sure the printer power switch is on. Note For Windows Vista™, when the User Account Control screen appears, click Allow. 2 Turn on your computer. (You must be logged on with Administrator rights.) 3 Put the supplied CD-ROM into your CD-ROM drive. The opening screen will appear automatically. Choose your printer model and the language. 6 Choose Wireless Setup and Driver Install (Recommended), and then click Next. Note If the opening screen does not appear, use Windows® Explorer to run the start.exe program from the root folder of the Brother CD-ROM. 4 Click Install Printer Driver on the menu screen. 7 Choose Step by Step install (Recommended) and then click Next. 22
-
 1
1 -
2
-
3
-
4
-
5
-
6
-
7
-
8
-
9
-
10
-
11
-
12
-
13
-
14
-
15
-
16
-
17
-
18
-
 19
19 -
 20
20 -
 21
21 -
 22
22 -
 23
23 -
 24
24 -
 25
25 -
 26
26 -
 27
27 -
 28
28 -
 29
29 -
30
-
31
-
32
-
33
-
34
-
35
-
36
-
37
-
38
-
39
-
40
-
41
-
42
-
43
-
44
-
45
-
46
-
47
-
48
-
49
-
50
-
51
-
52
 |
 |