Brother International HL-2170W Quick Setup Guide - English - Page 34
For Mac OS - install software
 |
UPC - 012502619468
View all Brother International HL-2170W manuals
Add to My Manuals
Save this manual to your list of manuals |
Page 34 highlights
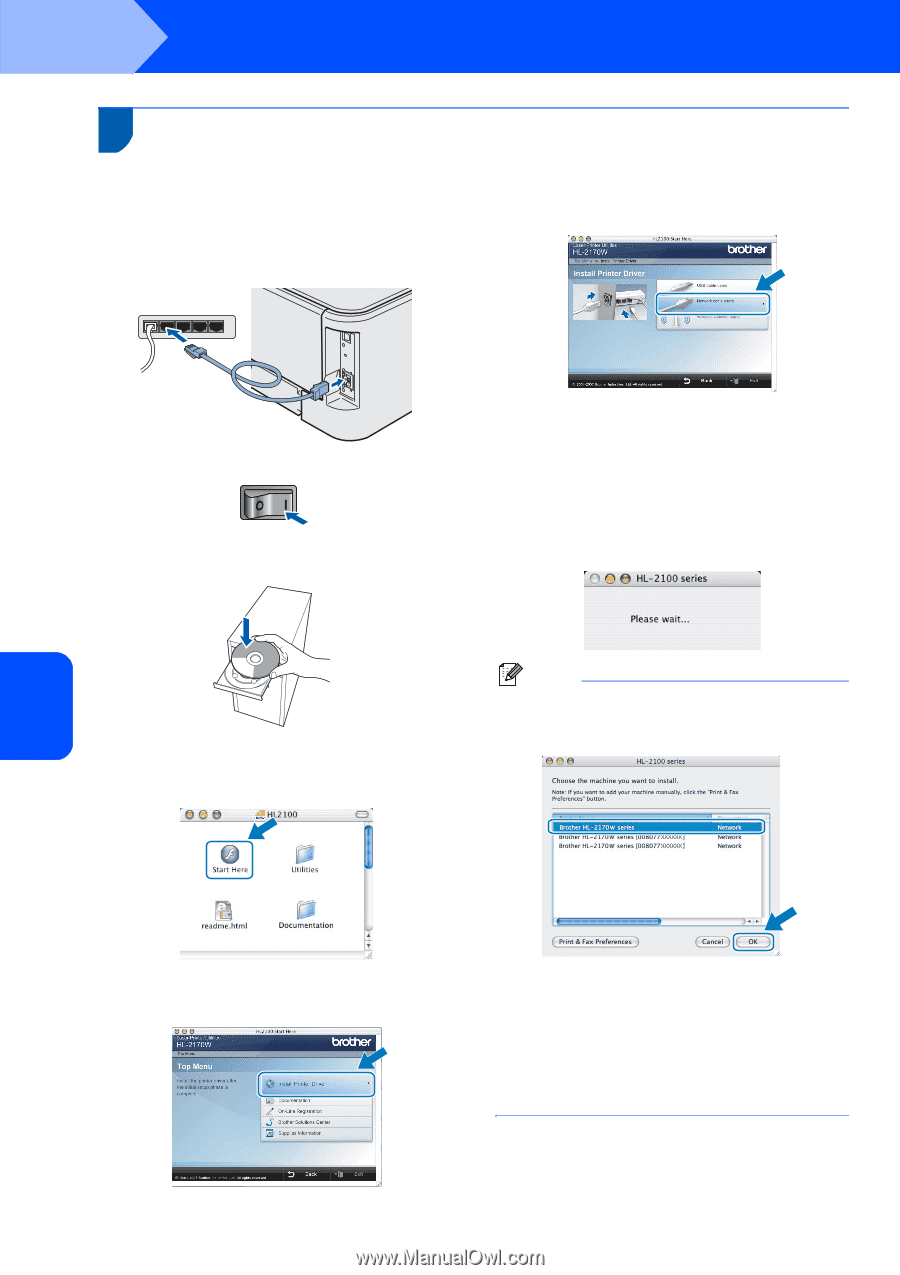
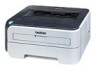
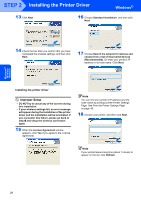
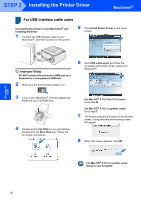
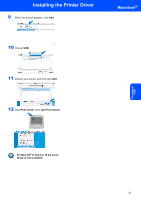
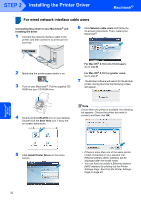
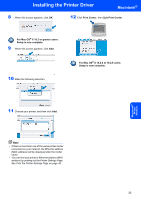
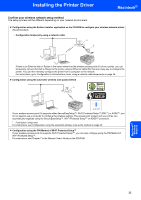
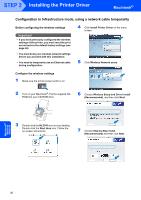
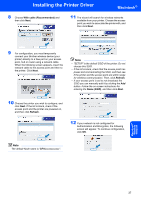
STEP 2 Installing the Printer Driver Macintosh® For wired network interface cable users 5 Connecting the printer to your Macintosh® and installing the driver 1 Connect the network interface cable to the printer, and then connect it to a free port on your hub. 6 Click Network cable users and follow the on-screen instructions. Then, restart your Macintosh®. 2 Make sure the printer power switch is on. 3 Turn on your Macintosh®. Put the supplied CD- ROM into your CD-ROM drive. For Mac OS® X 10.2.4 to 10.2.8 users: Go to step 9. For Mac OS® X 10.3 or greater users: Go to step 7. 7 The Brother software will search for the Brother printer. During this time the following screen will appear. 4 Double-click the HL2100 icon on your desktop. Double-click the Start Here icon. Follow the on-screen instructions. Note If more than one printer is available, the following list appears. Choose the printer you wish to connect, and then click OK. Macintosh® Wired Network 5 Click Install Printer Driver on the menu screen. • If there is more than one of the same printer model connected on your network, the Ethernet address (MAC address) will be displayed after the model name. • You can find your printer's Ethernet address (MAC address) by printing out the Printer Settings Page. See Print the Printer Settings Page on page 46. 32
-
 1
1 -
2
-
3
-
4
-
5
-
6
-
7
-
8
-
9
-
10
-
11
-
12
-
13
-
14
-
15
-
16
-
17
-
18
-
19
-
20
-
21
-
22
-
23
-
24
-
25
-
26
-
27
-
28
-
 29
29 -
 30
30 -
 31
31 -
 32
32 -
 33
33 -
 34
34 -
 35
35 -
 36
36 -
 37
37 -
 38
38 -
 39
39 -
40
-
41
-
42
-
43
-
44
-
45
-
46
-
47
-
48
-
49
-
50
-
51
-
52
 |
 |