Brother International HL-2170W Quick Setup Guide - English - Page 39
With cable Recommended, Refresh - wireless printer manual
 |
UPC - 012502619468
View all Brother International HL-2170W manuals
Add to My Manuals
Save this manual to your list of manuals |
Page 39 highlights
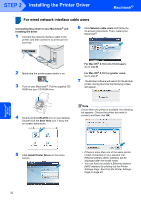
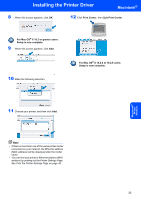
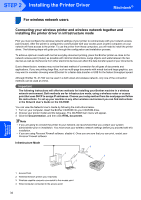
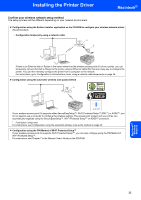
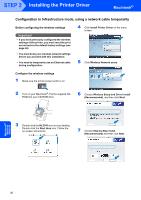
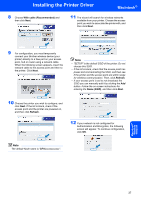
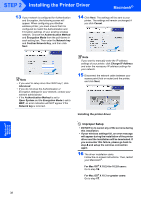
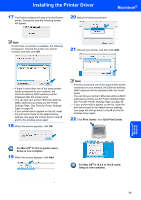
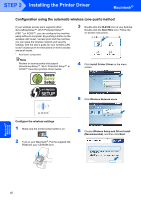
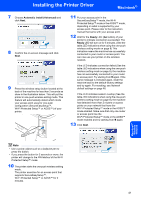
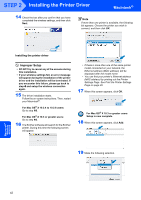
Installing the Printer Driver Macintosh® 8 Choose With cable (Recommended) and then click Next. 11 The wizard will search for wireless networks available from your printer. Choose the access point you wish to associate the printer with, and then click Next. 9 For configuration, you must temporarily connect your Brother wireless device (your printer) directly to a free port on your access point, hub or router using a network cable. When the following screen appears, insert the network cable to the access point and then to the printer. Click Next. Note • "SETUP" is the default SSID of the printer. Do not choose this SSID. • If the list is blank, check that the access point has power and is broadcasting the SSID, and then see if the printer and the access point are within range for wireless communication. Then, click Refresh. • If your access point is set to not broadcast the SSID you can manually add it by clicking the Add button. Follow the on-screen instructions for entering the Name (SSID), and then click Next. 10 Choose the printer you wish to configure, and click Next. If the list is blank, check if the access point and the printer are powered on, and then click Refresh. 12 If your network is not configured for Authentication and Encryption, the following screen will appear. To continue configuration, click OK. Note The default Node name is "BRNxxxxxxxxxxxx". Macintosh® Wireless Network 37
-
 1
1 -
2
-
3
-
4
-
5
-
6
-
7
-
8
-
9
-
10
-
11
-
12
-
13
-
14
-
15
-
16
-
17
-
18
-
19
-
20
-
21
-
22
-
23
-
24
-
25
-
26
-
27
-
28
-
29
-
30
-
31
-
32
-
33
-
 34
34 -
 35
35 -
 36
36 -
 37
37 -
 38
38 -
 39
39 -
 40
40 -
 41
41 -
 42
42 -
 43
43 -
 44
44 -
45
-
46
-
47
-
48
-
49
-
50
-
51
-
52
 |
 |