Brother International Innov-ís 80 Users Manual - English - Page 99
Satin stitching using the, sewing speed controller
 |
View all Brother International Innov-ís 80 manuals
Add to My Manuals
Save this manual to your list of manuals |
Page 99 highlights
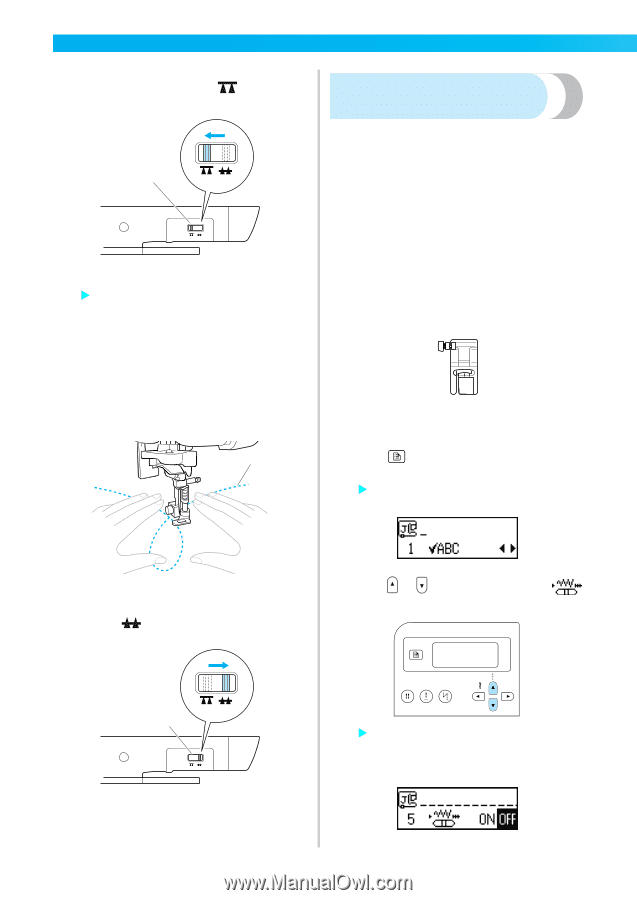
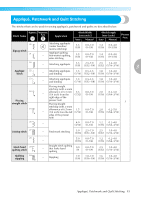
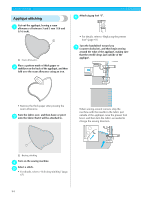
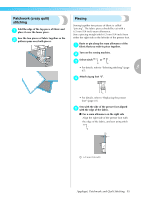
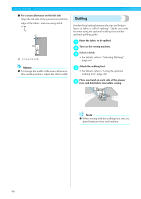
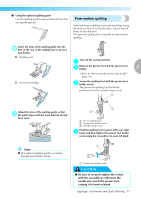
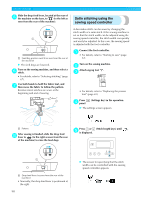
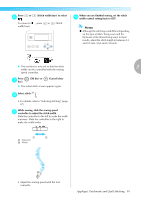
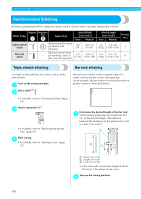
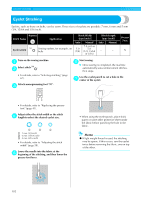
UTILITY STITCHES Slide the drop feed lever, located at the rear of e the machine on the base, to (to the left as seen from the rear of the machine). Satin stitching using the sewing speed controller a a Feed dog position switch (as seen from the rear of the machine) X The feed dogs are lowered. Turn on the sewing machine, and then select a f stitch. • For details, refer to "Selecting stitching" (page 67). Use both hands to hold the fabric taut, and g then move the fabric to follow the pattern. Reinforcement stitches are sewn at the beginning and end of sewing. a A decorative stitch can be sewn by changing the stitch width of a satin stitch. If the sewing machine is set so that the stitch width can be adjusted using the sewing speed controller, the stitch width can quickly and easily be adjusted. In this case, the sewing speed is adjusted with the foot controller. Connect the foot controller. a • For details, refer to "Starting to sew" (page 52). Turn on the sewing machine. b Attach zigzag foot "J". c J • For details, refer to "Replacing the presser foot" (page 41). Press d panel. (Settings key) in the operation X The settings screen appears. a Pattern After sewing is finished, slide the drop feed h lever to (to the right as seen from the rear of the machine) to raise the feed dogs. Press or (Stitch length keys) until e is displayed. a a Drop feed lever (as seen from the rear of the machine) • Normally, the drop feed lever is positioned at the right. 98 X The screen for specifying that the stitch width can be controlled with the sewing speed controller appears.
-
 1
1 -
2
-
3
-
4
-
5
-
6
-
7
-
8
-
9
-
10
-
11
-
12
-
13
-
14
-
15
-
16
-
17
-
18
-
19
-
20
-
21
-
22
-
23
-
24
-
25
-
26
-
27
-
28
-
29
-
30
-
31
-
32
-
33
-
34
-
35
-
36
-
37
-
38
-
39
-
40
-
41
-
42
-
43
-
44
-
45
-
46
-
47
-
48
-
49
-
50
-
51
-
52
-
53
-
54
-
55
-
56
-
57
-
58
-
59
-
60
-
61
-
62
-
63
-
64
-
65
-
66
-
67
-
68
-
69
-
70
-
71
-
72
-
73
-
74
-
75
-
76
-
77
-
78
-
79
-
80
-
81
-
82
-
83
-
84
-
85
-
86
-
87
-
88
-
89
-
90
-
91
-
92
-
93
-
 94
94 -
 95
95 -
 96
96 -
 97
97 -
 98
98 -
 99
99 -
 100
100 -
 101
101 -
 102
102 -
 103
103 -
 104
104 -
105
-
106
-
107
-
108
-
109
-
110
-
111
-
112
-
113
-
114
-
115
-
116
-
117
-
118
-
119
-
120
-
121
-
122
-
123
-
124
-
125
-
126
-
127
-
128
-
129
-
130
-
131
-
132
-
133
-
134
-
135
-
136
-
137
-
138
-
139
-
140
 |
 |