Brother International MFC 845CW Users Manual - English - Page 169
the cradle in position., Press the tab 1 and place the front
 |
UPC - 012502615828
View all Brother International MFC 845CW manuals
Add to My Manuals
Save this manual to your list of manuals |
Page 169 highlights
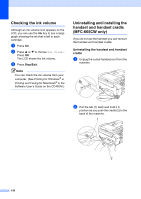
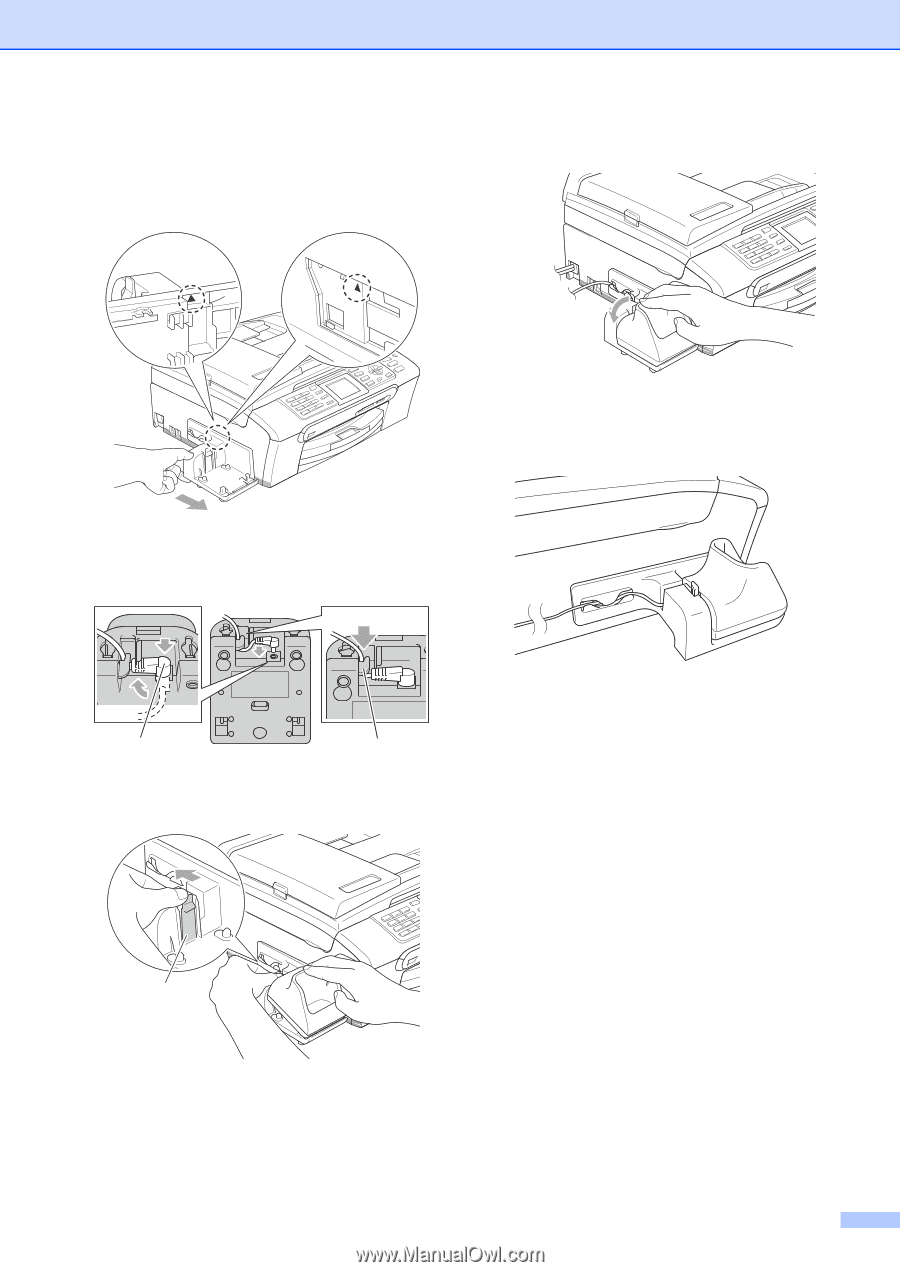
b Align the recessed arrows on the bracket with those on the machine, and then slide the bracket toward the front of the machine until it clicks into place. Troubleshooting and Routine Maintenance e Push the cradle down. f Route the AC power cord through the guide on the side of the machine. c Make sure you plug the connector into the jack (1) and route the cable through the hook (2) as shown below. 1 2 d Press the tab (1) and place the front of the cradle in position. g Plug the AC adapter into the AC power outlet. 1 153
-
 1
1 -
2
-
3
-
4
-
5
-
6
-
7
-
8
-
9
-
10
-
11
-
12
-
13
-
14
-
15
-
16
-
17
-
18
-
19
-
20
-
21
-
22
-
23
-
24
-
25
-
26
-
27
-
28
-
29
-
30
-
31
-
32
-
33
-
34
-
35
-
36
-
37
-
38
-
39
-
40
-
41
-
42
-
43
-
44
-
45
-
46
-
47
-
48
-
49
-
50
-
51
-
52
-
53
-
54
-
55
-
56
-
57
-
58
-
59
-
60
-
61
-
62
-
63
-
64
-
65
-
66
-
67
-
68
-
69
-
70
-
71
-
72
-
73
-
74
-
75
-
76
-
77
-
78
-
79
-
80
-
81
-
82
-
83
-
84
-
85
-
86
-
87
-
88
-
89
-
90
-
91
-
92
-
93
-
94
-
95
-
96
-
97
-
98
-
99
-
100
-
101
-
102
-
103
-
104
-
105
-
106
-
107
-
108
-
109
-
110
-
111
-
112
-
113
-
114
-
115
-
116
-
117
-
118
-
119
-
120
-
121
-
122
-
123
-
124
-
125
-
126
-
127
-
128
-
129
-
130
-
131
-
132
-
133
-
134
-
135
-
136
-
137
-
138
-
139
-
140
-
141
-
142
-
143
-
144
-
145
-
146
-
147
-
148
-
149
-
150
-
151
-
152
-
153
-
154
-
155
-
156
-
157
-
158
-
159
-
160
-
161
-
162
-
163
-
 164
164 -
 165
165 -
 166
166 -
 167
167 -
 168
168 -
 169
169 -
 170
170 -
 171
171 -
 172
172 -
 173
173 -
 174
174 -
175
-
176
-
177
-
178
-
179
-
180
-
181
-
182
-
183
-
184
-
185
-
186
-
187
-
188
-
189
-
190
-
191
-
192
-
193
-
194
-
195
-
196
-
197
-
198
-
199
-
200
-
201
-
202
-
203
-
204
-
205
-
206
-
207
-
208
-
209
-
210
-
211
-
212
-
213
-
214
-
215
-
216
-
217
 |
 |
Troubleshooting and Routine Maintenance
153
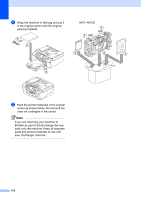
b
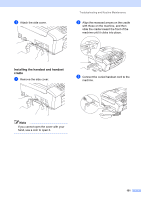
Align the recessed arrows on the
bracket with those on the machine, and
then slide the bracket toward the front of
the machine until it clicks into place.
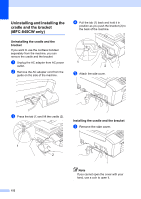
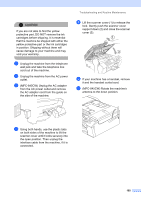
c
Make sure you plug the connector into
the jack (1) and route the cable through
the hook (2) as shown below.
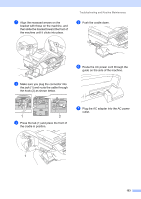
d
Press the tab (1) and place the front of
the cradle in position.
e
Push the cradle down.
f
Route the AC power cord through the
guide on the side of the machine.
g
Plug the AC adapter into the AC power
outlet.
1
2
1