Canon BJC 6000 Service Manual - Page 11
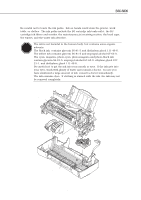
Operation of the Drive Switching Unit, Adjustable Bearings Supporting the Carriage Shaft - printer ink
 |
View all Canon BJC 6000 manuals
Add to My Manuals
Save this manual to your list of manuals |
Page 11 highlights
Page 4- 7 4- 8 4- 9 4 -10 4 -11 4 -12 4 -15 4 -17 4 -19 4 -20 4 -21 4 -22 4 -22 4 -25 4 -26 4 -27 4 -28 4 -29 4 -30 4 -32 4 -33 4 -34 4 -35 4 -35 4 -36 4 -37 4 -37 4 -38 4 -41 4 -42 4 -43 5- 3 5- 4 5- 5 5- 6 5- 6 5- 7 5- 9 5 -10 5 -11 5 -12 5 -36 5 -40 5 -43 5 -44 5 -44 5 -45 5 -45 5 -46 5 -46 5 -46 5 -47 5 -48 Figure 4- 6 Figure 4- 7 Figure 4- 8 Figure 4- 9 Figure 4- 10 Figure 4- 11 Figure 4- 12 Figure 4- 13 Figure 4- 14 Figure 4- 15 Figure 4- 16 Figure 4- 17 Figure 4- 18 Figure 4- 19 Figure 4- 20 Figure 4- 21 Figure 4- 22 Figure 4- 23 Figure 4- 24 Figure 4- 25 Figure 4- 26 Figure 4- 27 Figure 4- 28 Figure 4- 29 Figure 4- 30 Figure 4- 31 Figure 4- 32 Figure 4- 33 Figure 4- 34 Figure 4- 35 Figure 4- 36 Print Drive Method (1440 x 720 dpi, forward direction) Print Drive Method (Reverse direction) Power-Off Sequence Flowchart Interfacing Timing (Compatible Mode) Interface Timing (Nibble Mode) Interface Timing (ECP mode, reverse transfer) Automatic Printing Position Alignment Printer's Mechanical System Black BJ Cartridge Color/Photo BJ Cartridge Bubble Jet Nozzle (part) Nozzle Arrangement Signal Contacts Purge Unit Purge Unit Pumping Operations Paper Feed Path Paper Thickness Adjustment Mechanism Paper Feed Unit Carriage Unit Carriage Unit BJ Cartridge Maintenance Drive Switching Unit Operation of the Drive Switching Unit Printer's Electrical System Control Unit Block Diagram Control Unit Function Diagram Control Board Power Supply Unit Block Diagram Sensor Positions Ink Sensor Part 5: MAINTENANCE Figure 5- 1 Grease Points Figure 5- 2 Unlocking the Carriage Figure 5- 3 Removing the Printer Unit Figure 5- 4 Removing the ASF Unit Figure 5- 5 Adjustable Bearings Supporting the Carriage Shaft Figure 5- 6 Feed Gear Unit Precautions Figure 5- 7 Carriage Belt Tension Adjustment Figure 5- 8 ASF Gear Position Adjustment Figure 5- 9 Head Gap Adjustment (1) Figure 5- 10 Head Gap Adjustment (2) Figure 5- 11 Control Board Figure 5- 12 Carriage Board Figure 5- 13 BJ Cartridge Figure 5- 14 AC adapter Figure 5- 15 DC Power Supply Cable Figure 5- 16 Carriage Motor Figure 5- 17 Paper Feed Motor Figure 5- 18 Ink Sensor Figure 5- 19 Print Position Sensor Figure 5- 20 Pump Sensor Figure 5- 21 Control Board Figure 5- 22 Carriage Board VII
-
 1
1 -
2
-
3
-
4
-
5
-
 6
6 -
 7
7 -
 8
8 -
 9
9 -
 10
10 -
 11
11 -
 12
12 -
 13
13 -
 14
14 -
 15
15 -
 16
16 -
17
-
18
-
19
-
20
-
21
-
22
-
23
-
24
-
25
-
26
-
27
-
28
-
29
-
30
-
31
-
32
-
33
-
34
-
35
-
36
-
37
-
38
-
39
-
40
-
41
-
42
-
43
-
44
-
45
-
46
-
47
-
48
-
49
-
50
-
51
-
52
-
53
-
54
-
55
-
56
-
57
-
58
-
59
-
60
-
61
-
62
-
63
-
64
-
65
-
66
-
67
-
68
-
69
-
70
-
71
-
72
-
73
-
74
-
75
-
76
-
77
-
78
-
79
-
80
-
81
-
82
-
83
-
84
-
85
-
86
-
87
-
88
-
89
-
90
-
91
-
92
-
93
-
94
-
95
-
96
-
97
-
98
-
99
-
100
-
101
-
102
-
103
-
104
-
105
-
106
-
107
-
108
-
109
-
110
-
111
-
112
-
113
-
114
-
115
-
116
-
117
-
118
-
119
-
120
-
121
-
122
-
123
-
124
-
125
-
126
-
127
-
128
-
129
-
130
-
131
-
132
-
133
-
134
-
135
-
136
-
137
-
138
-
139
-
140
-
141
-
142
-
143
-
144
-
145
-
146
-
147
-
148
-
149
-
150
-
151
-
152
-
153
-
154
-
155
-
156
-
157
-
158
-
159
-
160
-
161
-
162
-
163
-
164
-
165
-
166
-
167
-
168
-
169
-
170
-
171
-
172
-
173
-
174
 |
 |